Woodworker's Journal 1984-8-1, страница 54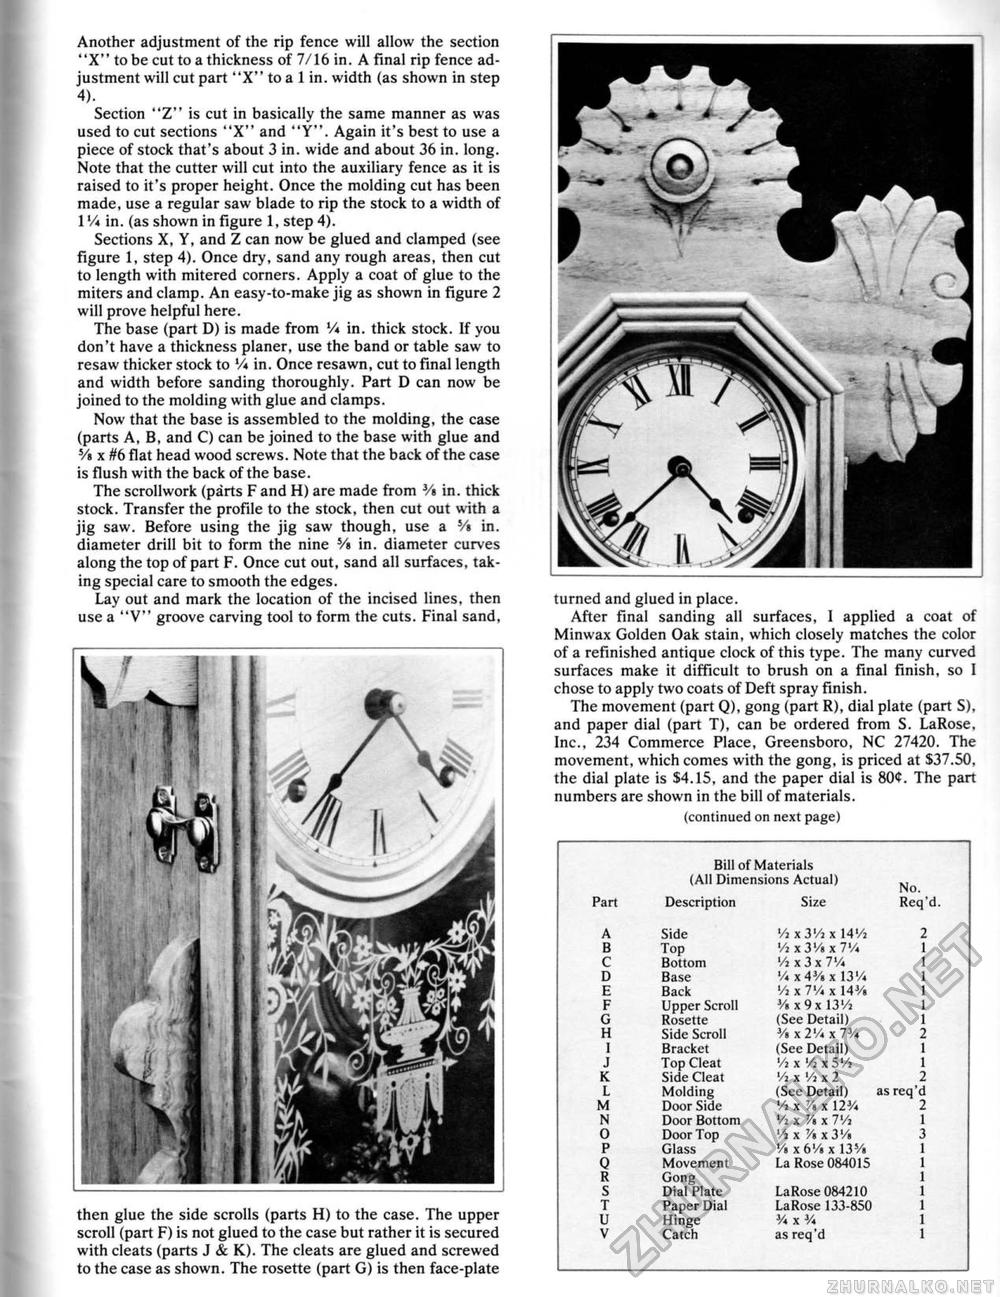
Another adjustment of the rip fence will allow the section "X" to be cut to a thickness of 7/16 in. A final rip fence adjustment will cut part "X" to a 1 in. width (as shown in step 4). Section "Z" is cut in basically the same manner as was used to cut sections "X" and "Y". Again it's best to use a piece of stock that's about 3 in. wide and about 36 in. long. Note that the cutter will cut into the auxiliary fence as it is raised to it's proper height. Once the molding cut has been made, use a regular saw blade to rip the stock to a width of 1V4 in, (as shown in figure 1, step 4). Sections X, Y, and Z can now be glued and clamped (see figure 1, step 4). Once dry, sand any rough areas, then cut to length with mitered corners. Apply a coat of glue to the miters and clamp. An easy-to-make jig as shown in figure 2 will prove helpful here. The base (part D) is made from V* in. thick stock. If you don't have a thickness planer, use the band or table saw to resaw thicker stock to V* in. Once resawn, cut to final length and width before sanding thoroughly. Part D can now be joined to the molding with glue and clamps. Now that the base is assembled to the molding, the case (parts A, B, and C) can be joined to the base with glue and Vt x #6 flat head wood screws. Note that the back of the case is flush with the back of the base. The scrollwork (parts F and H) are made from Vt in. thick stock. Transfer the profile to the stock, then cut out with a jig saw. Before using the jig saw though, use a Vt in. diameter drill bit to form the nine Vt in. diameter curves along the top of part F. Once cut out, sand all surfaces, taking special care to smooth the edges. Lay out and mark the location of the incised lines, then use a "V" groove carving tool to form the cuts. Final sand. then glue the side scrolls (parts H) to the case. The upper scroll (part F) is not glued to the case but rather it is secured with cleats (parts J & K). The cleats are glued and screwed to the case as shown. The rosette (part G) is then face-plate turned and glued in place. After final sanding all surfaces, I applied a coat of Minwax Golden Oak stain, which closely matches the color of a refinished antique clock of this type. The many curved surfaces make it difficult to brush on a final finish, so 1 chose to apply two coats of Deft spray finish. The movement (part Q). gong (part R), dial plate (part S), and paper dial (part T), can be ordered from S. LaRose. Inc., 234 Commerce Place, Greensboro, NC 27420. The movement, which comes with the gong, is priced at $37.50, the dial plate is $4.15, and the paper dial is 80<t. The part numbers are shown in the bill of materials. (continued on next page)
V • 'Vi; n II a f ' 1 1 ' i 1 %; 1J |
||||||||||||||||||||||||||||||||||||||||||||||||||||||||||||||||||||||||||||||||||||||||||||||||||||


