Woodworker's Journal 1984-8-3, страница 26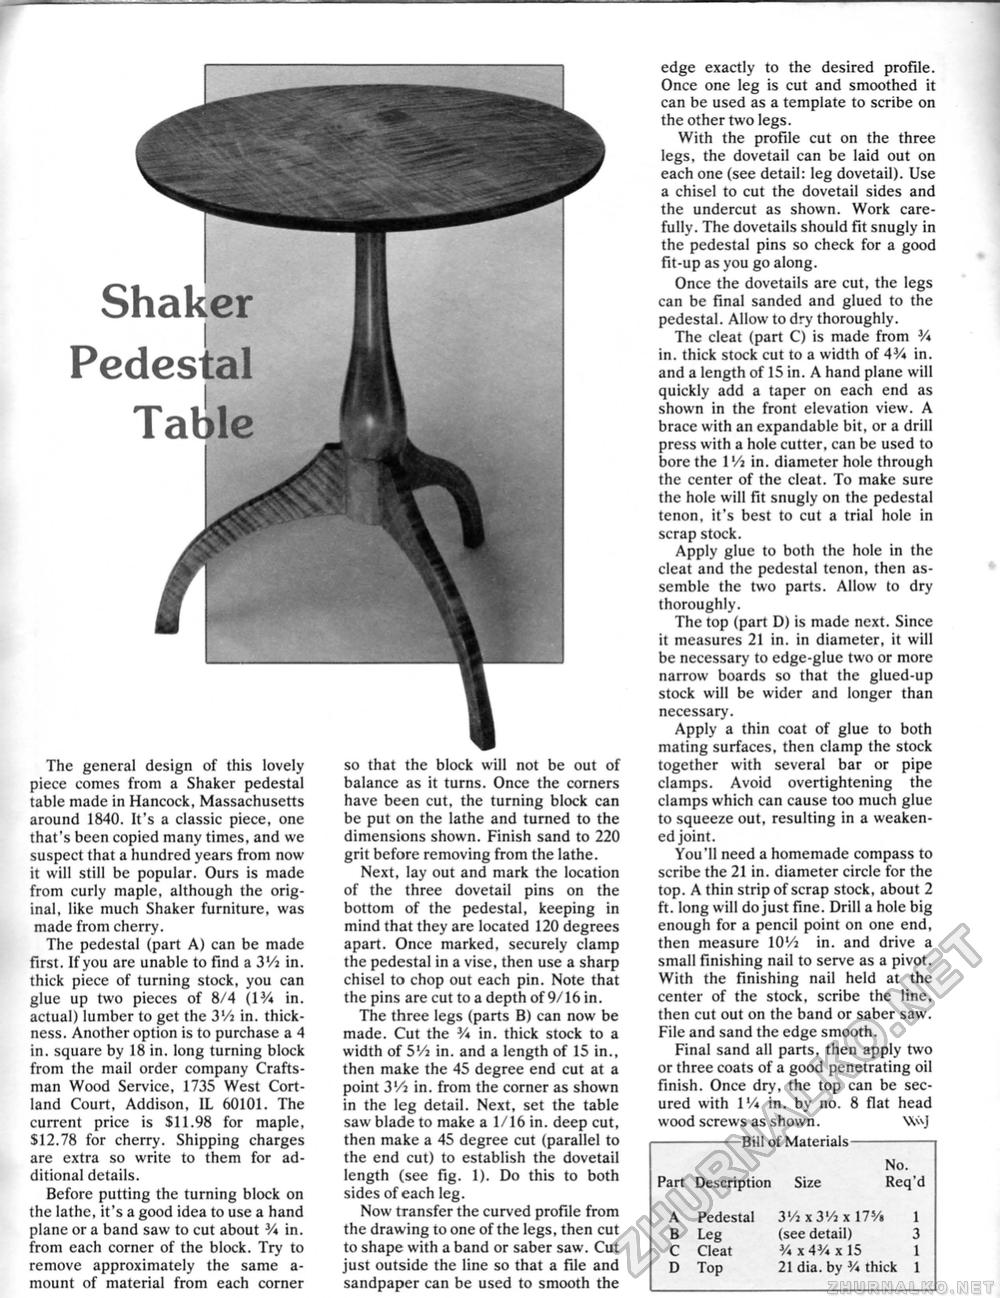
Shaker Pedestal Tat>le The general design of this lovely piece comes from a Shaker pedestal table made in Hancock, Massachusetts around 1840. It's a classic piece, one that's been copied many times, and we suspect that a hundred years from now it will still be popular. Ours is made from curly maple, although the original, like much Shaker furniture, was made from cherry. The pedestal (part A) can be made first. If you are unable to find a 3'/a in. thick piece of turning stock, you can glue up two pieces of 8/4 (W* in. actual) lumber to get the 3'/j in. thickness. Another option is to purchase a 4 in. square by 18 in. long turning block from the mail order company Craftsman Wood Service, 1735 West Cortland Court, Addison. IL 60101. The current price is $11.98 for maple, $12.78 for cherry. Shipping charges are extra so write to them for additional details. Before putting the turning block on the lathe, it's a good idea to use a hand plane or a band saw to cut about V* in. from each corner of the block. Try to remove approximately the same amount of material from each corner so that the block will not be out of balance as it turns. Once the corners have been cut, the turning block can be put on the lathe and turned to the dimensions shown. Finish sand to 220 grit before removing from the lathe. Next, lay out and mark the location of the three dovetail pins on the bottom of the pedestal, keeping in mind that they are located 120 degrees apart. Once marked, securely clamp the pedestal in a vise, then use a sharp chisel to chop out each pin. Note that the pins are cut to a depth of 9/16 in. The three legs (parts B) can now be made. Cut the V* in. thick stock to a width of 5'/i in. and a length of 15 in., then make the 45 degree end cut at a point 3'/j in. from the corner as shown in the leg detail. Next, set the table saw blade to make a 1/16 in. deep cut, then make a 45 degree cut (parallel to the end cut) to establish the dovetail length (see fig. 1). Do this to both sides of each leg. Now transfer the curved profile from the drawing to one of the legs, then cut to shape with a band or saber saw. Cut just outside the line so that a file and sandpaper can be used to smooth the edge exactly to the desired profile. Once one leg is cut and smoothed it can be used as a template to scribe on the other two legs. With the profile cut on the three legs, the dovetail can be laid out on each one (see detail: leg dovetail). Use a chisel to cut the dovetail sides and the undercut as shown. Work carefully. The dovetails should fit snugly in the pedestal pins so check for a good fit-up as you go along. Once the dovetails are cut, the legs can be final sanded and glued to the pedestal. Allow to dry thoroughly. The cleat (part C) is made from V* in. thick stock cut to a width of 4V* in. and a length of 15 in. A hand plane will quickly add a taper on each end as shown in the front elevation view. A brace with an expandable bit, or a drill press with a hole cutter, can be used to bore the l'/i in. diameter hole through the center of the cleat. To make sure the hole will fit snugly on the pedestal tenon, it's best to cut a trial hole in scrap stock. Apply glue to both the hole in the cleat and the pedestal tenon, then assemble the two parts. Allow to dry thoroughly. The top (part D) is made next. Since it measures 21 in. in diameter, it will be necessary to edge-glue two or more narrow boards so that the glued-up stock will be wider and longer than necessary. Apply a thin coat of glue to both mating surfaces, then clamp the stock together with several bar or pipe clamps. Avoid overtightening the clamps which can cause too much glue to squeeze out, resulting in a weakened joint. You'll need a homemade compass to scribe the 21 in. diameter circle for the top. A thin strip of scrap stock, about 2 ft. long will do just fine. Drill a hole big enough for a pencil point on one end, then measure lO'/i in. and drive a small finishing nail to serve as a pivot. With the finishing nail held at the center of the stock, scribe the line, then cut out on the band or saber saw. File and sand the edge smooth. Final sand all parts, then apply two or three coats of a good penetrating oil finish. Once dry, the top can be secured with IV* in. by no. 8 flat head wood screws as shown. W\) -Bill of Materials- No. Part Description Size Req'd A Pedestal 3'/j x 3lA x 175/i 1 B Leg (see detail) 3 C Cleat V* x 4V* x 15 1 D Top 21 dia. by V* thick 1 |


