Woodworker's Journal 1984-8-3, страница 24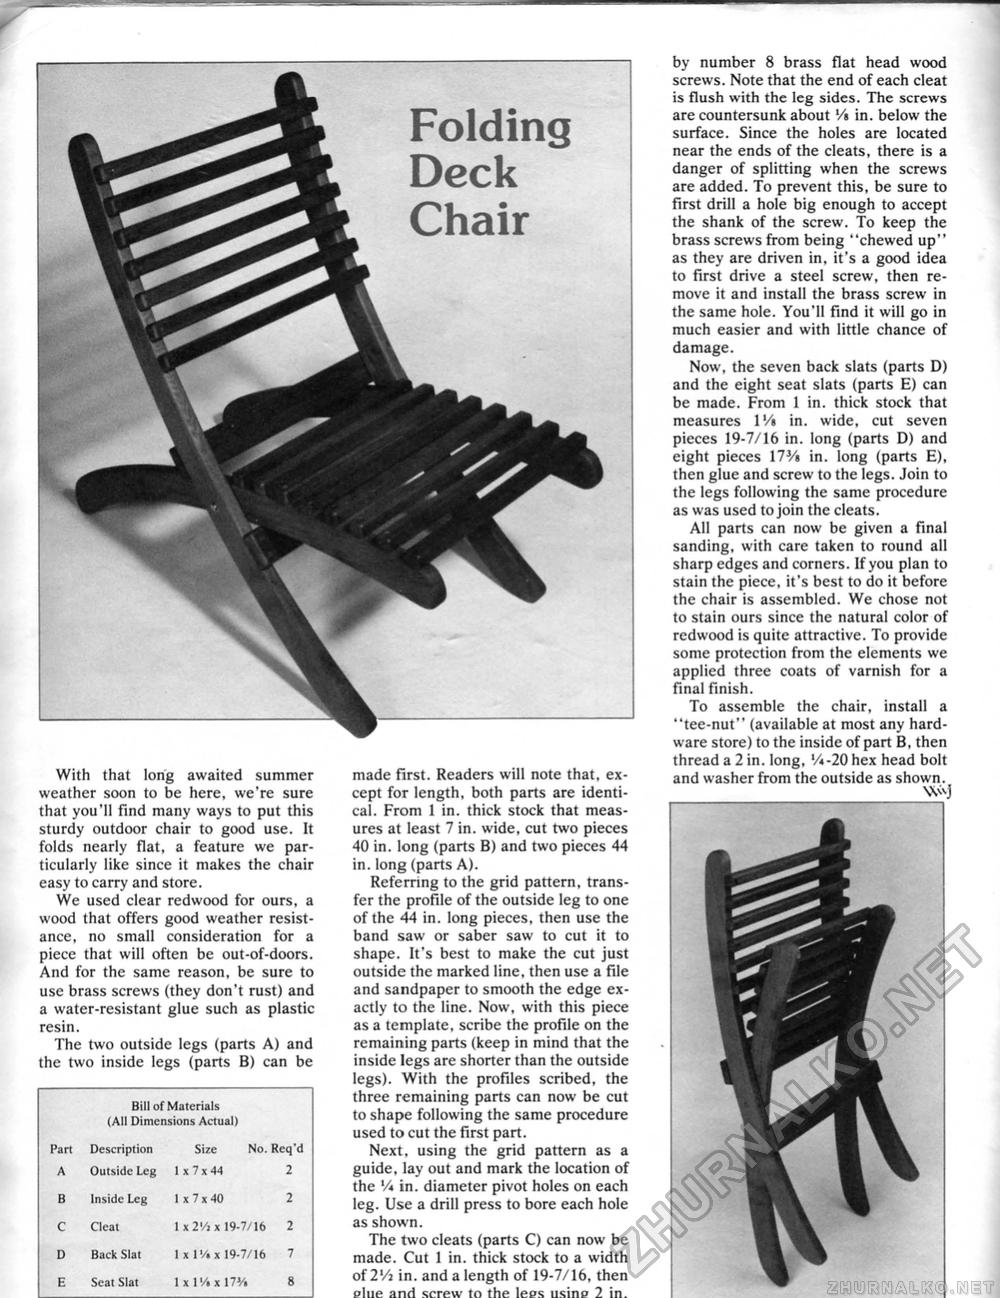
With that long awaited summer weather soon to be here, we're sure that you'll find many ways to put this sturdy outdoor chair to good use. It folds nearly flat, a feature we particularly like since it makes the chair easy to carry and store. We used clear redwood for ours, a wood that offers good weather resistance, no small consideration for a piece that will often be out-of-doors. And for the same reason, be sure to use brass screws {they don't rust) and a water-resistant glue such as plastic resin. The two outside legs (parts A) and the two inside legs (parts B) can be made first. Readers will note that, except for length, both parts are identical. From 1 in. thick stock that measures at least 7 in. wide, cut two pieces 40 in. long (parts B) and two pieces 44 in. long (parts A). Referring to the grid pattern, transfer the profile of the outside leg to one of the 44 in. long pieces, then use the band saw or saber saw to cut it to shape. It's best to make the cut just outside the marked line, then use a File and sandpaper to smooth the edge exactly to the line. Now, with this piece as a template, scribe the profile on the remaining parts (keep in mind that the inside legs are shorter than the outside legs). With the profiles scribed, the three remaining parts can now be cut to shape following the same procedure used to cut the first part. Next, using the grid pattern as a guide, lay out and mark the location of the V* in. diameter pivot holes on each leg. Use a drill press to bore each hole as shown. The two cleats (parts C) can now be made. Cut 1 in. thick stock to a width of 2'/j in. and a length of 19-7/16, then slue and screw to the lees usine 2 in. by number 8 brass fiat head wood screws. Note that the end of each cleat is flush with the leg sides. The screws are countersunk about */i in. below the surface. Since the holes are located near the ends of the cleats, there is a danger of splitting when the screws are added. To prevent this, be sure to first drill a hole big enough to accept the shank of the screw. To keep the brass screws from being "chewed up" as they are driven in, it's a good idea to first drive a steel screw, then remove it and install the brass screw in the same hole. You'll find it will go in much easier and with little chance of damage. Now, the seven back slats (parts D) and the eight seat slats (parts E) can be made. From 1 in. thick stock that measures l'/i in. wide, cut seven pieces 19-7/16 in. long (parts D) and eight pieces 17J/» in. long (parts E), then glue and screw to the legs. Join to the legs following the same procedure as was used to join the cleats. All parts can now be given a final sanding, with care taken to round all sharp edges and corners. If you plan to stain the piece, it's best to do it before the chair is assembled. We chose not to stain ours since the natural color of redwood is quite attractive. To provide some protection from the elements we applied three coats of varnish for a final finish. To assemble the chair, install a "tee-nut" (available at most any hardware store) to the inside of part B, then thread a 2 in. long, V*-20 hex head bolt and washer from the outside as shown. \\v-j
|
||||||||||||||||||||||||


