Woodworker's Journal 1984-8-3, страница 35
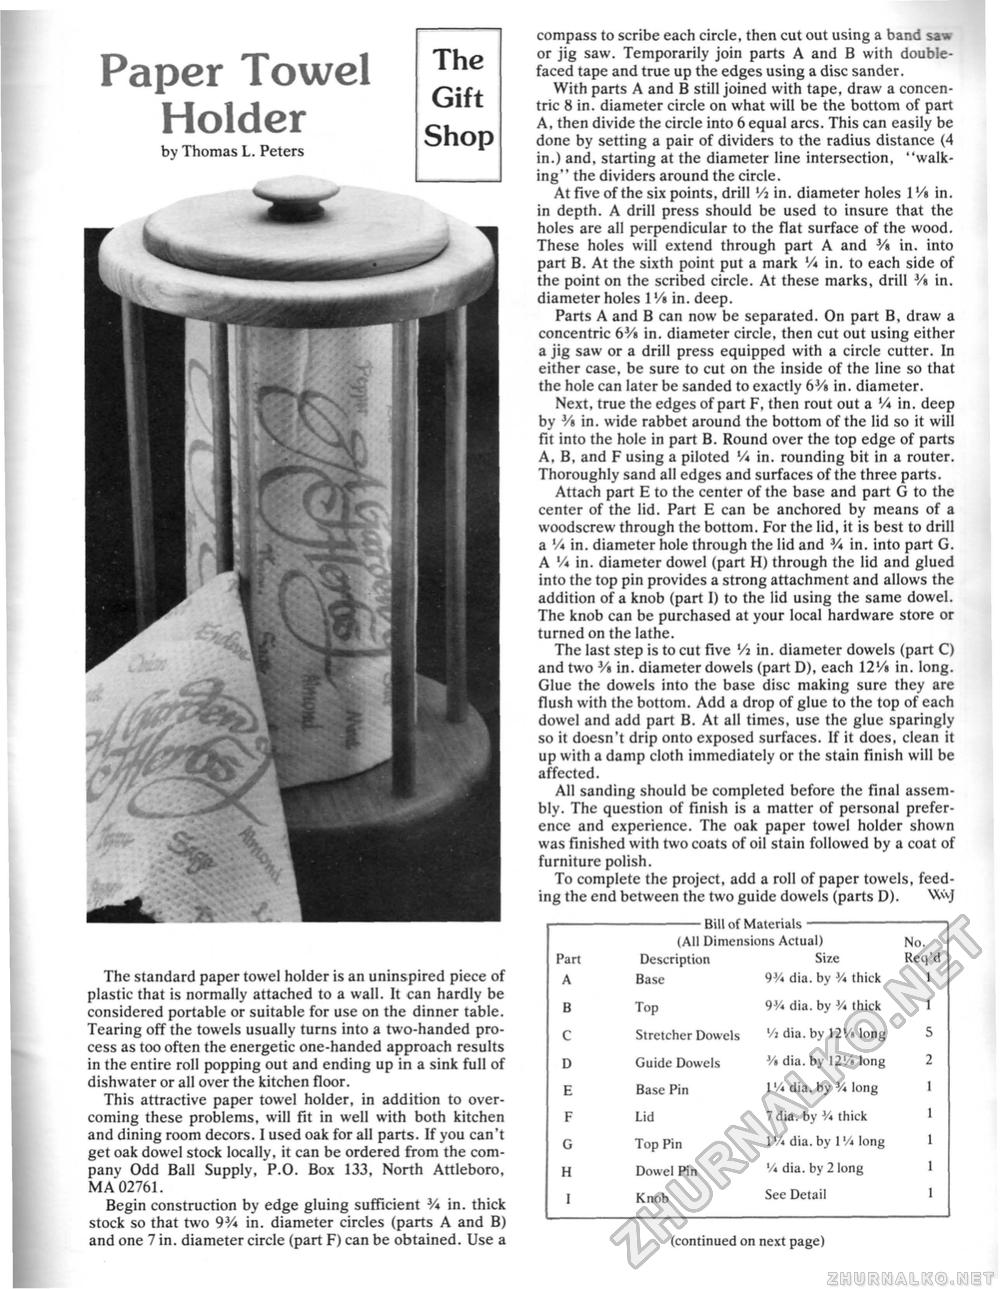
Paper Towel Holder by Thomas L. Peters The standard paper towel holder is an uninspired piece of plastic that is normally attached to a wall. It can hardly be considered portable or suitable for use on the dinner table. Tearing off the towels usually turns into a two-handed process as too often the energetic one-handed approach results in the entire roll popping out and ending up in a sink full of dishwater or all over the kitchen floor. This attractive paper towel holder, in addition to overcoming these problems, will fit in well with both kitchen and dining room decors. I used oak for all parts. If you can't get oak dowel stock locally, it can be ordered from the company Odd Ball Supply, P.O. Box 133, North Attleboro, MA 02761. Begin construction by edge gluing sufficient V* in. thick stock so that two 9V* in. diameter circles (pans A and B) and one 7 in. diameter circle (part F) can be obtained. Use a compass to scribe each circle, then cut out using a band saw or jig saw. Temporarily join parts A and B with double-faced tape and true up the edges using a disc sander. With parts A and B still joined with tape, draw a concentric 8 in. diameter circle on what will be the bottom of part A, then divide the circle into 6 equal arcs. This can easily be done by setting a pair of dividers to the radius distance (4 in.) and, starting at the diameter line intersection, "walking" the dividers around the circle. At five of the six points, drill Vi in. diameter holes 1 '/> in. in depth. A drill press should be used to insure that the holes are all perpendicular to the flat surface of the wood. These holes will extend through part A and V» in. into part B. At the sixth point put a mark V* in. to each side of the point on the scribed circle. At these marks, drill V» in. diameter holes l'/» in. deep. Parts A and B can now be separated. On part B, draw a concentric 63/» in. diameter circle, then cut out using either a jig saw or a drill press equipped with a circle cutter. In either case, be sure to cut on the inside of the line so that the hole can later be sanded to exactly 6J/» in. diameter. Next, true the edges of part F, then rout out a V4 in. deep by V% in. wide rabbet around the bottom of the lid so it will fit into the hole in part B. Round over the top edge of parts A, B, and F using a piloted % in. rounding bit in a router. Thoroughly sand all edges and surfaces of the three parts. Attach part E to the center of the base and part G to the center of the lid. Part E can be anchored by means of a woodscrew through the bottom. For the lid, it is best to drill a V* in. diameter hole through the lid and V* in. into part G. A Vi in. diameter dowel (part H) through the lid and glued into the top pin provides a strong attachment and allows the addition of a knob (part I) to the lid using the same dowel. The knob can be purchased at your local hardware store or turned on the lathe. The last step is to cut five '/»in, diameter dowels (part C) and two Vt in. diameter dowels (part D), each 12'/s in. long. Glue the dowels into the base disc making sure they are flush with the bottom. Add a drop of glue to the top of each dowel and add part B. At all times, use the glue sparingly so it doesn't drip onto exposed surfaces. If it does, clean it up with a damp cloth immediately or the stain finish will be affected. All sanding should be completed before the final assembly. The question of finish is a matter of personal preference and experience. The oak paper towel holder shown was finished with two coats of oil stain followed by a coat of furniture polish. To complete the project, add a roll of paper towels, feeding the end between the two guide dowels (parts D). - Bill of Materials (All Dimensions Actual) - Bill of Materials (All Dimensions Actual)
(continued on next page) No. Req'd 1 (continued on next page) |


