Woodworker's Journal 1984-8-3, страница 44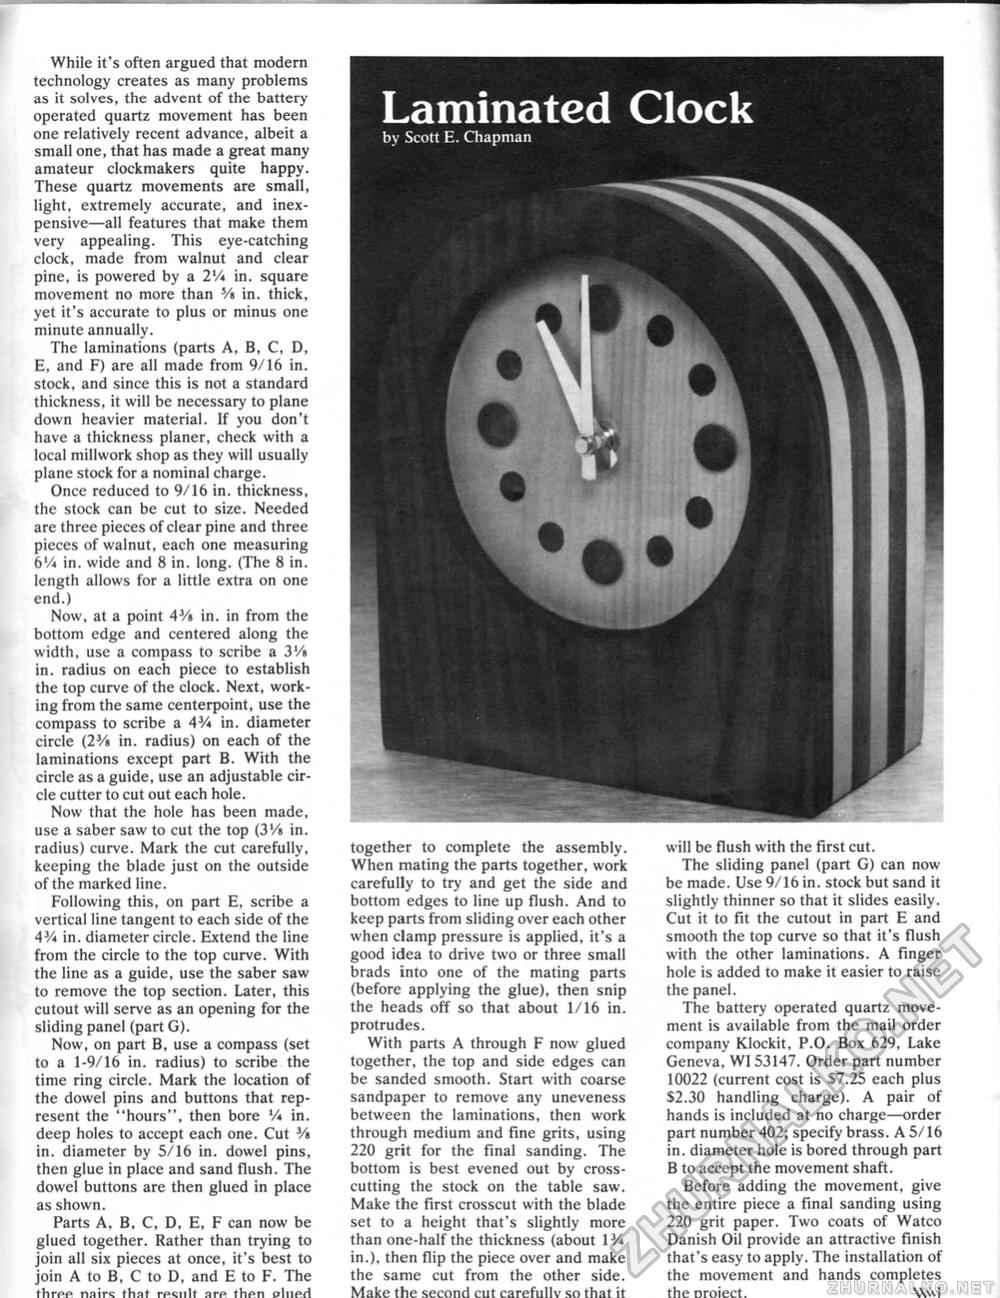
While it's often argued that modern technology creates as many problems as it solves, the advent of the battery operated quartz movement has been one relatively recent advance, albeit a small one, that has made a great many amateur clockmakers quite happy. These quartz movements are small, light, extremely accurate, and inexpensive—all features that make them very appealing. This eye-catching clock, made from walnut and clear pine, is powered by a 2V* in. square movement no more than Vt in. thick, yet it's accurate to plus or minus one minute annually. The laminations (parts A, B, C, D, E, and F) are all made from 9/16 in. stock, and since this is not a standard thickness, it will be necessary to plane down heavier material. If you don't have a thickness planer, check with a local millwork shop as they will usually plane stock for a nominal charge. Once reduced to 9/16 in. thickness, the stock can be cut to size. Needed are three pieces of clear pine and three pieces of walnut, each one measuring bV* in. wide and 8 in. long. (The 8 in. length allows for a little extra on one end.) Now, at a point 4V> in. in from the bottom edge and centered along the width, use a compass to scribe a 3'/i in. radius on each piece to establish the top curve of the clock. Next, working from the same centerpoint, use the compass to scribe a 43/* in. diameter circle (2V» in. radius) on each of the laminations except part B. With the circle as a guide, use an adjustable circle cutter to cut out each hole. Now that the hole has been made, use a saber saw to cut the top (3'/» in. radius) curve. Mark the cut carefully, keeping the blade just on the outside of the marked line. Following this, on part E, scribe a vertical line tangent to each side of the 4V* in. diameter circle. Extend the line from the circle to the top curve. With the line as a guide, use the saber saw to remove the top section. Later, this cutout will serve as an opening for the sliding panel (part G). Now, on part B, use a compass (set to a 1-9/16 in. radius) to scribe the time ring circle. Mark the location of the dowel pins and buttons that represent the "hours", then bore V* in. deep holes to accept each one. Cut V» in. diameter by 5/16 in. dowel pins, then glue in place and sand flush. The dowel buttons are then glued in place as shown. Parts A, B, C, D, E, F can now be glued together. Rather than trying to join all six pieces at once, it's best to join A to B, C to D, and E to F. The three nair<; that result are then oliieri together to complete the assembly. When mating the parts together, work carefully to try and get the side and bottom edges to line up flush. And to keep parts from sliding over each other when clamp pressure is applied, it's a good idea to drive two or three small brads into one of the mating parts (before applying the glue), then snip the heads off so that about 1/16 in. protrudes. With parts A through F now glued together, the top and side edges can be sanded smooth. Start with coarse sandpaper to remove any uneveness between the laminations, then work through medium and fine grits, using 220 grit for the final sanding. The bottom is best evened out by cross-cutting the stock on the table saw. Make the first crosscut with the blade set to a height that's slightly more than one-half the thickness (about IV* in.), then flip the piece over and make the same cut from the other side. Make the second cut carefullv so that it will be flush with the first cut. The sliding panel (part G) can now be made. Use 9/16 in. stock but sand it slightly thinner so that it slides easily. Cut it to fit the cutout in part E and smooth the top curve so that it's flush with the other laminations. A finger hole is added to make it easier to raise the panel. The battery operated quartz movement is available from the mail order company Klockit, P.O. Box 629, Lake Geneva, W153147. Order part number 10022 (current cost is $7.25 each plus S2.30 handling charge). A pair of hands is included at no charge—order part number 402; specify brass. A 5/16 in. diameter hole is bored through part B to accept the movement shaft. Before adding the movement, give the entire piece a final sanding using 220 grit paper. Two coats of Watco Danish Oil provide an attractive finish that's easy to apply. The installation of the movement and hands completes theoroiect. \\<M |


