Woodworker's Journal 1984-8-4, страница 36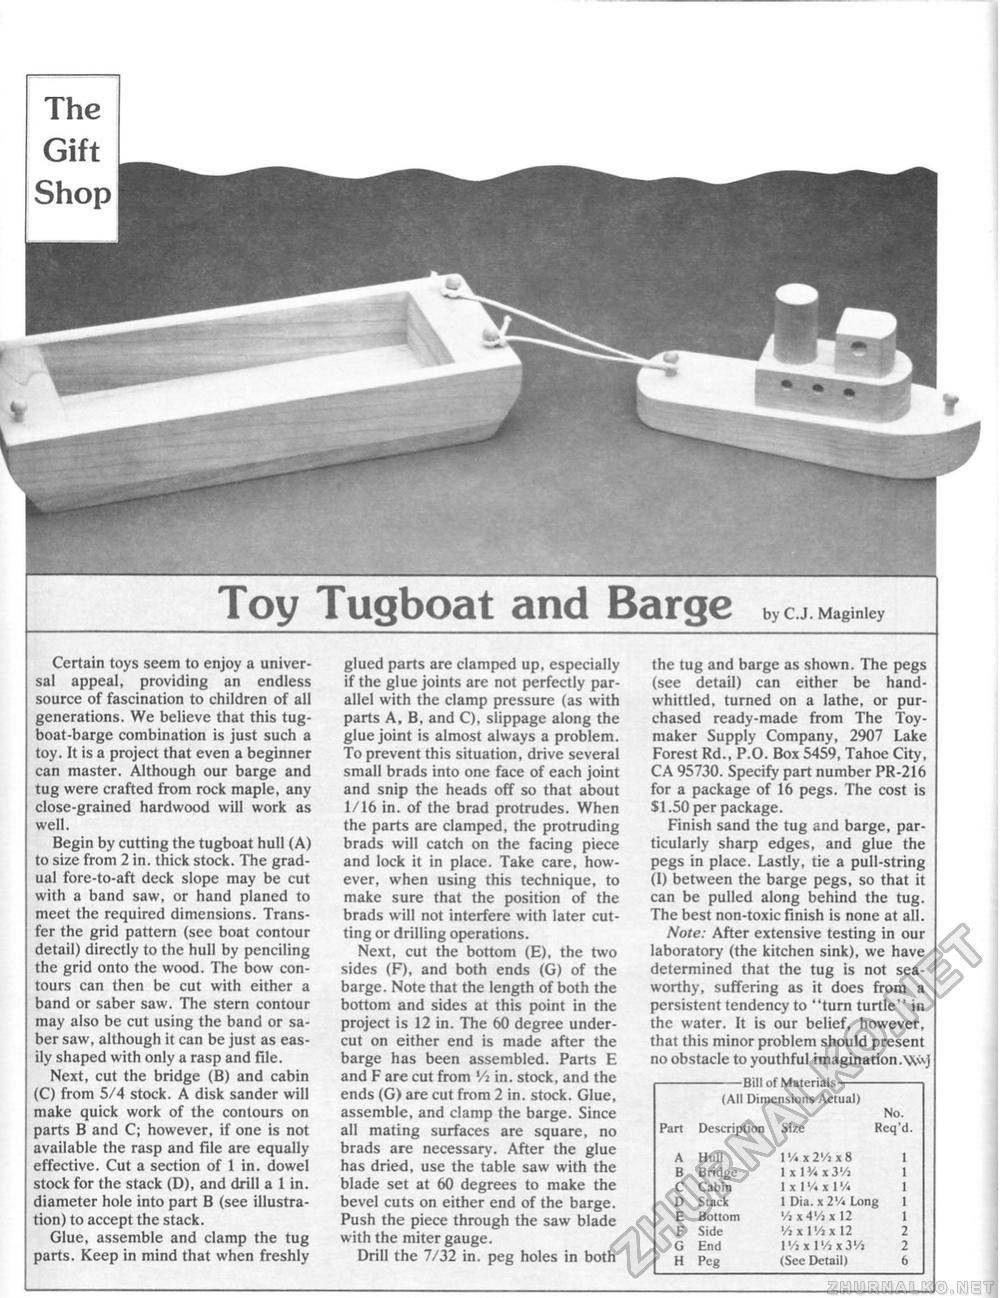
Certain toys seem to enjoy a universal appeal, providing an endless source of fascination to children of all generations. We believe that this tugboat-barge combination is just such a toy. It is a project that even a beginner can master. Although our barge and tug were crafted from rock maple, any close-grained hardwood will work as well. Begin by cutting the tugboat hull (A) to size from 2 in. thick stock. The gradual fore-to-aft deck slope may be cut with a band saw, or hand planed to meet the required dimensions. Transfer the grid pattern (see boat contour detail) directly to the hull by penciling the grid onto the wood. The bow contours can then be cut with either a band or saber saw. The stern contour may also be cut using the band or saber saw, although it can be just as easily shaped with only a rasp and file. Next, cut the bridge (B) and cabin (C) from 5/4 stock. A disk sander will make quick work of the contours on parts B and C; however, if one is not available the rasp and file are equally effective. Cut a section of 1 in. dowel stock for the stack (D), and drill a 1 in. diameter hole into part B (see illustration) to accept the stack. Glue, assemble and clamp the tug parts. Keep in mind that when freshly glued parts are clamped up, especially if the glue joints are not perfectly parallel with the clamp pressure (as with parts A, B, and C), slippage along the glue joint is almost always a problem. To prevent this situation, drive several small brads into one face of each joint and snip the heads off so that about 1/16 in. of the brad protrudes. When the parts are clamped, the protruding brads will catch on the facing piece and lock it in place. Take care, however, when using this technique, to make sure that the position of the brads will not interfere with later cutting or drilling operations. Next, cut the bottom (E), the two sides (F), and both ends (G) of the barge. Note that the length of both the bottom and sides at this point in the project is 12 in. The 60 degree undercut on either end is made after the barge has been assembled. Parts E and F are cut from Vi in. stock, and the ends (G) are cut from 2 in. stock. Glue, assemble, and clamp the barge. Since all mating surfaces are square, no brads are necessary. After the glue has dried, use the table saw with the blade set at 60 degrees to make the bevel cuts on either end of the barge. Push the piece through the saw blade with the miter gauge. Drill the 7/32 in. peg holes in both the tug and barge as shown. The pegs (see detail) can either be hand-whittled, turned on a lathe, or purchased ready-made from The Toy-maker Supply Company, 2907 Lake Forest Rd., P.O. Box 5459, Tahoe City, CA 95730. Specify part number PR-216 for a package of 16 pegs. The cost is $1.50 per package. Finish sand the tug and barge, particularly sharp edges, and glue the pegs in place. Lastly, tie a pull-string (I) between the barge pegs, so that it can be pulled along behind the tug. The best non-toxic finish is none at all. Note: After extensive testing in our laboratory (the kitchen sink), we have determined that the tug is not seaworthy, suffering as it does from a persistent tendency to "turn turtle" in the water. It is our belief, however, that this minor problem should present no obstacle to youthful imagination.\\wj -Bill of Materials- (All Dimensions Actual) No.
Toy Tugboat and Barge by C.J. Maginley |


