Woodworker's Journal 1984-8-5, страница 38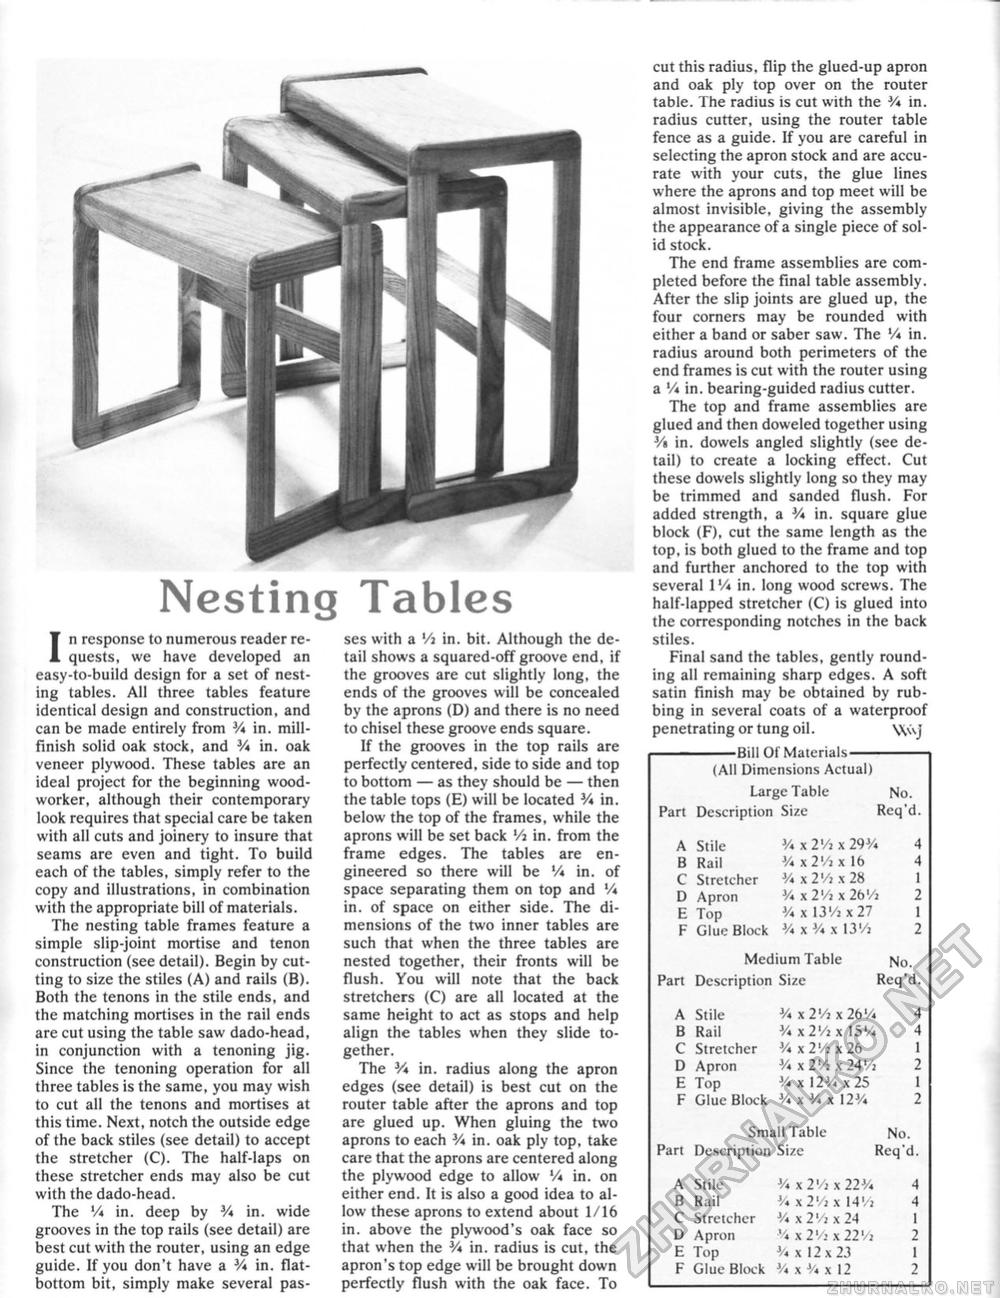
Nesting Tables In response to numerous reader requests, we have developed an easy-to-build design for a set of nesting tables. All three tables feature identical design and construction, and can be made entirely from ¥* in. mill-finish solid oak stock, and V* in. oak veneer plywood. These tables are an ideal project for the beginning woodworker, although their contemporary look requires that special care be taken with all cuts and joinery to insure that seams are even and tight. To build each of the tables, simply refer to the copy and illustrations, in combination with the appropriate bill of materials. The nesting table frames feature a simple slip-joint mortise and tenon construction (see detail). Begin by cutting to size the stiles (A) and rails (B). Both the tenons in the stile ends, and the matching mortises in the rail ends are cut using the table saw dado-head, in conjunction with a tenoning jig. Since the tenoning operation for all three tables is the same, you may wish to cut all the tenons and mortises at this time. Next, notch the outside edge of the back stiles (see detail) to accept the stretcher (C). The half-laps on these stretcher ends may also be cut with the dado-head. The V* in. deep by V* in. wide grooves in the top rails (see detail) are best cut with the router, using an edge guide. If you don't have a V* in. flat-bottom bit, simply make several pas ses with a Vi in. bit. Although the detail shows a squared-off groove end, if the grooves are cut slightly long, the ends of the grooves will be concealed by the aprons (D) and there is no need to chisel these groove ends square. If the grooves in the top rails are perfectly centered, side to side and top to bottom — as they should be — then the table tops (E) will be located V* in. below the top of the frames, while the aprons will be set back Vi in. from the frame edges. The tables are engineered so there will be V* in, of space separating them on top and % in. of space on either side. The dimensions of the two inner tables are such that when the three tables are nested together, their fronts will be flush. You will note that the back stretchers (C) are all located at the same height to act as stops and help align the tables when they slide together. The V* in. radius along the apron edges (see detail) is best cut on the router table after the aprons and top are glued up. When gluing the two aprons to each V* in. oak ply top, take care that the aprons are centered along the plywood edge to allow '/* in. on either end. It is also a good idea to allow these aprons to extend about 1/16 in. above the plywood's oak face so that when the V* in. radius is cut, the apron'stop edge will be brought down perfectly flush with the oak face. To cut this radius, flip the glued-up apron and oak ply top over on the router table. The radius is cut with the V* in. radius cutter, using the router table fence as a guide. If you are careful in selecting the apron stock and are accurate with your cuts, the glue lines where the aprons and top meet will be almost invisible, giving the assembly the appearance of a single piece of solid stock. The end frame assemblies are completed before the final table assembly. After the slip joints are glued up, the four corners may be rounded with either a band or saber saw. The V* in. radius around both perimeters of the end frames is cut with the router using a V* in. bearing-guided radius cutter. The top and frame assemblies are glued and then doweled together using J/« in. dowels angled slightly (see detail) to create a locking effect. Cut these dowels slightly long so they may be trimmed and sanded flush. For added strength, a V* in. square glue block (F), cut the same length as the top, is both glued to the frame and top and further anchored to the top with several 1V* in. long wood screws. The half-lapped stretcher (C) is glued into the corresponding notches in the back stiles. Final sand the tables, gently rounding all remaining sharp edges. A soft satin finish may be obtained by rubbing in several coats of a waterproof penetrating or tung oil. \\uj -Bill OI'Materials- (Atl Dimensions Actual) Large Table No. -Bill OI'Materials- (Atl Dimensions Actual) Large Table No.
|
|||||||||||||||||||||||||||||||||||||||||||||||||||||||||||||||||||||


