Woodworker's Journal 1984-8-6, страница 34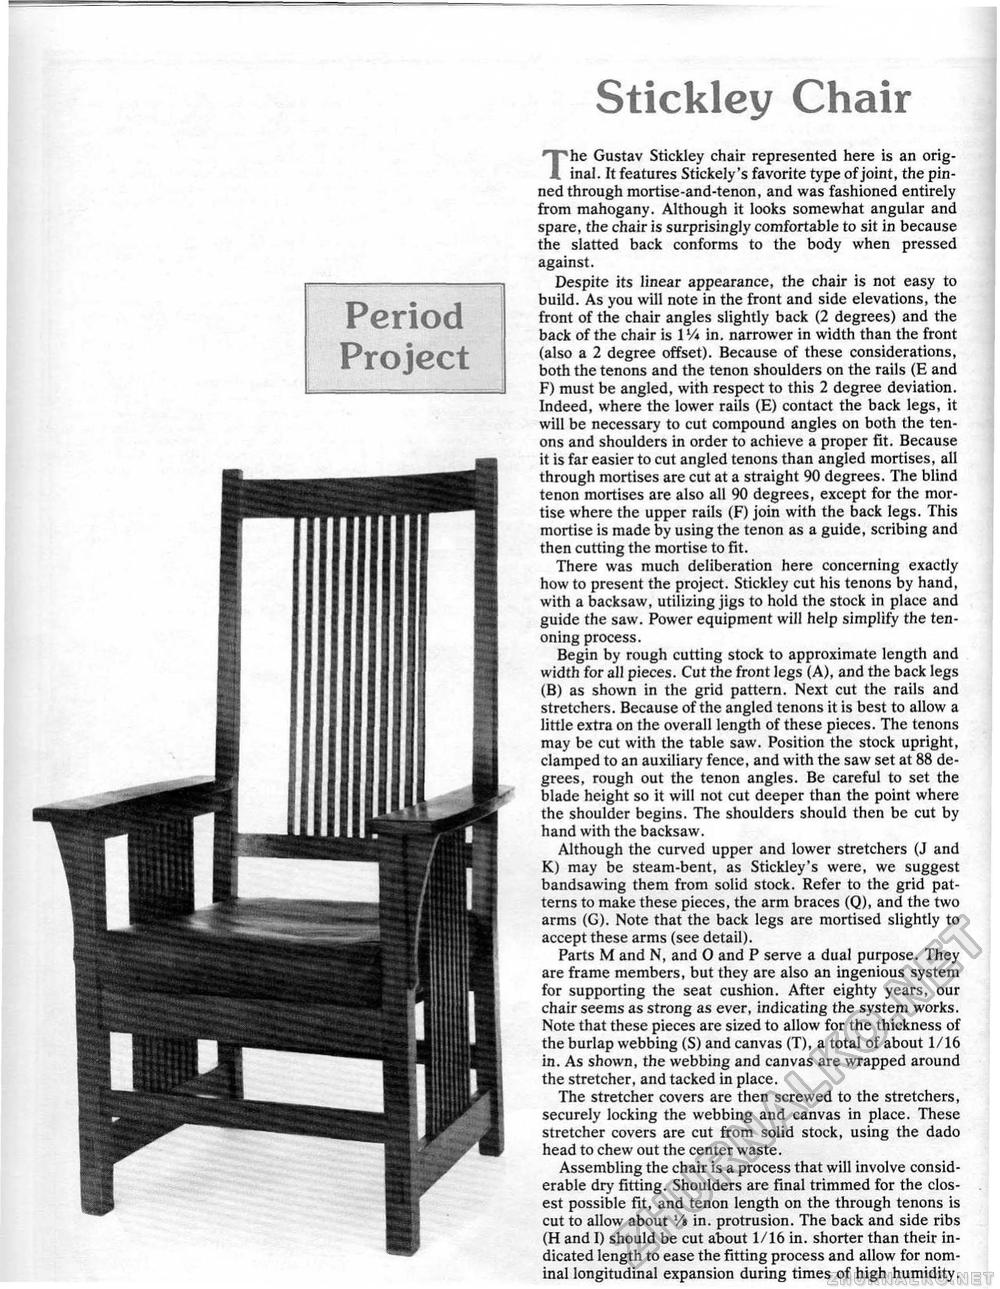
Stickley Chair Period Project The Gustav Stickley chair represented here is an original. It features Stickely's favorite type of joint, the pinned through mortise-and-tenon, and was fashioned entirely from mahogany. Although it looks somewhat angular and spare, the chair is surprisingly comfortable to sit in because the slatted back conforms to the body when pressed against. Despite its linear appearance, the chair is not easy to build. As you will note in the front and side elevations, the front of the chair angles slightly back (2 degrees) and the back of the chair is 1V* in. narrower in width than the front (also a 2 degree offset). Because of these considerations, both the tenons and the tenon shoulders on the rails (E and F) must be angled, with respect to this 2 degree deviation. Indeed, where the lower rails (E) contact the back legs, it will be necessary to cut compound angles on both the tenons and shoulders in order to achieve a proper fit. Because it is far easier to cut angled tenons than angled mortises, all through mortises are cut at a straight 90 degrees. The blind tenon mortises are also all 90 degrees, except for the mortise where the upper rails (F) join with the back legs, This mortise is made by using the tenon as a guide, scribing and then cutting the mortise to fit. There was much deliberation here concerning exactly how to present the project. Stickley cut his tenons by hand, with a backsaw, utilizing jigs to hold the stock in place and guide the saw. Power equipment will help simplify the tenoning process. Begin by rough cutting stock to approximate length and width for all pieces. Cut the front legs (A), and the back legs (B) as shown in the grid pattern. Next cut the rails and stretchers. Because of the angled tenons it is best to allow a little extra on the overall length of these pieces. The tenons may be cut with the table saw. Position the stock upright, clamped to an auxiliary fence, and with the saw set at 88 degrees, rough out the tenon angles. Be careful to set the blade height so it will not cut deeper than the point where the shoulder begins. The shoulders should then be cut by hand with the backsaw. Although the curved upper and lower stretchers (J and K.) may be steam-bent, as Stickley's were, we suggest bandsawing them from solid stock. Refer to the grid patterns to make these pieces, the arm braces (Q), and the two arms (G). Note that the back legs are mortised slightly to accept these arms (see detail). Parts M and N, and 0 and P serve a dual purpose. They are frame members, but they are also an ingenious system for supporting the seat cushion. After eighty years, our chair seems as strong as ever, indicating the system works. Note that these pieces are sized to allow for the thickness of the burlap webbing (S) and canvas (T), a total of about 1/16 in. As shown, the webbing and canvas are wrapped around the stretcher, and tacked in place. The stretcher covers are then screwed to the stretchers, securely locking the webbing and canvas in place. These stretcher covers are cut from solid stock, using the dado head to chew out the center waste. Assembling the chair is a process that will involve considerable dry fitting. Shoulders are final trimmed for the closest possible fit, and tenon length on the through tenons is cut to allow about Vs in. protrusion. The back and side ribs (H and I) should be cut about 1/16 in. shorter than their indicated length to ease the fitting process and allow for nominal longitudinal expansion during times of high humidity. |


