Woodworker's Journal 1985-9-2, страница 52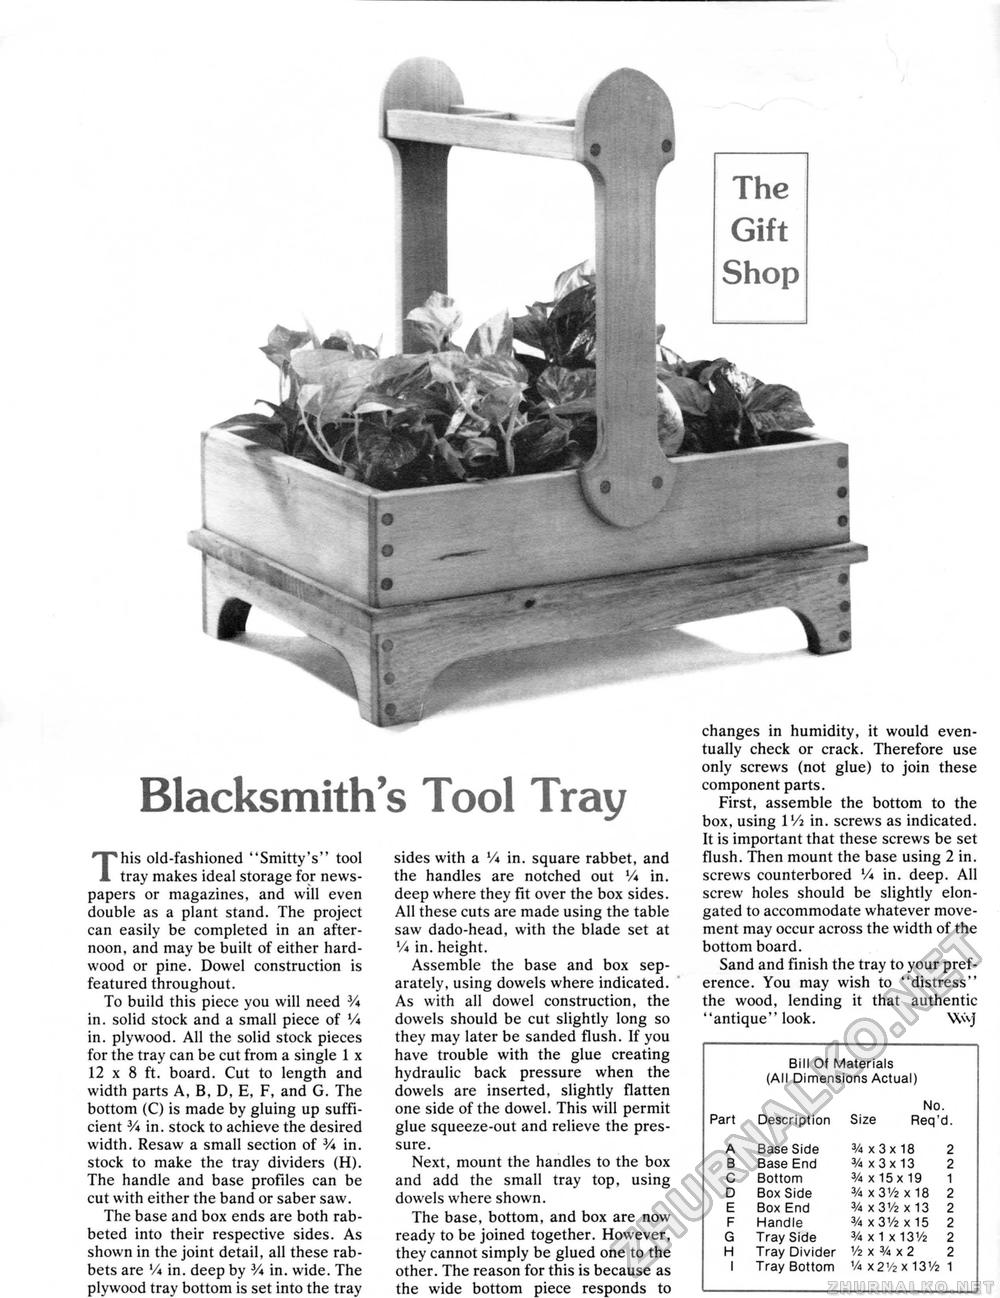
changes in humidity, it would eventually check or crack. Therefore use only screws (not glue) to join these component parts. First, assemble the bottom to the box, using 1 Vi in. screws as indicated. It is important that these screws be set flush. Then mount the base using 2 in. screws counterbored V« in. deep. All screw holes should be slightly elongated to accommodate whatever movement may occur across the width of the bottom board. Sand and finish the tray to your preference. You may wish to "distress" the wood, lending it that authentic "antique" look. Wuj Blacksmith's Tool Tray This old-fashioned "Smitty's" tool tray makes ideal storage for newspapers or magazines, and will even double as a plant stand. The project can easily be completed in an afternoon, and may be built of either hardwood or pine. Dowel construction is featured throughout. To build this piece you will need V* in. solid stock and a small piece of V* in. plywood. All the solid stock pieces for the tray can be cut from a single 1 x 12 x 8 ft. board. Cut to length and width parts A, B, D, E, F, and G. The bottom (C) is made by gluing up sufficient V* in. stock to achieve the desired width. Resaw a small section of V* in. stock to make the tray dividers (H). The handle and base profiles can be cut with either the band or saber saw. The base and box ends are both rabbeted into their respective sides. As shown in the joint detail, all these rabbets are V* in. deep by % in. wide. The plywood tray bottom is set into the tray sides with a V* in. square rabbet, and the handles are notched out '/* in. deep where they fit over the box sides. All these cuts are made using the table saw dado-head, with the blade set at V* in. height. Assemble the base and box separately, using dowels where indicated. As with all dowel construction, the dowels should be cut slightly long so they may later be sanded flush. If you have trouble with the glue creating hydraulic back pressure when the dowels are inserted, slightly flatten one side of the dowel. This will permit glue squeeze-out and relieve the pressure. Next, mount the handles to the box and add the small tray top, using dowels where shown. The base, bottom, and box are now ready to be joined together. However, they cannot simply be glued one to the other. The reason for this is because as the wide bottom piece responds to |
|||||||||||||||||||||||||||||||||||||||


