Woodworker's Journal 1985-9-2, страница 50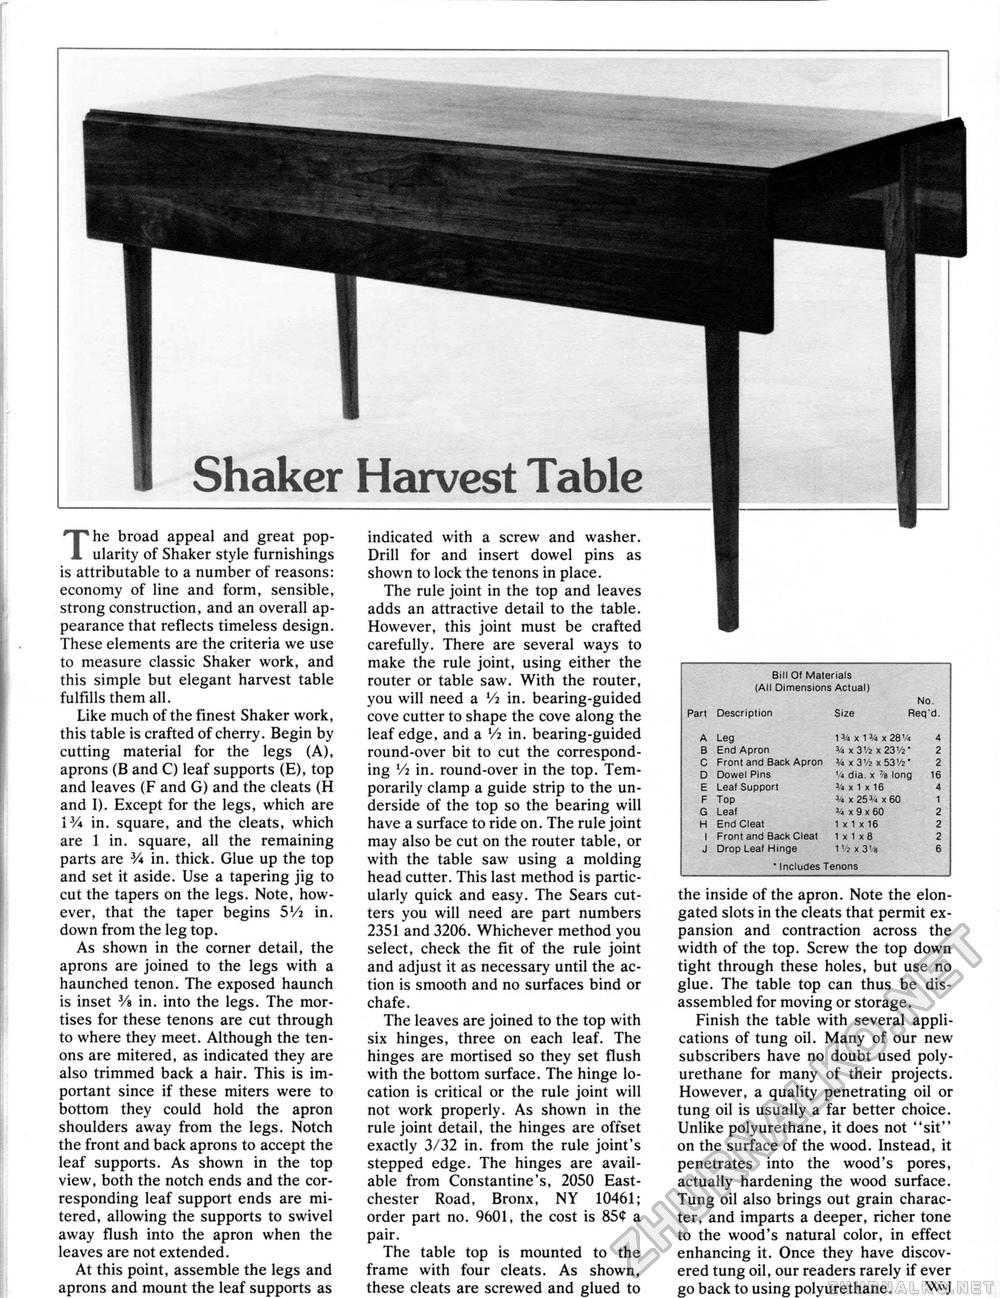
The broad appeal and great popularity of Shaker style furnishings is attributable to a number of reasons: economy of line and form, sensible, strong construction, and an overall appearance that reflects timeless design. These elements are the criteria we use to measure classic Shaker work, and this simple but elegant harvest table fulfills them all. Like much of the finest Shaker work, this table is crafted of cherry. Begin by cutting material for the legs (A), aprons (B and C) leaf supports (E), top and leaves (F and G) and the cleats (H and I). Except for the legs, which are 13A in. square, and the cleats, which are 1 in. square, all the remaining parts are 3/« in. thick. Glue up the top and set it aside. Use a tapering jig to cut the tapers on the legs. Note, however, that the taper begins 5'/2 in. down from the leg top. As shown in the corner detail, the aprons are joined to the legs with a haunched tenon. The exposed haunch is inset 3/a in. into the legs. The mortises for these tenons are cut through to where they meet. Although the tenons are mitered, as indicated they are also trimmed back a hair. This is important since if these miters were to bottom they could hold the apron shoulders away from the legs. Notch the front and back aprons to accept the leaf supports. As shown in the top view, both the notch ends and the corresponding leaf support ends are mitered, allowing the supports to swivel away flush into the apron when the leaves are not extended. At this point, assemble the legs and aprons and mount the leaf supports as indicated with a screw and washer. Drill for and insert dowel pins as shown to lock the tenons in place. The rule joint in the top and leaves adds an attractive detail to the table. However, this joint must be crafted carefully. There are several ways to make the rule joint, using either the router or table saw. With the router, you will need a Vi in. bearing-guided cove cutter to shape the cove along the leaf edge, and a Vi in. bearing-guided round-over bit to cut the corresponding V2 in. round-over in the top. Temporarily clamp a guide strip to the underside of the top so the bearing will have a surface to ride on. The rule joint may also be cut on the router table, or with the table saw using a molding head cutter. This last method is particularly quick and easy. The Sears cutters you will need are part numbers 2351 and 3206. Whichever method you select, check the fit of the rule joint and adjust it as necessary until the action is smooth and no surfaces bind or chafe. The leaves are joined to the top with six hinges, three on each leaf. The hinges are mortised so they set flush with the bottom surface. The hinge location is critical or the rule joint will not work properly. As shown in the rule joint detail, the hinges are offset exactly 3/32 in. from the rule joint's stepped edge. The hinges are available from Constantine's, 2050 East-chester Road, Bronx, NY 10461; order part no. 9601, the cost is 85<f a pair. The table top is mounted to the frame with four cleats. As shown, these cleats are screwed and glued to the inside of the apron. Note the elongated slots in the cleats that permit expansion and contraction across the width of the top. Screw the top down tight through these holes, but use no glue. The table top can thus be disassembled for moving or storage. Finish the table with several applications of tung oil. Many of our new subscribers have no doubt used poly-urethane for many of their projects. However, a quality penetrating oil or tung oil is usually a far better choice. Unlike polyurethane, it does not "sit" on the surface of the wood. Instead, it penetrates into the wood's pores, actually hardening the wood surface. Tung oil also brings out grain character, and imparts a deeper, richer tone to the wood's natural color, in effect enhancing it. Once they have discovered tung oil, our readers rarely if ever go back to using polyurethane. Wvj |
||||||||||||||||||||||||||||||||||||||||||||||||||||||||||||


