Woodworker's Journal 1985-9-3, страница 30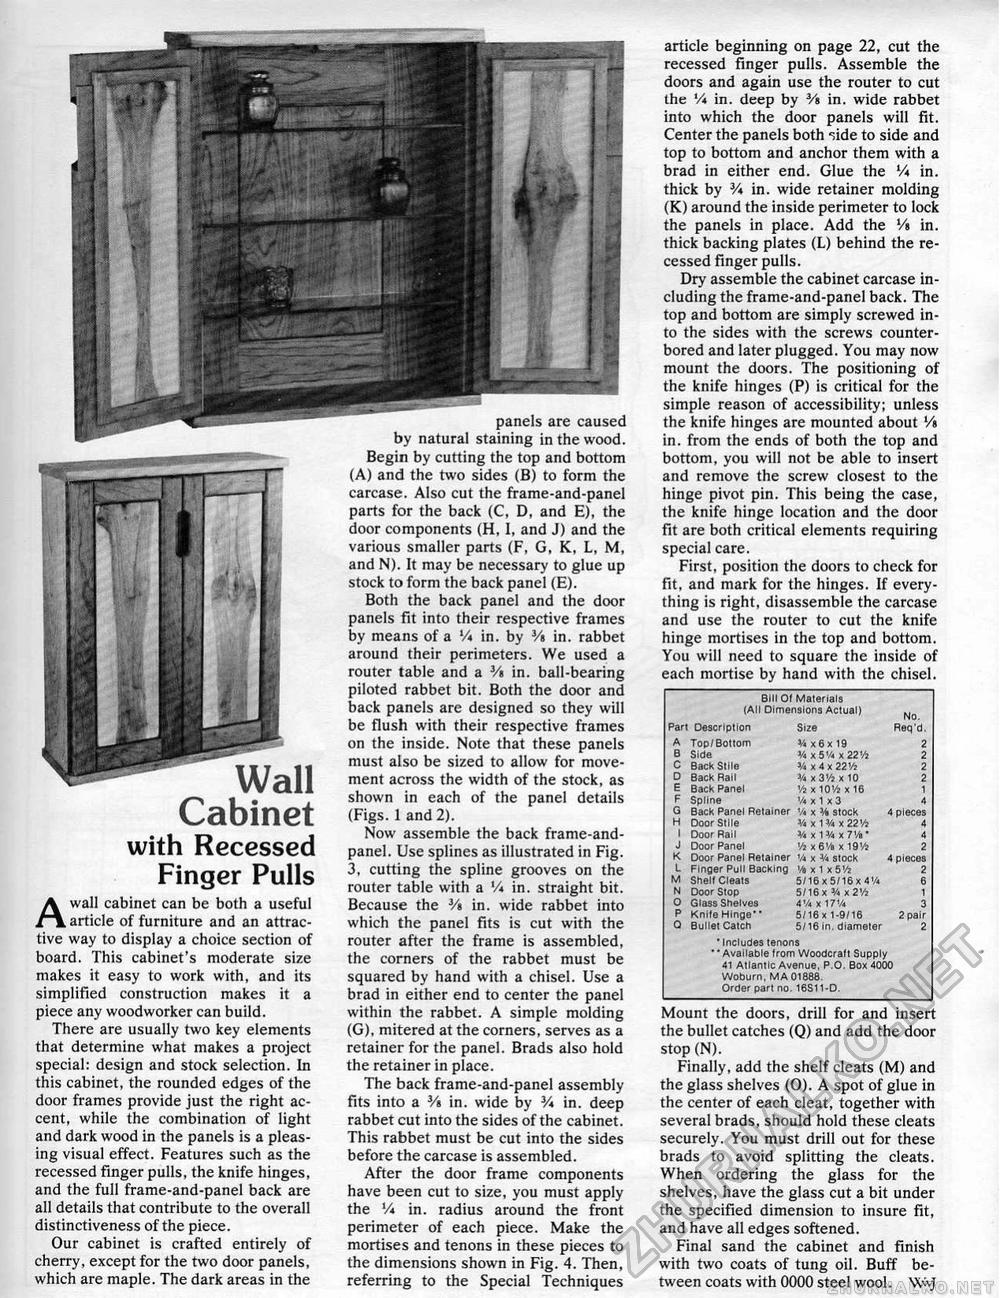
panels are caused by natural staining in the wood. Begin by cutting the top and bottom (A) and the two sides (B) to form the carcase. Also cut the frame-and-panel parts for the back (C, D, and E), the door components (H, I, and J) and the various smaller parts (F, G, K, L, M, and N). It may be necessary to glue up stock to form the back panel (E). Both the back panel and the door panels fit into their respective frames by means of a V* in, by V» in. rabbet around their perimeters. We used a router (able and a 3/« in. ball-bearing piloted rabbet bit. Both the door and back panels are designed so they will be flush with their respective frames on the inside. Note that these panels must also be sized to allow for movement across the width of the stock, as shown in each of the pane! details (Figs. 1 and 2). Now assemble the back frame-and-panel. Use splines as illustrated in Fig. 3, cutting the spline grooves on the router table with a V* in. straight bit. Because the Vt in. wide rabbet into which the panel fits is cut with the router after the frame is assembled, the corners of the rabbet must be squared by hand with a chisel. Use a brad in either end to center the panel within the rabbet. A simple molding (G), mitered at the corners, serves as a retainer for the panel. Brads also hold the retainer in place. The back frame-and-panel assembly fits into a Vi in. wide by V* in. deep rabbet cut into the sides of the cabinet. This rabbet must be cut into the sides before the carcase is assembled. After the door frame components have been cut to size, you must apply the V* in. radius around the front perimeter of each piece. Make the mortises and tenons in these pieces to the dimensions shown in Fig. 4. Then, referring to the Special Techniques with Recessed Finger Pulls A wall cabinet can be both a useful article of furniture and an attractive way to display a choice section of board. This cabinet's moderate size makes it easy to work with, and its simplified construction makes it a piece any woodworker can build. There are usually two key elements that determine what makes a project special: design and stock selection. In this cabinet, the rounded edges of the door frames provide just the right accent, while the combination of light and dark wood in the panels is a pleasing visual effect. Features such as the recessed finger pulls, the knife hinges, and the full frame-and-panel back are all details that contribute to the overall distinctiveness of the piece. Our cabinet is crafted entirely of cherry, except for the two door panels, which are maple. The dark areas in the Cabinetarticle beginning on page 22, cut the recessed finger pulls. Assemble the doors and again use the router to cut the Vi in. deep by Vs in. wide rabbet into which the door panels will fit. Center the panels both "ide to side and top to bottom and anchor them with a brad in either end. Glue the V* in. thick by 3A in. wide retainer molding (K) around the inside perimeter to lock the panels in place. Add the V» in, thick backing plates (L) behind the recessed finger pulls. Dry assemble the cabinet carcase including the frame-and-panel back. The top and bottom are simply screwed into the sides with the screws counter-bored and later plugged, You may now mount the doors. The positioning of the knife hinges (P) is critical for the simple reason of accessibility; unless the knife hinges are mounted about V» in, from the ends of both the top and bottom, you will not be able to insert and remove the screw closest to the hinge pivot pin. This being the case, the knife hinge location and the door fit are both critical elements requiring special care. First, position the doors to check for fit, and mark for the hinges. If everything is right, disassemble the carcase and use the router to cut the knife hinge mortises in the top and bottom. You will need to square the inside of each mortise by hand with the chisel. Bill Of Materials (All Dimensions Actual) Bill Of Materials (All Dimensions Actual)
■ Induces tenons * Available Irom Woodcraft Supply Atlantic Avenue, P.O. Box 4000 Woburn, MA01808 Order part no. 16S11-D, ■ Induces tenons * Available Irom Woodcraft Supply Atlantic Avenue, P.O. Box 4000 Woburn, MA01808 Order part no. 16S11-D, Mount the doors, drill for and insert the bullet catches (Q) and add the door stop (N). Finally, add the shelf cleats (M) and the glass shelves (O). A spot of glue in the center of each cleat, together with several brads, should hold these cleats securely. You must drill out for these brads to avoid splitting the cleats. When ordering the glass for the shelves, have the glass cut a bit under the specified dimension to insure fit, and have all edges softened. Final sand the cabinet and finish with two coats of tung oil. Buff between coats with 0000 steel wool. Wvj |
||||||||||||||||||||||||||||||||||||||||||||||||||||||||||||||||||||||||


