Woodworker's Journal 1985-9-3, страница 32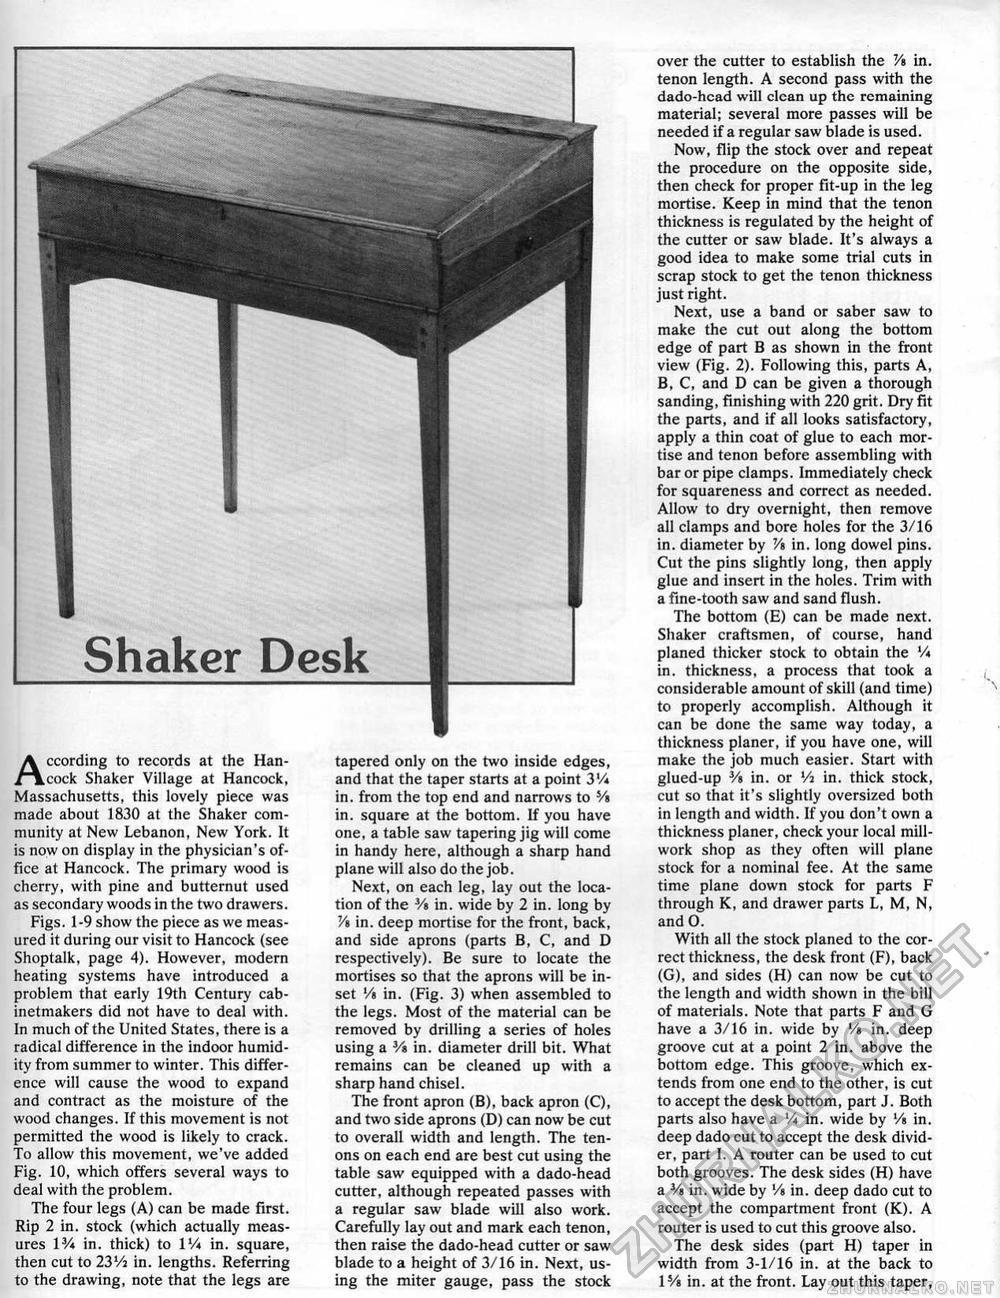
According to records at the Hancock Shaker Village at Hancock, Massachusetts, this lovely piece was made about 1830 at the Shaker community at New Lebanon, New York. It is now on display in the physician's office at Hancock. The primary wood is cherry, with pine and butternut used as secondary woods in the two drawers. Figs. 1-9 show the piece as we measured it during our visit to Hancock (see Shoptalk, page 4). However, modern heating systems have introduced a problem that early 19th Century cabinetmakers did not have to deal with. In much of the United States, there is a radical difference in the indoor humidity from summer to winter. This difference will cause the wood to expand and contract as the moisture of the wood changes. If this movement is not permitted the wood is likely to crack. To allow this movement, we've added Fig. 10, which offers several ways to deal with the problem. The four legs (A) can be made first. Rip 2 in. stock (which actually measures l3A in. thick) to 1 Vi in. square, then cut to 23Vi in. lengths. Referring to the drawing, note that the legs are tapered only on the two inside edges, and that the taper starts at a point 3V* in. from the top end and narrows to Vt in. square at the bottom. If you have one, a table saw tapering jig will come in handy here, although a sharp hand plane will also do the job. Next, on each leg, lay out the location of the 3/» in. wide by 2 in. long by Vt in. deep mortise for the front, back, and side aprons (parts B, C, and D respectively). Be sure to locate the mortises so that the aprons will be inset V» in. (Fig. 3) when assembled to the legs. Most of the material can be removed by drilling a series of holes using a V* in. diameter drill bit. What remains can be cleaned up with a sharp hand chisel. The front apron (B), back apron (C), and two side aprons (D) can now be cut to overall width and length. The tenons on each end are best cut using the table saw equipped with a dado-head cutter, although repeated passes with a regular saw blade will also work. Carefully layout and mark each tenon, then raise the dado-head cutter or saw blade to a height of 3/16 in. Next, using the miter gauge, pass the stock over the cutter to establish the Vt in. tenon length. A second pass with the dado-hcad will clean up the remaining material; several more passes will be needed if a regular saw blade is used. Now, flip the stock over and repeat the procedure on the opposite side, then check for proper fit-up in the leg mortise. Keep in mind that the tenon thickness is regulated by the height of the cutter or saw blade. It's always a good idea to make some trial cuts in scrap stock to get the tenon thickness just right. Next, use a band or saber saw to make the cut out along the bottom edge of part B as shown in the front view (Fig. 2). Following this, parts A, B, C, and D can be given a thorough sanding, finishing with 220 grit. Dry fit the parts, and if all looks satisfactory, apply a thin coat of glue to each mortise and tenon before assembling with bar or pipe clamps. Immediately check for squareness and correct as needed. Allow to dry overnight, then remove all clamps and bore holes for the 3/16 in. diameter by Vt in. long dowel pins. Cut the pins slightly long, then apply glue and insert in the holes. Trim with a fine-tooth saw and sand flush. The bottom (E) can be made next. Shaker craftsmen, of course, hand planed thicker stock to obtain the Vt in. thickness, a process that took a considerable amount of skill (and time) to properly accomplish. Although it can be done the same way today, a thickness planer, if you have one, will make the job much easier. Start with glued-up Vt in. or Vi in. thick stock, cut so that it's slightly oversized both in length and width. If you don't own a thickness planer, check your local mill-work shop as they often will plane stock for a nominal fee. At the same time plane down stock for parts F through K, and drawer parts L, M, N, and 0. With all the stock planed to the correct thickness, the desk front (F), back (G), and sides (H) can now be cut to the length and width shown in the bill of materials. Note that parts F and G have a 3/16 in. wide by Vt in. deep groove cut at a point 2 in. above the bottom edge. This groove, which extends from one end to the other, is cut to accept the desk bottom, part J. Both parts also have a Vi in. wide by Vt in. deep dado cut to accept the desk divider, part I. A router can be used to cut both grooves. The desk sides (H) have a V» in. wide by Vt in. deep dado cut to accept the compartment front (K). A router is used to cut this groove also. The desk sides (part H) taper in width from 3-1/16 in. at the back to IVt in. at the front. Lay out this taper, |


