Woodworker's Journal 1985-9-5, страница 20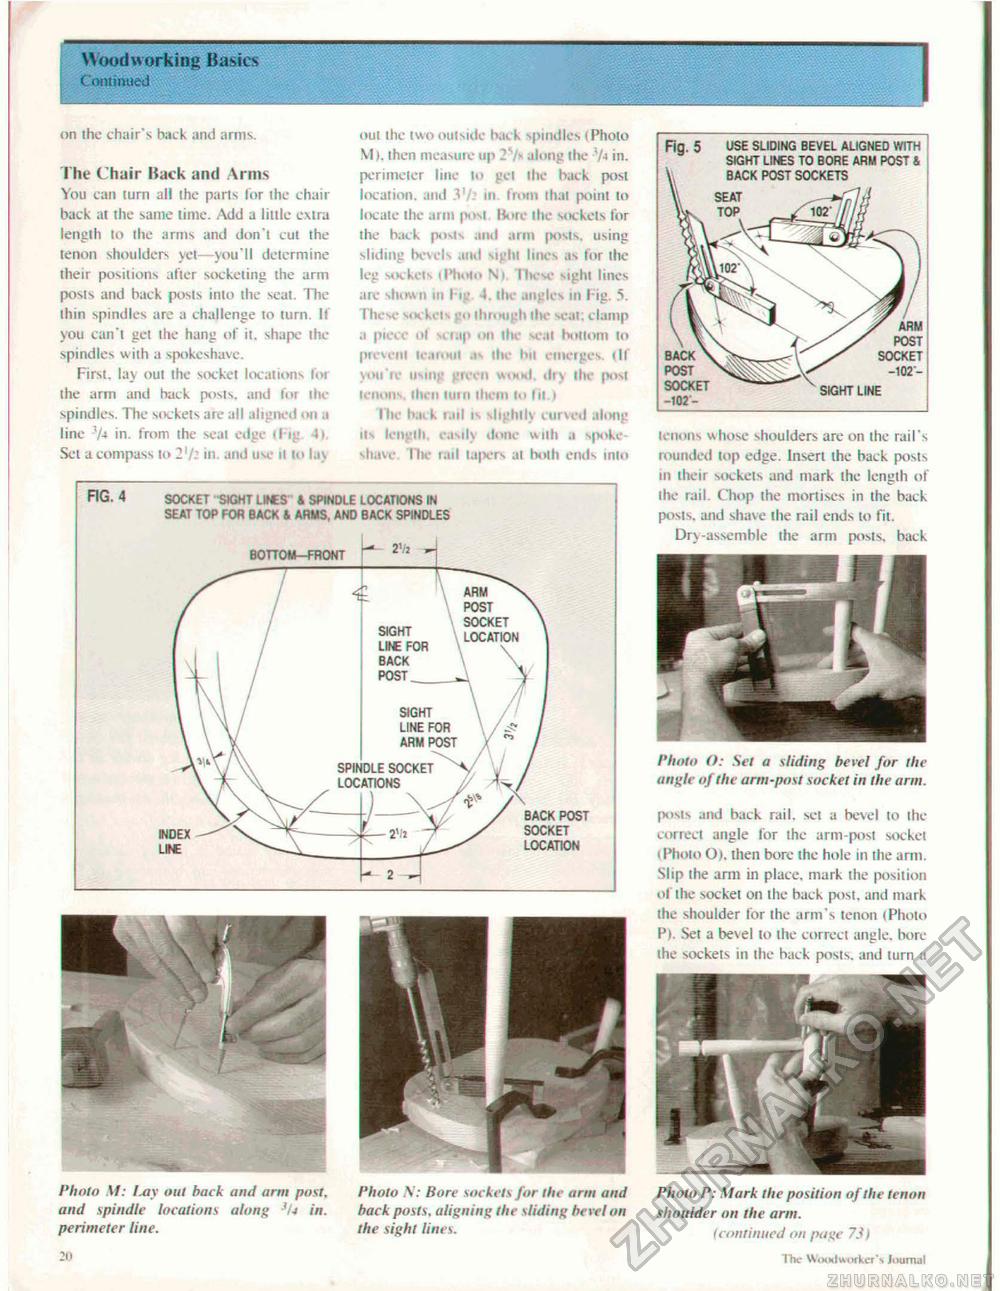
Woodworking Basics Continued on the chair's hack and arms. The Chair Hack and Arms You can (urn all ihe parts lor the chair back at the same lime. Add a litlle exira length to the arms and don't cut the tenon shoulders yet—you'll determine their positions alter socketing the arm posts and back posts into the seal. The Ihin spindles are a challenge to turn. It you can't get ihe hang of it. shape the spindles with a spokeshave. First, lay out the socket locations lor the arm and hack posts, and lor the spindles. The sockets are all aligned •»» .1 line lA in. from the seal edge tltg tl Set a compass to 2'/." in. and Use it to lay out the two otiiside bav k spindles i Photo M). then measure up 2 along the '/-i in. perimeter line lo gel the back post location, and V/: hi from thai point to locate ihe arm post [lore the sockets for the back posts and arm |>os|s. using sliding bevels and sight lines as for the leg sockets (Photo N) these sighi lines arc shown m I >y J, the angles in l ig. 5. These sockets go through the seat, clamp a piece ot scuip on the seat hoilom to prevent leafoul .tv Ihe hil emerges, (If you're using green wood, dry the posi tenons, ihcn iiiiii lliem to tit.) the buck rail is shghih curved along its length, easily done with a spoke-shave. lite rail lajvrs at both ends mlo FIG. 4 SOCKET SIGHT L»€S & SPINDLE LOCATIONS IN SEAT TOP FOR BACK & ARMS, AND BACK SPINDLES Photo M: Lay out hack and arm post, and spindle locutions along 3U in. perimeter line. 20 Photo X: Bore sockets for the arm and hack posts, aligning the sliding bevel on the sight lines. tenons whose shoulders are on the rail's rounded (op edge. lnser( the back posts in their sockets and mark the length of the rail. Chop the monises in the back posis. and shave the rail ends to fit. Dr\-assemble the arm posts, back Photo O: Set a sliding bevel for the angle of the arm-post socket in the arm. posts and back rail, set a bevel to the correct angle for the arm-post socket i Photo O). then bore ihe hole in the arm. Slip the arm in place, mark the position of the socket on the back post, and mark the shoulder for the arm's tenon (Photo P). Set a be\e! to ihe correct angle, bore the sockets in the back posts, and turn a Photo P: Mark the position of the tenon shoulder on the arm. {continued on page 73) The Woodworker's journal |


