Woodworker's Journal 1985-9-5, страница 59
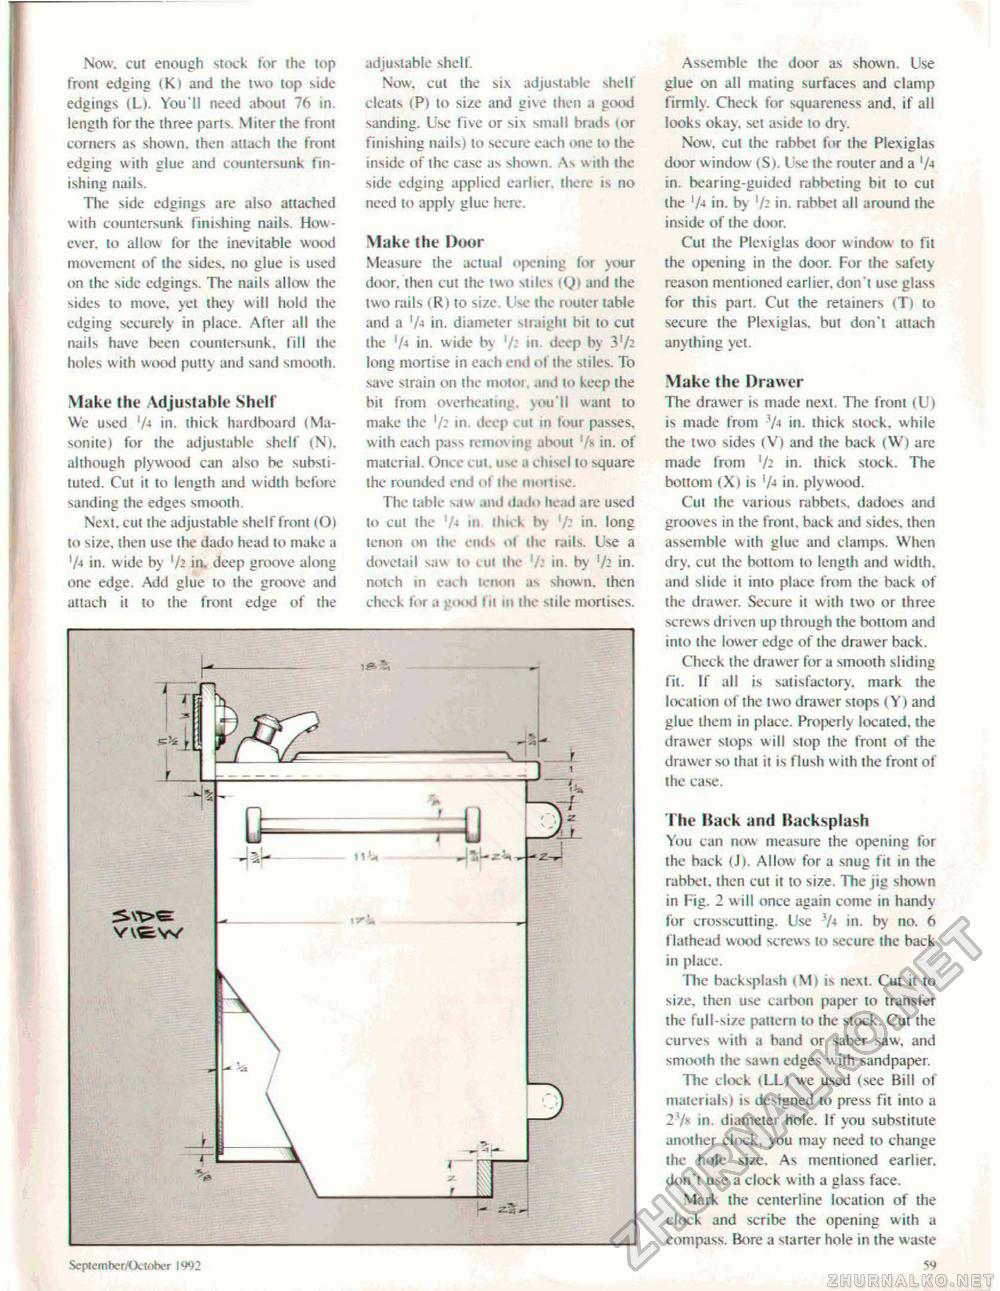
Now. cut enough stock for the top front edging (K) and the two top side edgings (L). You'll need ahoul 76 in. length for the three parts. Miter the front corners as shown, then attach the front edging with glue and countersunk finishing nails. The side edgings are also attached with countersunk finishing nails. However. to allow for the inevitable wood movement of the sides, no glue is used on the side edgings. The nails allow the sides to move, yet they will hold the edging securely in place. After all the nails have been countersunk, fill the holes w ith wood putty and sand smooth. Make the Adjustable Shell We used 'A in. thick hardhoard (Ma-sonite) for the adjustable shelf <N>. although plywood can also be substituted. Cut it to length and width before sanding the edges smooth. Next, cut the adjustable shelf front (O) to size, then use the dado head to make a 'A in. w ide by 1 /z in. deep groove along one edge. Add glue to the groove and attach it to the front edge of the adjustable shelf. Now, cut the six adjustable shelf cleats (Pi to size and give then a good sanding. Use five or six small brads (or finishing nails) to secure each one to the inside of the case as shown. \s w ith ihe side edging applied earlier, there ts no need to apply glue here. Make the Door Measure the actual opening for your door, then cut the two stiles and ihe two rails (R l to size. Use the router table and a 'A in, diameter straight bit to cut the 'A in. wide by '/•■ in. deep by Vh long mortise in each end ol the stiles. To save strain on ihe motor, and to keep ihe bit from overheating, you'll wani to make ihe in. deep cut 111 four passes, with each pass removing about '/« in. of material. Once cut. use a chisel to square the rounded end of tlx- mortise. The table saw and dado head are used to cut ihe 'A in thick hv yfc in. long tenon on the ends ot the rails. Use a dovetail saw to cut ihe in. by 'A in, notch in each tenon as shown, then check for a good fu in ihe stile mortises. September/October 1992 Assemble the door as shown. Use glue on all mating surfaces and clamp firmly. Check for squareness and. if all looks okay, sei aside to dry. Now, cut the rabbet for the Plexiglas door w indow (S). Use ihe router and a 'A in. bearing-guided rabbeting bit to cut the 'A in. by '/- in. rabhei ail around the inside of the door. Cut the Plexiglas door window to fit the opening in the door. For the safety reason mentioned earlier, don't use glass for this part. Cut the retainers (T) to secure the Plexiglas. but don't attach anything yet. Make the Drawer The drawer is made next. The front (U) is made from V» in. thick stock, while the two sides (V) and the back (W) are made from '/- in. thick slock. The bottom <Xi is 'A in. plywood. Cut the various rabbets, dadoes and grooves in ihe front, back and sides, then assemble with glue and clamps. When dry. cut the bottom to length and w idth. and slide it inio place from the back of the drawer. Secure it with two or three screws driven up through the bottom and into the lower edge of the drawer back. Check the drawer for a smooth sliding fit. If all is satisfactory, mark the location of the iwo drawer stops (Y l and glue them in place. Property located, the drawer stops w ill stop the front of Ihe drawer so that it is flush with ihe front of the case. The Hack and Backsplash You can now measure the opening for the back (JI. Allow for a snug fit in the rabbet, then cut it to size. The jig show n in Fig. 2 will once again come in handy for crosscutting. Use 3A in. by no. 6 flalhead wood screws to secure the back in place. The backsplash (M) is nexl. Cut it to size, then use carbon paper to transfer the full-size pattern to ihe stock. Cut the curves with a hand or saber saw, and smooth the saw n edges w ith sandpaper. Hie clock (LL) we used (see Bill of materials) is designed to press fit into a 27* m. diameter hole. If you substitute another clock, you may need lo change the hole size. As mentioned earlier, don'i use a clock with a glass face. Mark the centerline location of the clock and scribe the opening wiih a compass. Bore a siarter hole in the waste 59 |


