Woodworker's Journal 1993-17-3, страница 18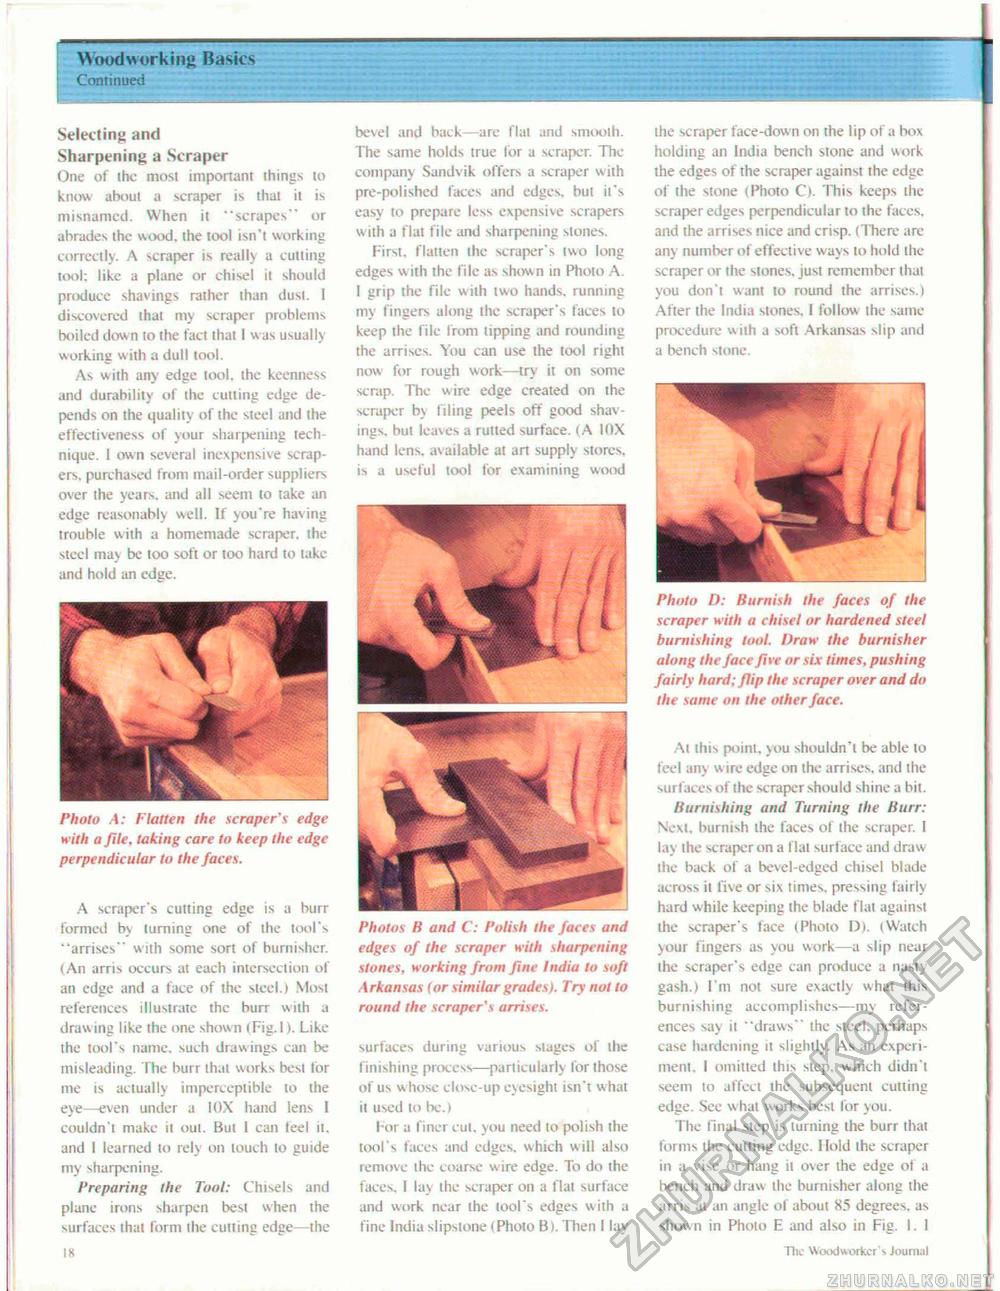
Woodworking Basics Continued Selecting and Sharpening a Scraper One of ihe most important things to knew about a scraper is that it is misnamed. When it "scrapes" or abrades the wood, the tool isn't working correctly. A scraper is really a cutting tool; like a plane or chisel it should produce shavings rather than dusi. I discovered that my scraper problems boiled down to the fact that 1 w as usually working with a dull tool. As with any edge tool, the keenness and durability of the culling edge depends on the quality of ihe steel and the effectiveness of your sharpening technique. 1 own several inexpensive scrapers. purchased front mail-order suppliers over the years, and all seem lo take an edge reasonably well. If you're having trouble with a homemade scraper, the steel may be too soft or loo hard to take and hold an edge. A scraper's cutting edge is a burr formed by turning one of the tool's "arrises" with some sort of burnisher. (An arris occurs at each intersection of an edge and a face of the steel.) Most references illustrate the burr with a drawing like the one shown iFig.l). Like the tool's name, such drawings can be misleading. The burr that works best tor me is actually imperceptible to the eye—even under a 10X hand lens I couldn't make it out. But I can feel it. and I learned to rely on touch lo guide my sharpening. Preparing the Tool: Chisels and plane irons sharpen best when the surfaces that form the cutting edge—the 18 bevel and back—are flat and smooth. The same holds true for a scraper. The company Sandvik offers a scraper with pre-polished faces and edges, but it's easy to prepare less expensive scrapers with a flat file and sharpening stones. First, flatten the scraper's two long edges with the File as shown in Photo A. 1 grip the file wilh two hands, running my fingers along the scraper's faces to keep the file from tipping and rounding the arrises. You can use the tool right now for rough work—try it on some scrap. The wire edge created on the scraper by filing peels off good shavings, but leaves a rutted surface. (A 10X hand lens, available at an supply stores, is a useful tool for examining wood 1 Photos B and C: Polish the faces and edges of the scraper with sharpening stones, working from fine India to soft Arkansas (or similar grades). Try not to round the scraper's arrises. surfaces during various stages of the finishing process—particularly for those of us w hose close-up eyesight isn't what it used to be.) For a finer cut. you need to polish the tool's faces and edges, which will also remove the coarse wire edge. To do the faces, I lay ihe scraper on a flat surface and work near the loot's edges w ith a fine India slipslone (Photo Bi. Then I lay the scraper face-down on the lip of a box holding an India bench stone and work the edges of the scraper against the edge of the stone iPhoto Cl. This keeps the scraper edges perpendicular to ihe faces, and the arrises nice and crisp. ( There are any number of effective ways to hold the scraper or ihe stones, just remember thai you don't want to round the arrises.) After the India stones. I follow the same procedure with a soft Arkansas slip and a bench stone. Photo D: Burnish the faces of the scraper with a chisel or hardened steel burnishing tool. Draw the burnisher along the face five or six times, pushing fairly hard; flip the scraper over and do the same on the other face. At this point, you shouldn't be able lo feel any wire edge on the arrises, and the surfaces of ihe scraper should shine a bit. Burnishing and Turning the Burr: Next, burnish the faces of the scraper. I lay the scraper on a flat surface and draw the back of a bevel-edged chisel blade across it five or six times, pressing fairly hard while keeping the blade flat against the scraper's face (Photo Dk (Watch your fingers as you work—a slip near ihe scraper's edge can produce a nasty gash.) I'm not sure exactly what this burnishing accomplishes—my references say it "draws" the slecl, perhaps case hardening it slightly. As an experiment, 1 omitted this step, which didn't seem to affect the subsequent cutting edge. See what works best for you. The final step is turning the burr that forms the culling edge. Hold ihe scraper in a vise or hang it over ihe edge of a bench and draw Ihe burnisher along the arris at an angle of about 85 degrees, as shown in Photo E and also in Fig. 1. I The Woodworker's Journal Photo A: Flatten the scraper's edge with a file, taking care to keep the edge perpendicular to the faces. |


