Woodworker's Journal 1993-17-3, страница 36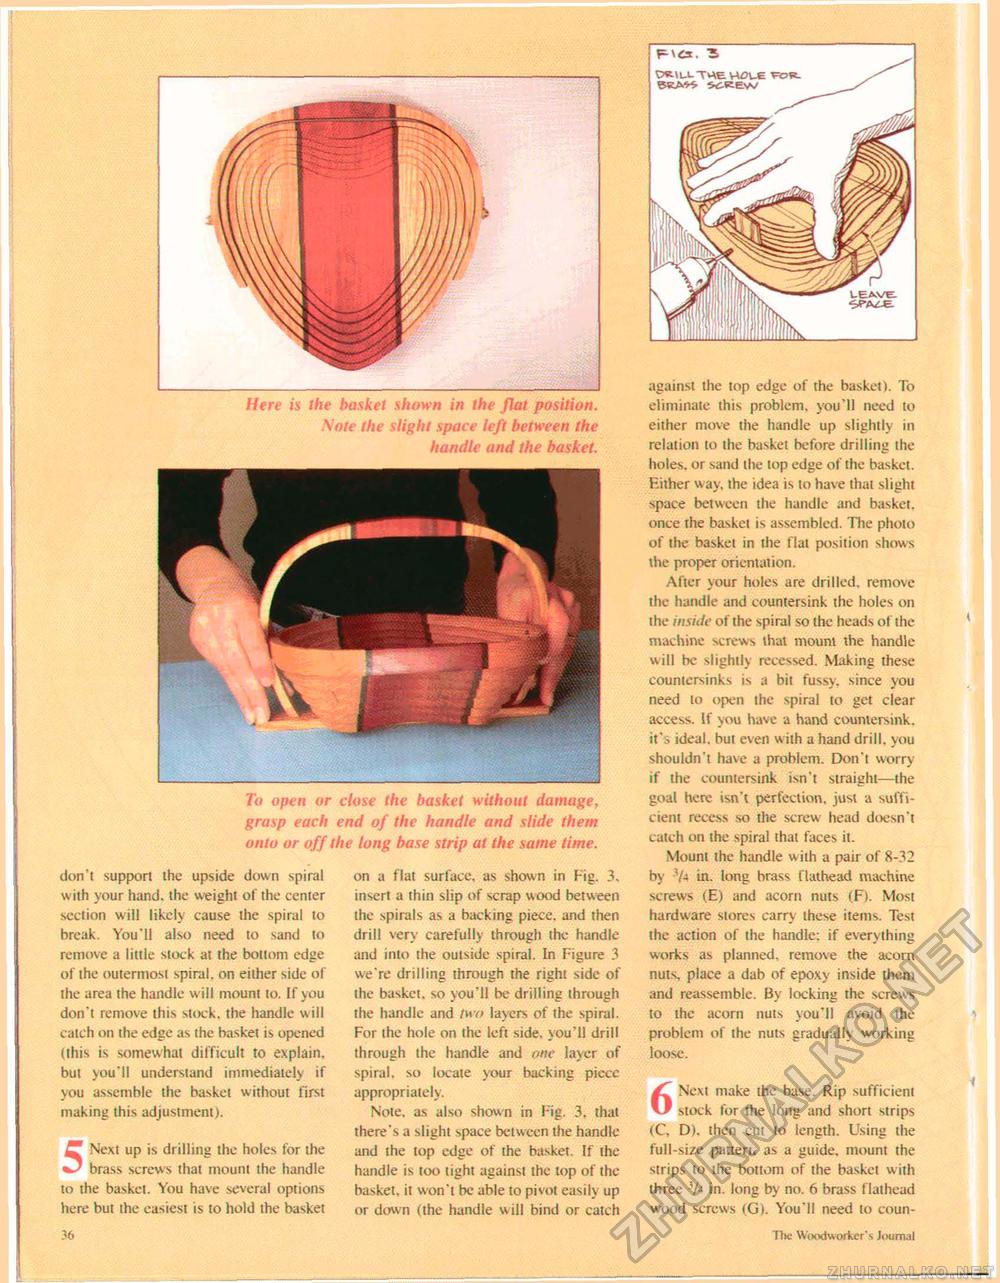
against the top edge of the basket). To eliminate this problem, you'll need to either move the handle up slightly in relation to the basket before drilling the holes, or sand the top edge of the basket. Hither way, the idea is to have that slight space between the handle and basket, once the basket is assembled. The photo of the basket in the flat position shows the proper orientation. After your holes are drilled, remove the handle and countersink the holes on the inside of the spiral so the heads of the machine screws that mount the handle will be slightly recessed. Making these countersinks is a bit fussy, since you need to open the spiral to get clear access. If you have a hand countersink, it's ideal, but even with a hand drill, you shouldn't have a problem. Don't worry if the countersink isn't straight—the goal here isn't perfection, just a sufficient recess so the screw head doesn't catch on the spiral that faces it. Mount the handle with a pair of 8-32 by 74 in. long brass flathead machine screws (E) and acorn nuts (F). Most hardware stores carry these items. Test the action of the handle: if everything works as planned, remove the acorn nuts, place a dab of epoxy inside them and reassemble. By locking the screws to the acorn nuts you'll avoid the problem of the nuts gradually working loose. 6 Next make the base. Rip sufficient I stock for the long and short strips <C, D). then cut to length. Using the full-size patten, as a guide, mount the strips to the bottom of the basket with three 3/t in. long by no. 6 brass flathead wood screws (G). You'll need to coun- To open or close the basket without damage, grasp each end of the handle and slide them onto or off the long base strip at the same time. don't support the upside down spiral with your hand, the weight of the center section will likely cause the spiral to break. You'll also need to sand to remove a little stock at the bottom edge of the outermost spiral, on either side of the area the handle will mount to. If you don't remove this stock, the handle will catch on the edge as the basket is opened (this is somewhat difficult to explain, but you'll understand immediately if you assemble the basket without first making this adjustment). 5 Next up is drilling the holes for the brass screws that mount the handle to the basket. You have several options here but the easiest is to hold the basket on a flat surface, as shown in Fig. 3, insert a thin slip of scrap wood between the spirals as a backing piece, and then drill very carefully through the handle and into the outside spiral. In Figure 3 we're drilling through the right side of the basket, so you'll be drilling through the handle and two layers of the spiral. For the hole on the left side, you'll drill through the handle and one layer of spiral, so locate your backing piccc appropriately. Note, as also shown in l ig. 3. that there's a slight space between the handle and the top edge of the basket. If the handle is too tight against the top of the basket, it won't be able to pivot easily up or down (the handle will bind or catch Here is the basket shown in the flat position. Mote the slight space left between the handle and the basket. 36 ~t"he Woodworker's Journal |


