Woodworker's Journal 1993-17-3, страница 54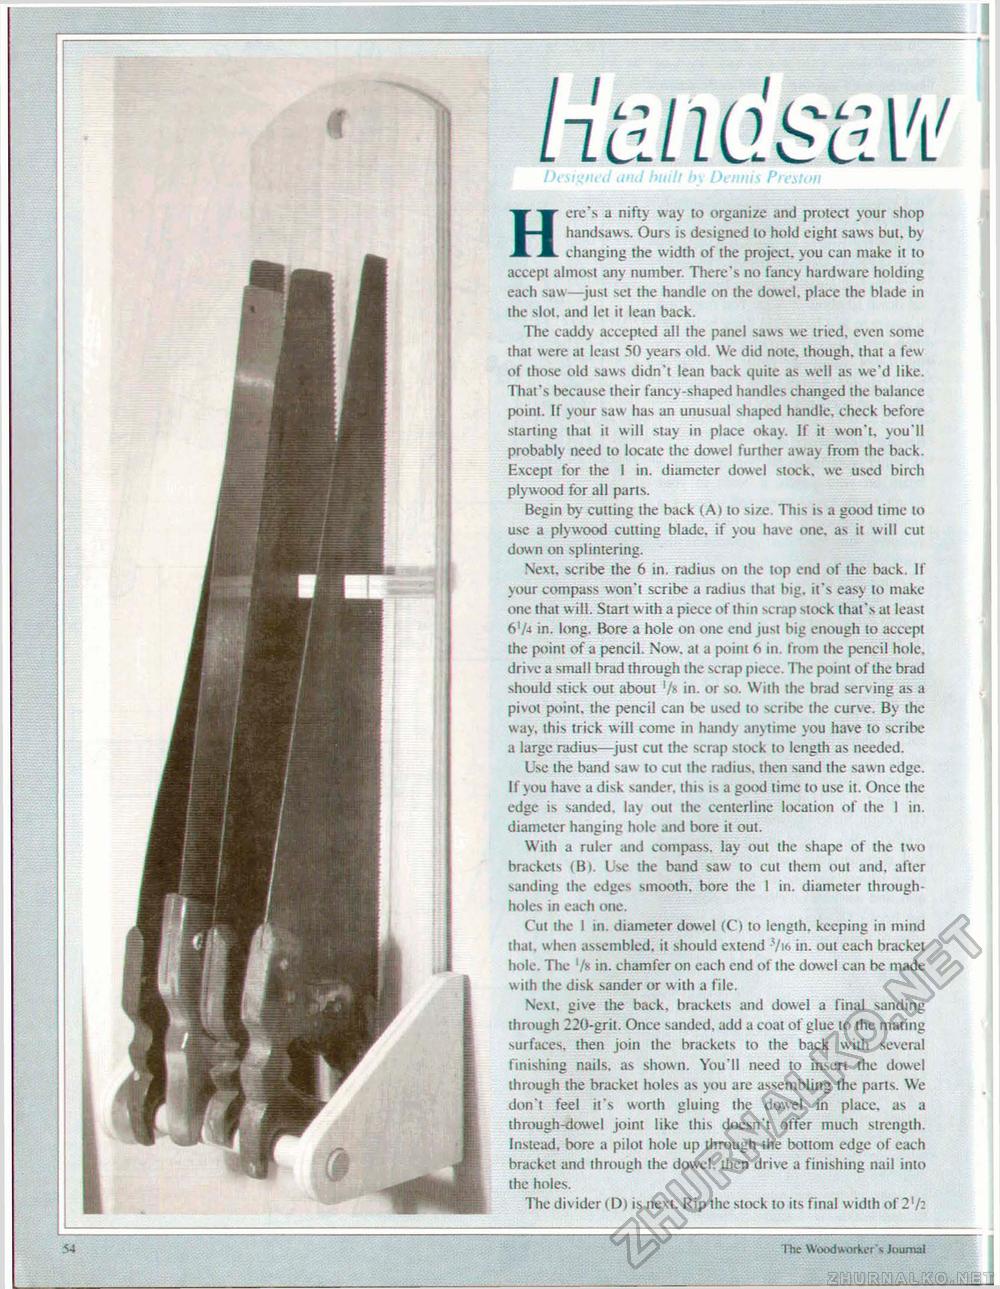
ttmdsaw Designed and built by Dennis Preston Here's a nifty way to organize and protect your shop handsaws. Ours is designed to hold eight saws but. by changing the width of the project, you can make it to accept almost any number. There's no fancy hardware holding each saw—just set the handle on the dowel, place the blade in the slot, and let it lean back. The caddy accepted all the panel saws we tried, even some that were at least 50 years old. We did note, though, that a few of those old saws didn't lean back quite as well as we'd like. That's because their fancy-shaped handles changed the balance point. If your saw has an unusual shaped handle, check before starting that it will stay in place okay. If it won't, you'll probably need to locale the dowel further away from the back. Except for the 1 in. diameter dowel stock, we used birch plywood for all parts. Begin by cutting the back (A) to size. This is a good time to use a plywood cutting blade, if you have one, as it will cut down on splintering. Next, scribe the 6 in. radius on the top end of the back. If your compass won't scribe a radius that big, it's easy to make one that will. Start with a piece of thin scrap stock that's at least 6'/4 in. long. Bore a hole on one end just big enough to accept the point of a pencil. Now, at a point ft in. from the pencil hole, drive a small brad through the scrap piece. The point of the brad should stick out about in. or so. With the brad serving as a pivot point, the pencil can be used to scribe the curve. By the way, this trick will come in handy anytime you have to scribe a large radius—just cut the scrap stock to length as needed. Use the band saw to cut the radius, then sand the sawn edge. If you have a disk sander. this is a good lime to use it. Once the edge is sanded, lay out the centerline location of the 1 in. diameter hanging hole and bore it out. With a ruler and compass, lay out the shape of the two brackets (B). Use the band saw to cut them out and, after sanding the edges smooth, bore the 1 in. diameter through-holes in each one. Cut the 1 in. diameter dowel (C) to length, keeping in mind that, when assembled, it should extend J/i6 in. out each bracket hole. The '/« in. chamfer on each end of the dowel can be made with the disk sander or w iih a file. Next, give the back, brackets and dowel a final sanding through 220-grit. Once sanded, add a coat of glue to the mating surfaces, then join the brackets to the back with several finishing nails, as shown. You'll need to insert the dowel through the bracket holes as you are assembling the parts. We don't feel it's worth gluing the dowel in place, as a ihrough-dowel joint like this doesn't offer much strength. Instead, bore a pilot hole up through the bottom edge of each bracket and through the dowel, then drive a finishing nail into ihc holes. The divider (D) is next. Rip the stock to its final w idth of 2'/2 54 ~t"he Woodworker's Journal |


