Woodworker's Journal 1993-17-3, страница 55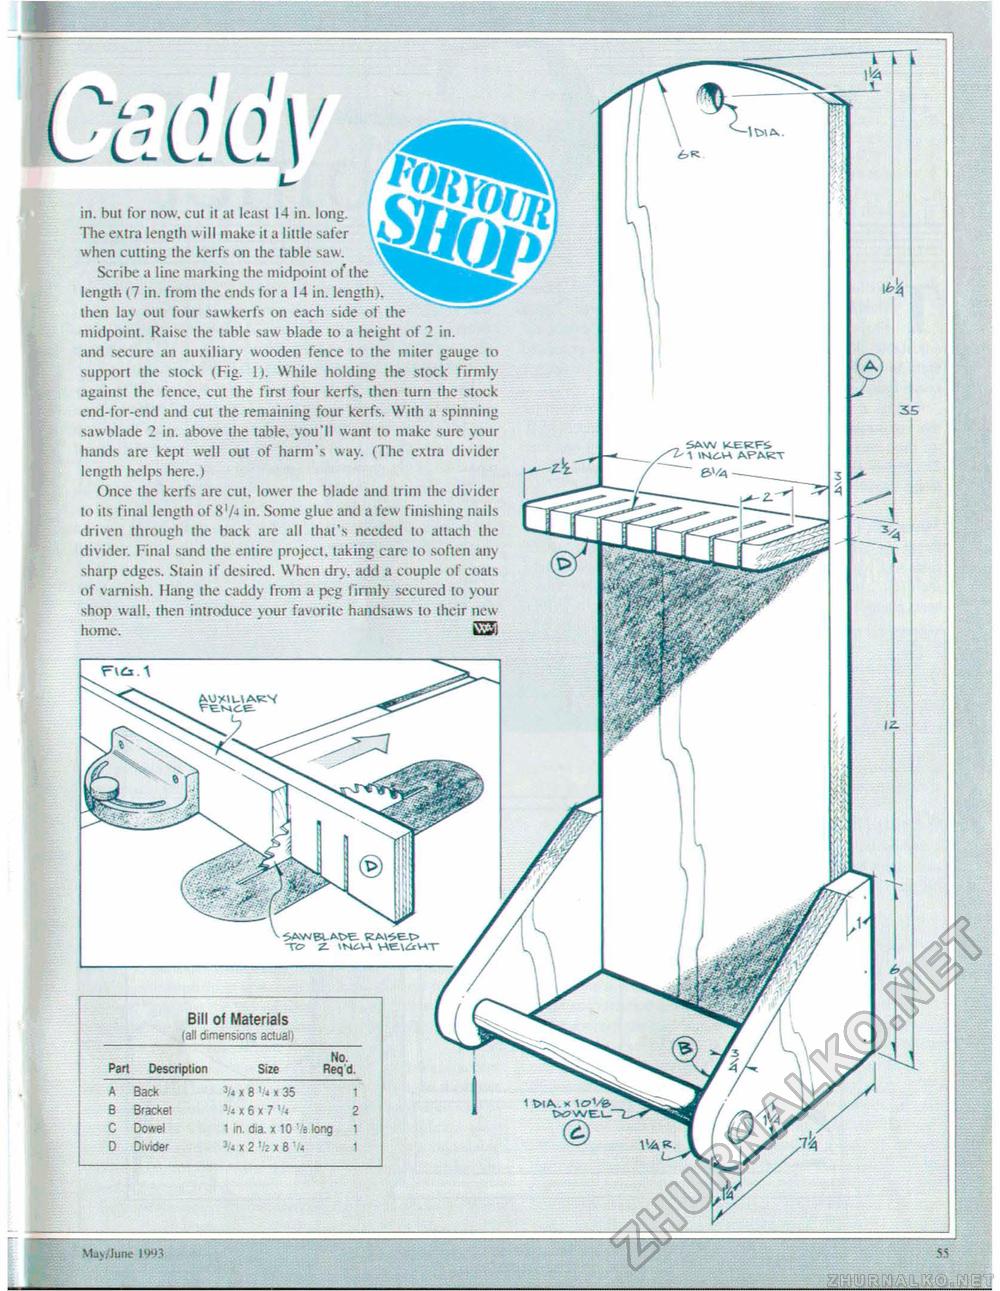
_ _ ___ / I SGQ / in. hui for now. cut it at least 14 in. long. The extra length will make it a little safer when cutting the kerfs on the table saw. Scribe a line marking the midpoint of the length (7 in. from the ends for a 14 in. length), then la> out four sawkerfs on each side of the midpoint. Raise the table saw blade to a height of 2 in. and secure an auxiliary wooden fence to the miter gauge to support the stock (Fig. 1). While holding the stock firmly against the fence, cut the first four kerfs, then turn the stock end-for-end and cut the remaining four kerfs. With a spinning sawblade 2 in. above the table, you'll want to make sure your hands are kept well out of harm's way. (The extra divider length helps here.) Once the kerfs are cut. lower the blade and trim the divider to its final length of S'/4 in. Some glue and a few finishing nails driven through the back are all that's needed to attach Ihe divider. Final sand the entire project, taking care to soften any sharp edges. Stain if desired. When dry. add a couple of coats of varnish. Hang the caddy from a peg firmly secured to your shop wall, then introduce your favorite handsaws to their new home. E3) TO z. v-\e\<£rwr
Muv/June 1993 |
||||||||||||||||||||||||


