Woodworker's Journal 1993-17-3, страница 57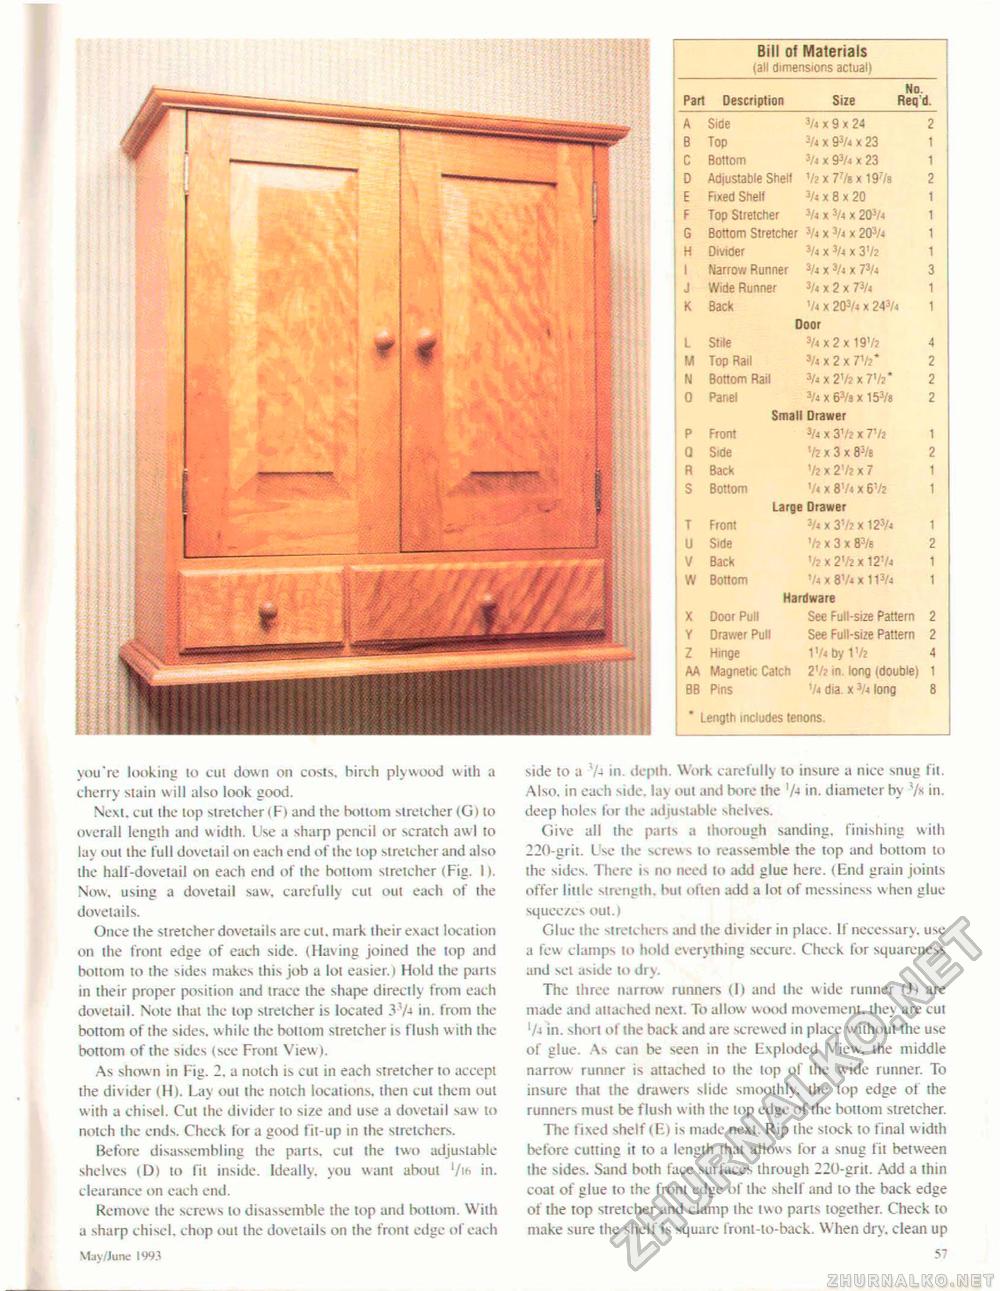
you're looking lo cul down on costs, birch plywood with a cherry stain will also look good. Next, cut the top stretcher < F i and the bottom stretcher (G > to overall length and width. Use a sharp pencil or scratch awl to lay out the full dovetail on each end of the top stretcher and also the half-dovetail on each end of the bottom stretcher (Fig. 1). Now, using a dovetail saw. carefully cut out each of the dovetails. Once the stretcher dovetails arc cul. mark their exact location on the front edge of each side. (Having joined the top and bottom to the sides makes this job a lot easier, i Hold the parts in their proper position and trace the shape directly from each dovetail. Note that the lop stretcher is located 37-» in. from the bottom of the sides, while the bottom stretcher is flush with the bottom of the sides (see Front View ). As shown in Fig. 2. a notch is cut in each stretcher to accept the divider (H). Lay out the notch locations, then cut them out w ith a chisel. Cut the divider to size and use a dovetail saw to notch the ends. Check for a good fit-up in the strctchers. Before disassembling the parts, cut the two adjustable shelves (D) to fit inside. Ideally, you want about '/i*> in. clearance on each end. Remove the screws io disassemble the top and bottom. With a sharp chisel, chop out the dovetails on the front edge of each May/June IW3 side to a 7-t in. depth. Work, carefully to insure a nice snug fit. Also, in each side, lay out and bore the in. diameter by in. deep holes for the adjustable shelves. Give all the parts a thorough sanding, finishing with 220-grit. I so the screws to reassemble the top and bottom to the sides. There is no need to add glue here. (End grain joints offer little strength, but often add a lot of messiness when glue squeezes out, I Glue the stretchers and the divider in place. If necessary, use a few clamps to hold everything secure. Check for squareness and set aside to dry. The three narrow runners (I) and the wide runner IJ) are made and attached next. To allow wood movement, they are cut l/i in. short of the back and are screwed in place without the use of glue. As can be seen in the Exploded View, the middle narrow runner is attached to the lop of the wide runner. To insure that the drawers slide smoothly, the top edge of the runners must be flush with the top edge of the bottom stretcher. The fixed shelf (E) is made next. Rip the stock to final w idth before cutting it to a length that allows for a snug lit between the sides. Sand both face surfaces through 220-grit. Add a thin coat of glue to the front edge of the shelf and to the back edge of the top stretcher and clamp the two parts together. Check to make sure the shelf is square front-to-back. W hen dry. clean up 57 |
||||||||||||||||||||||||||||||||||||||||||||||||||||||||||||||||||||||||||||||||||||||||||||||||||||||||||||||||||||||||||||||||||||||||||||||||||||


