Woodworker's Journal 1993-17-4, страница 55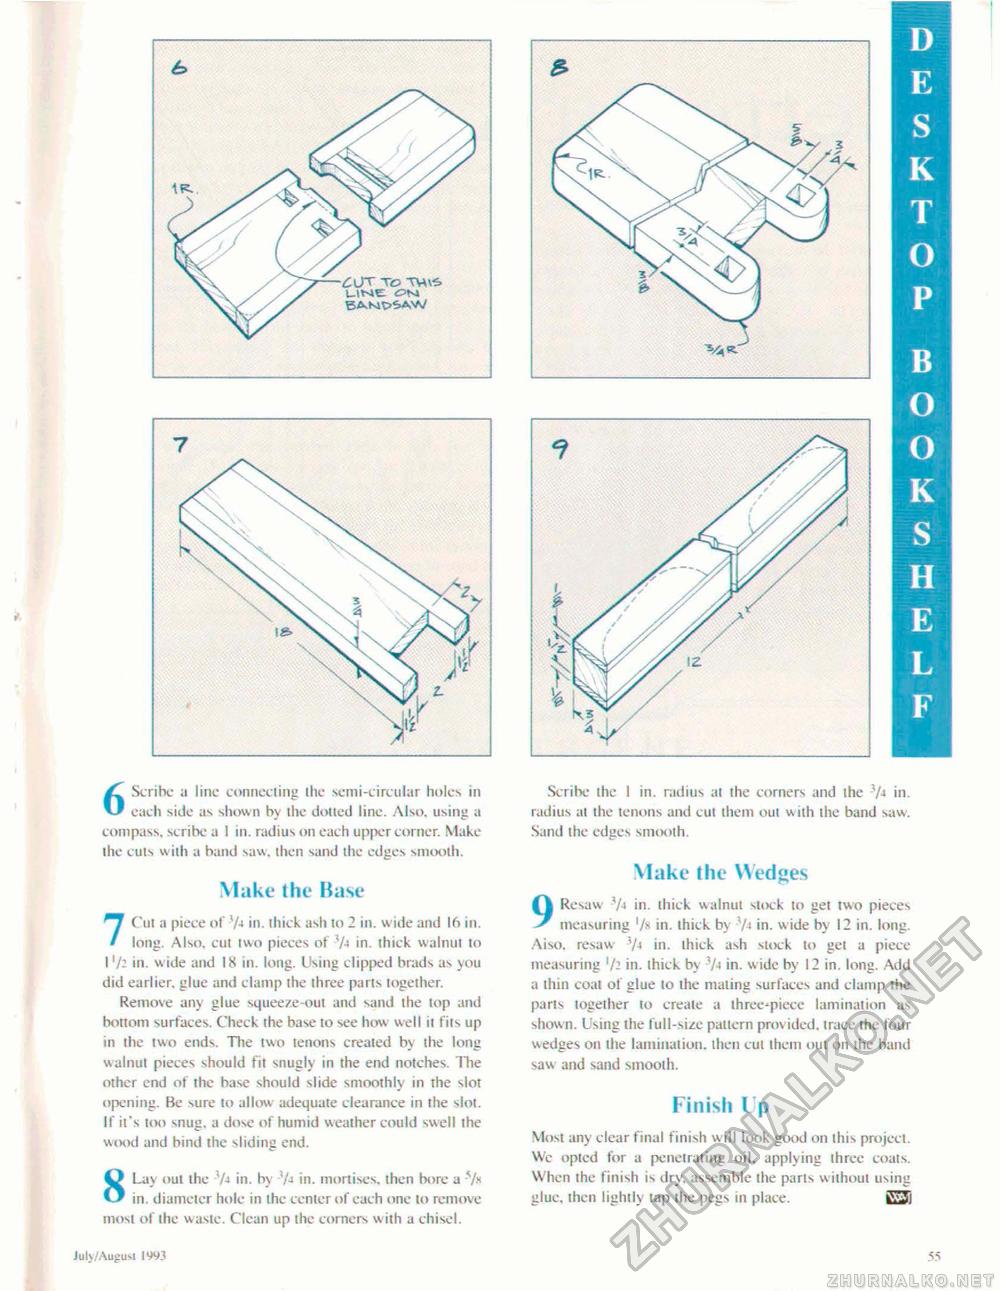
COT To THV6 6 Scribe a line connecting the semi-circular holes in each side as shown by the dotted line. Also, using a compass, scribe a 1 in. radius on each upper corner. Make the cuts with a hand saw. then sand the edges smooth. Make the Base 7 Cut a piece of l/-t in. thick ash to 2 in. wide and Ifi in. long. Also, cut two pieces ot V-i in. thick walnut lo 1'/: in. wide and IX in. long. Using clipped brads as you did earlier, glue and clamp the ihree pans together. Remove any glue squeeze-out and sand the lop and bottom surfaces. Check the base to see how well it fits up in the two ends. The two tenons created by the long walnut pieces should fit snugly in the end notches. The other end of the base should slide smoothly in the slot opening. Be sure to allow adequate clearance in the slot. If it's loo snug, a dose of humid weather could swell the wood and bind the sliding end. 8 Lay out the V* in. by % in. mortises, then bore a 5/h in. diameter hole in the ccnter of each one to remove most of the waste. Clean up the corners with a chisel. Scribe the I in. radius al the corners and the }M in. radius at ihe tenons and cut them out wiih the band saw. Sand the edges smooth. Make the Wedges 9Resaw 7-1 in. thick walnut su>ck to get two pieces measuring in. thick by 7' in. wide by 12 in. long. Aiso. resaw -'/•» in. thick ash stock to get a piece measuring '/2 in. thick by -7* in. wide by 12 in. long. Add a thin coat of glue lo the mating surfaces and clamp the parts together lo create a three-piece lamination as shown. Using ihe full-size pattern prov ided, trace the four wedges on ihe lamination, then cut them out on the band saw and sand smooth. Finish Up Most any clear final finish will look good on this project. We opicd for a penetrating oil, applying three coats. When the finish is dry, assemble ihe parts without using glue, then lightly tap the pegs in place. HvJl July/August I <W3 55 |


