Woodworker's Journal 1993-17-4, страница 60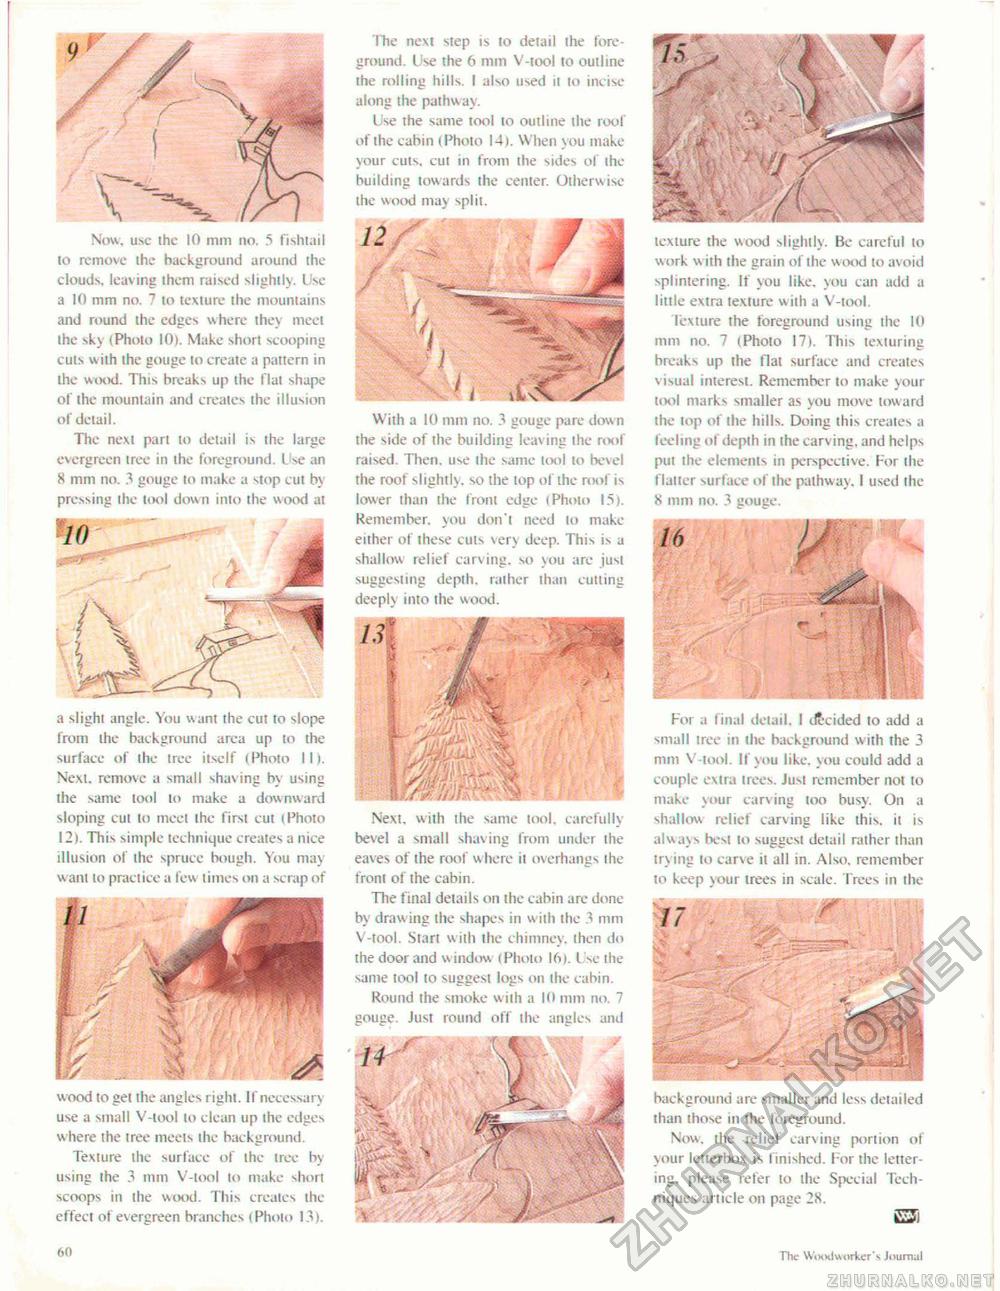
Now, use ihe 10 mm no, 5 fishtail 10 remove ihe background around the clouds, leaving them raised slightly. Use a 10 mm no. 7 to texture the mountains and round the edges where they meet the sky (Pholo 10). Make short scooping cuts with the gouge to create a pattern in the wood. This breaks up ihe flat shape of ihe mountain and creates the illusion of detail. The next part to detail is the large evergreen tree in the foreground. Ike an 8 mm nt). 3 gouge to make a slop cut by pressing the tool down into the wood at a slighi angle. You want the cut to slope from the background area up to the surface of the tree itself (Photo II). Next, remove a small shaving by using the same tool to make a downward sloping cut to meet the first cut i Photo 12). Thi> simple technique creates a nice illusion of the spruce bough. You may want lo practice a few times on a scrap of wood to get the angles right. If necessary use a small V-tool to clean up the edges where the tree meets the background. Texture the surface of the tree by using the 3 mm V-tool to make short scoops in the wood. This creates ihe effect of evergreen branches (Photo 13). The next step is to detail the foreground. Use the 6 mm V-tool to outline ihe rolling hills. I also used u to incise along the pathway. Use the same tool to outline ihe roof of the cabin (Pholo 14). When y ou make your cuts, cut in from the sides of ihe building towards the center. Otherwise the wood may split. With a 10 mm no. 3 gouge pare down the side of the building leaving ihe roof raised. Then, use the same kx>l lo bevel the roof slightly, so the top ot the roof is lower than the front edge (Pholo 15). Remember, you don't need lo make either of these cuts very deep. This is a shallow relief carving, so you are just suggesting depth, rather than cutting deeply into the wood. Next, with the same tool, carefully bevel a small shav ing from under ihe eaves of ihe roof where it overhangs the front of the cabin. The final details on the cabin are done by drawing the shapes in with the 3 mm V-tool. Stan with the chimney, then do the door and window (Photo 16). I ?se the same tool to suggest logs on the cabin. Round the smoke with a 10 mm no. 7 gouge. Just round off the angles and ij5.- . \ f , :\ r Tv m> 14 { tfS&fJ^ >> texture the wood slightly. Be careful to work w ith the grain of the wood to avoid splintering. If you like, you can add a little extra texture with a V-tool. Texture the foreground using the 10 mm no. 7 (Photo 17). This texturing breaks up the flat surface and creates visual interest. Remember lo make your tool marks smaller as you move toward the top of the hills. Doing this creates a feeling of depth in the carv ing, and helps put the elements in perspective. For the flatter surface of the pathway. I used the 8 mm no. 3 gouge. For a final detail. I decided to add a small tree in ihe background with the 3 mm V-tool. If you like, you could add a couple extra irees. Just remember not to make your carving too busy. On a shallow relief carving like this, ii is always besi io suggesi detail rather than try ing to carve it all in. Also, remember to keep your trees in scale, frees in the than those in the foreground. Now. ihe relief carving portion of your lenerbox is finished, l or the lettering. please refer to the Special Techniques article on page 2K, 60 The Woodworkers Journal |


