Woodworker's Journal 1993-17-5, страница 18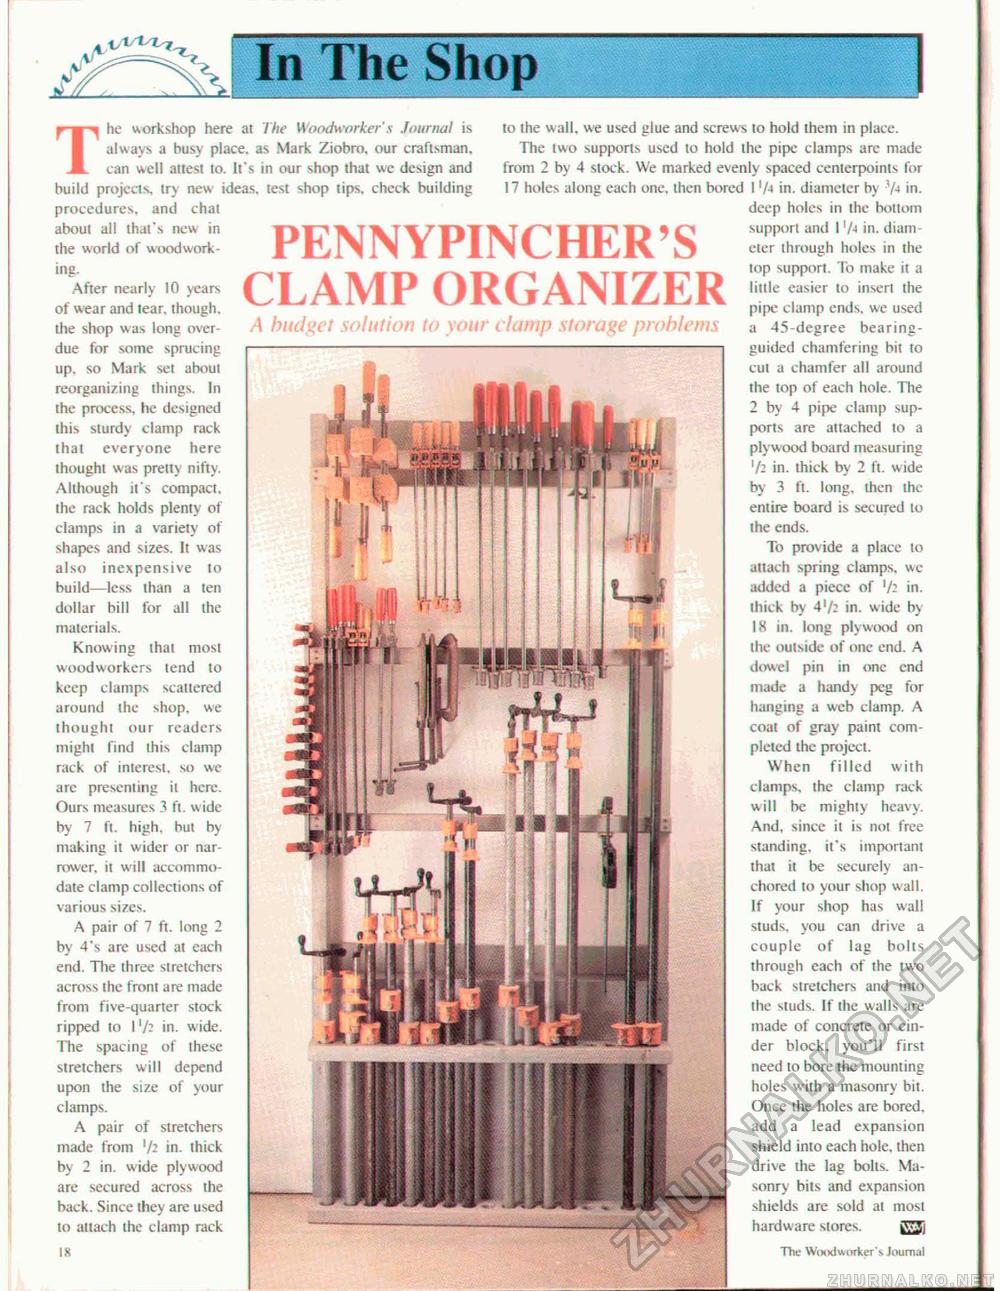
PENNYPINCHER'S CLAMP ORGANIZER A budget solution to your clamp storage problems The workshop here at The Woodworker's Journal is always a busy place, as Mark Ziobro, our craftsman, can well attest to. It's in our shop that we design and build projects, try new ideas, test shop tips, check building procedures, and chat about all that's new in the world of woodworking- After nearly 10 years of wear and tear, though, the shop was long overdue for some sprucing up. so Mark set about reorganizing things. In the process, he designed this sturdy clamp rack that everyone here ihought was pretty nifty. Although it's compact, the rack holds plenty of clamps in a variety of shapes and sizes. It was also inexpensive to build—less than a len dollar bill for all the materials. Knowing thai most woodworkers tend to keep clamps scattered around ihe shop, we thought our readers might find this clamp rack of interest, so we arc presenting it here. Ours measures 3 ft. wide by 7 ft. high, but by making it wider or narrower, it will accommodate clamp collections of various sizes. A pair of 7 ft. long 2 by 4's are used at each end. The three stretchers across the from are made from five-quarter stock ripped to I1/- in. wide. The spacing of these stretchers will depend upon the size of your clamps. A pair of stretchers made from [/i in. thick by 2 in. wide plywood are secured across the back. Since they are used to altaeh the clamp rack 18 lo ihe wall, we used glue and screws to hold them in place. The two supports used to hold the pipe clamps are made from 2 by 4 slock. We marked evenly spaced centerpoints for 17 holes along each one. then bored I '/4 in. diameter by 'A in. deep holes in ihe bottom supporl and I 'A in. diam eter through holes in the top support. To make it a liltle easier to insert the pipe clamp ends, we used a 45-degree bearing-guided chamfering bit to cut a chamfer all around the lop of each hole. The 2 by 4 pipe clamp supports are attached to a plywood board measuring '/2 in. ihick by 2 ft. wide by 3 ft. long, then ihe entire board is secured lo the ends. To provide a place lo attach spring clamps, wc added a piece of in. ihick by 4in. wide by 18 in. long plywood on the outside of one end. A dowel pin in one end made a handy peg for hanging a web clamp. A coal of gray paint completed the project. When filled with clamps, the clamp rack will be mighty heavy. And. since it is nol free standing, it's important that it be securely anchored lo your --hop wall. If your shop has wall studs, you can drive a couple of lag bolts through each of the iwo back slrelchers and into ihe studs. If the walls are made of concrete or cinder block, you'll first need to bore the mounting holes with a masonry bit. Once the holes are bored, add a lead expansion shield into each hole, then drive the lag bolts. Masonry bits and expansion shields are sold at most hardware stores. kVJ. The Woodworker's Journal |


