Woodworker's Journal 1993-17-5, страница 35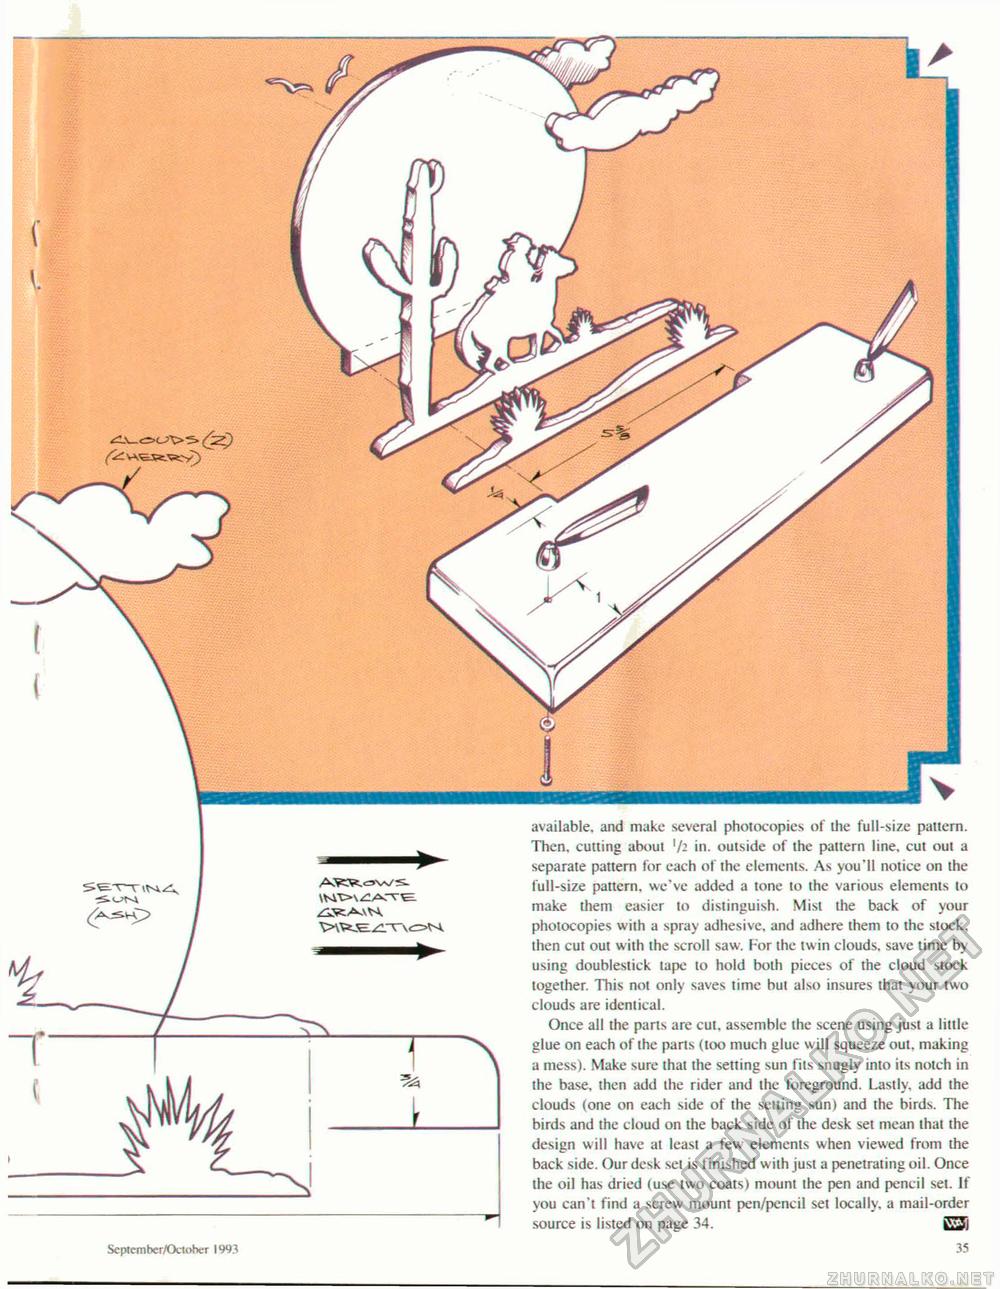
September/October 1993 available, and make several photocopies of the full-size pattern. Then, cutting about ]/2 in. outside of the pattern line, cut out a separate pattern for each of the elements. As you'll notice on the full-size pattern, we've added a tone to the various elements to make them easier to distinguish. Mist the back of your photocopies with a spray adhesive, and adhere them to the stock, then cut out with the scroll saw. For the twin clouds, save time by using doublestick tape to hold both pieces of the cloud stock together. This not only saves time but also insures that your two clouds are identical. Once all the parts are cut, assemble the scene using just a little glue on each of the parts (too much glue will squeeze out. making a mess). Make sure that the setting sun fits snugly into its notch in the base, then add the rider and the foreground. Lastly, add the clouds (one on each side of the setting sun) and the birds. The birds and the cloud on the back side of the desk set mean that the design will have at least a few elements when viewed from the back side. Our desk set is finished with just a penetrating oil. Once the oil has dried (use two coats) mount the pen and pencil set. If you can't find a screw mount pen/pencil set locally, a mail-order source is listed on page 34. E3i 35 |


