Woodworker's Journal 1993-17-6, страница 33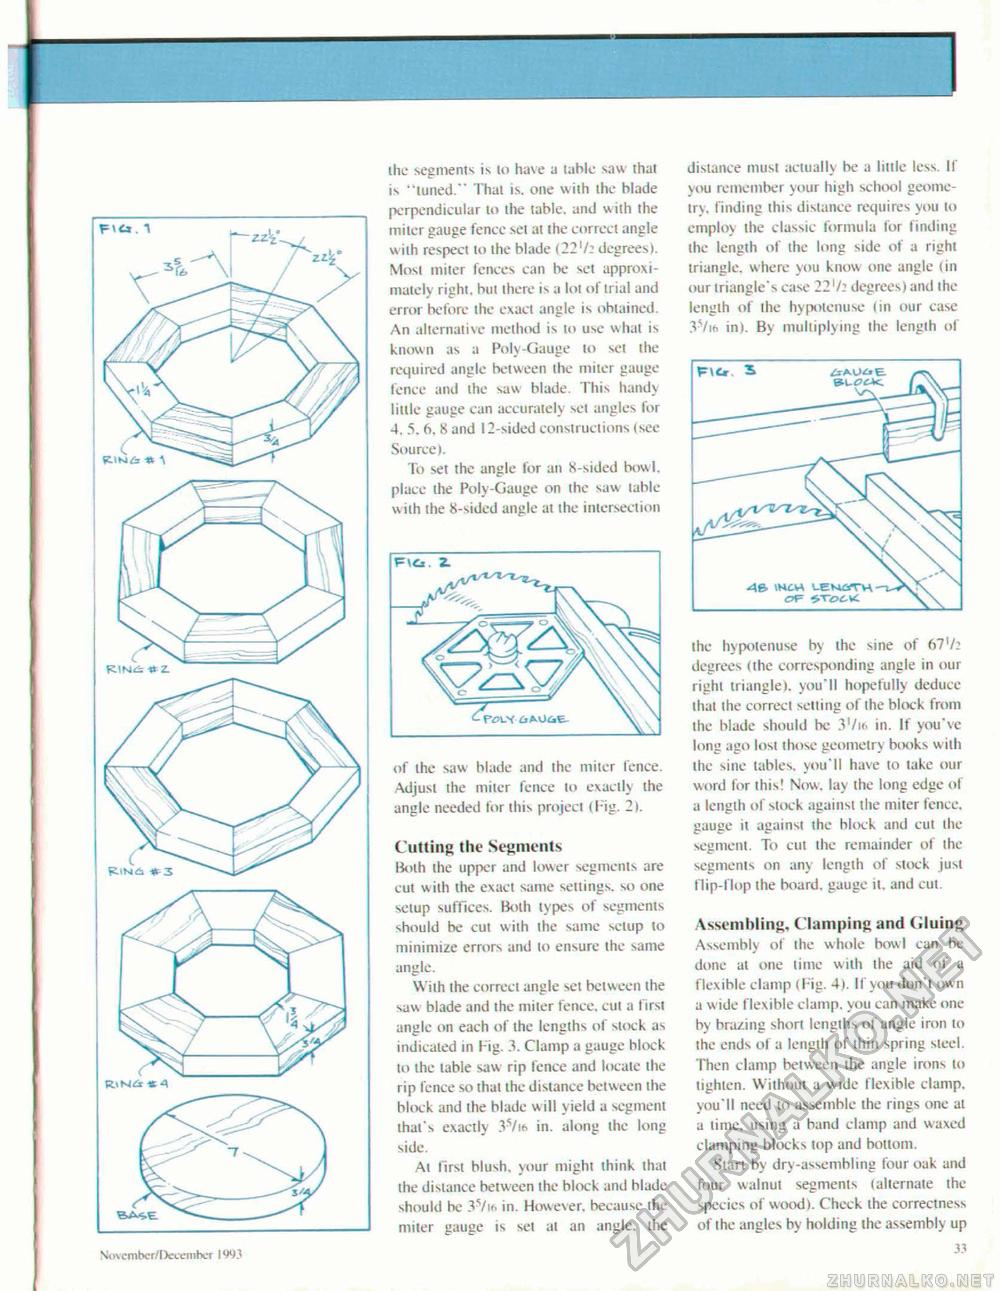
the segments is lo have a table saw that is 'tuned." That is. one with the blade perpendicular to ihe table, and w ith the miter gauge fence set at the correct angle w ith respect to the blade (221/: degrees). Most miter fences can be set approximately right, but there is a lot of trial and error before the exact angle is obtained. An alternative method is to use what is known as a Polv-Gauge to set the required angle between the miter gauge fence and the saw blade. This handy little gauge can accurately set angles for 4. 5. 6, 8 and 12-sided constructions (see Source). To set the angle for an X sided bowl, place the Polv-Gauge on the saw table with the 8-sided angle at the intersection PlCj. Z. Ni tvcmtvr/Decembcr 19*> 3 of the saw blade and Ihe miter fence-Adjust the miter fence to exactly the angle needed for this project (Fig. 2). Cutting the Segments Both the upper and lower segments are cut with the exact same settings, so one setup suffices. Both types of segments should be cut with the same setup to minimize errors and to ensure the same angle. Wilh the correct angle set between the saw blade and the miter fence, cut a first angle on each of the lengths of stock as indicated in Fig. 3. Clamp a gauge hlock to the table saw rip fence and locate the rip fence so that the distance between the block and the blade will yield a segment that's exactly 3s/it> in. along the long side. At first blush, your might think that the distance between the block and blade should be 3Vi<. in. However, because the miter gauge is set at an angle, the the hypotenuse by the sine of (">77: degrees (the corresponding angle in our right triangle), you'll hopefully deduce that the correct setting of the block from ihe blade should be 31 /if. in. If you've long ago losi those geometry books with ihe sine tables, you'll have to take our word lor this! Now. lay the long edge of a length of slock against the miter fence, gauge it against the block and cut the segment. To cut the remainder of the segments on any length of stock just flip-flop the board, gauge it. and cut. Assembling, Clamping and Gluing Assembly of the whole bowl can be done al one time with the aid of a flexible clamp (Fig. 4). If you don't own a w ide flexible clamp, you can make one by brazing short lengths of angle iron to the ends of a length of thin spring steel. Then clamp between the angle irons to tighten. Without a wide flexible clamp, you'll need to assemble the rings one at a time, using a band clamp and waxed clamping blocks top and bottom. Start by dry-assembling four oak and four walnut segments (alternate the species of wood). Check the correctness of the angles by holding the assembly up 33 distance must actually be a little less If you remember your high school geometry, finding this distance requires you lo employ the classic formula for finding ihe length of the long side of a righi triangle, where you know one angle (in our triangle's case 22'/: degrees) and the length of the hypotenuse (in our case in). By multiplying the lengih of |


