Woodworker's Journal 1993-17-6, страница 31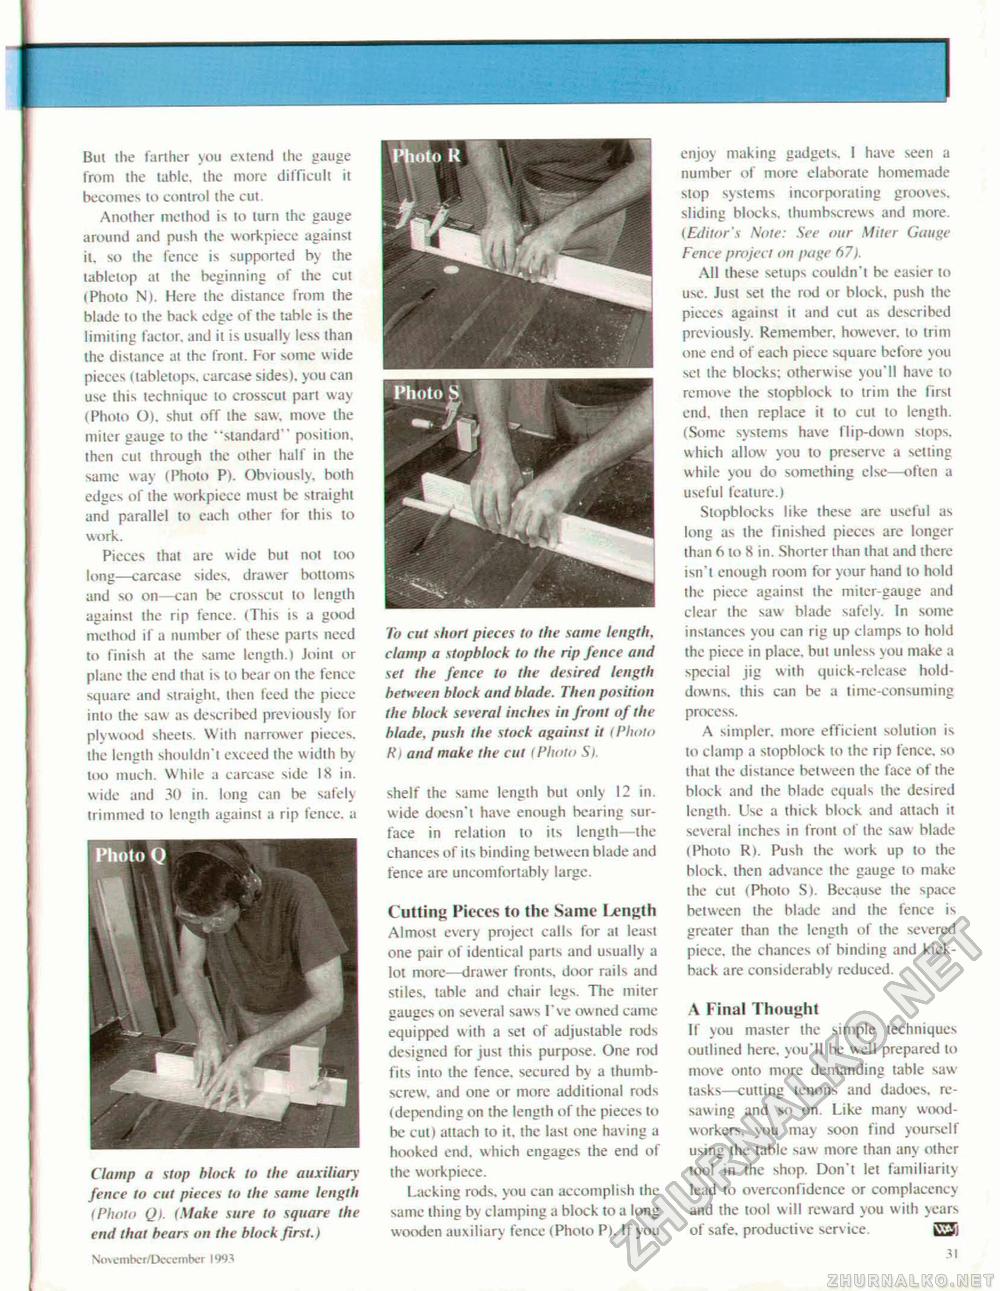
But the farther you extend the gauge from the table, the more difficult it becomes lo control the cut. Another method is to turn the gauge around and push the workpiece against it, so the fence is supported by the tabletop at ihe beginning of ihe cut (Photo N). Here the distance from the blade to the back edge of the table is the limiting factor, and it is usually less than the distance at the front. For some wide pieces (labletops, carcase sides), you can use this technique to crosscut pari way (Photo O). shut off the saw. move ihe miter gauge to ihe ''standard" position, then cut through the other half in the same way (Photo P). Obviously, bolh edges of the workpiece must be straight and parallel to each other for Ihis to work. Pieces thai are wide but not too long—carcase sides, drawer bottoms and so on—can be crosscut to length against the rip fence. (This is a good method if a number of these parts need to finish at the same length.) Joint or plane the end that is to bear on the fence square and straight, then feed the piece into the saw as described previously for plywood sheets. With narrower pieces, ihe length shouldn't exceed the width by UK) much. While a carcase side IS in. wide and 30 in. long can be safely trimmed lo length against a rip fence, a Clamp a slap black lo the auxiliary fence lo cut pieces to the same length (Photo Q). (Make sure to square (he end (hat hears on (he block first.) NmenibciYDcccmber IW^ To cut short pieces (o the same length, clamp a stopblock to the rip fence and set the fence to the desired length betw een block and blade. Then position the block several inches in front of the blade, push the stock against it <Photo R> and make the cut (Photo Si. shelf the same lengih but only 12 in. wide doesn't have enough bearing surface in relation to its lengih—ihe chances of its binding between blade and fence are uncomfortably large. Cutting Pieces to the Same Length Almost every project calls for ai least one pair of identical parts and usually a lot more—drawer fronts, door rails and stiles, table and chair legs. The miter gauges on several saws I've owned came equipped with a set of adjustable rods designed for just this purpose. One rod fits into the fence, secured by a thumbscrew, and one or more additional rods (depending on the length of the pieces to be cut) attach to it, the last one having a hooked end. which engages the end of the workpiece. Lacking rods, you can accomplish the same thing by clamping a block to a long wooden auxiliary fence (Photo P). If you enjoy making gadgets. I have seen a number of more elaborate homemade stop systems incorporating grooves, sliding blocks, thumbscrews and more. (EilHor's Note: See our Miter Gauge Fence project on page 67). All these setups couldn't be easier to use. Just set the rod or block, push the pieces against it and cut as described previously. Remember, however, to trim one end of each piece square before you set the blocks: otherwise you'll have to remove the stopblock to trim the first end. then replace ii to cut to length. (Some systems have flip-down stops, which allow you to preserve a setting while you do something else—often a useful feature.) Stopblocks like these are useful as long as the finished pieces are longer than 6 to 8 in. Shorter than that and there isn't enough room for your hand lo hold the piece against the miier-gauge and clear the saw blade safely. In some instances you can rig up clamps to hold the piece in place, but unless you make a special jig with quick-release hold-downs, this can be a time-consuming process. A simpler, more efficient solution is to clamp a stopblock to the rip fence, so that the distance between the face of the block and the blade equals the desired lengih. Use a thick block and attach it several inches in front of the saw blade (Photo R>. Push the work up to the block, then advance the gauge to make the cut (Photo S). Because the space between the blade and ihe fence is greater than the length of the severed piece, the chances of binding and kickback are considerably reduced. A Final Thought If you master the simple techniques outlined here, you'll be well prepared lo move onto more demanding table saw-tasks—cutting tenons and dadoes, re-sawing and so on. Like many woodworkers, you may soon find yourself using the table saw more than any other tool in the shop. Don't let familiarity lead to overcon fide nee or complacency and the tool will reward you with years of safe, productive serv ice. iV-3. 31 |


