Woodworker's Journal 1993-17-6, страница 28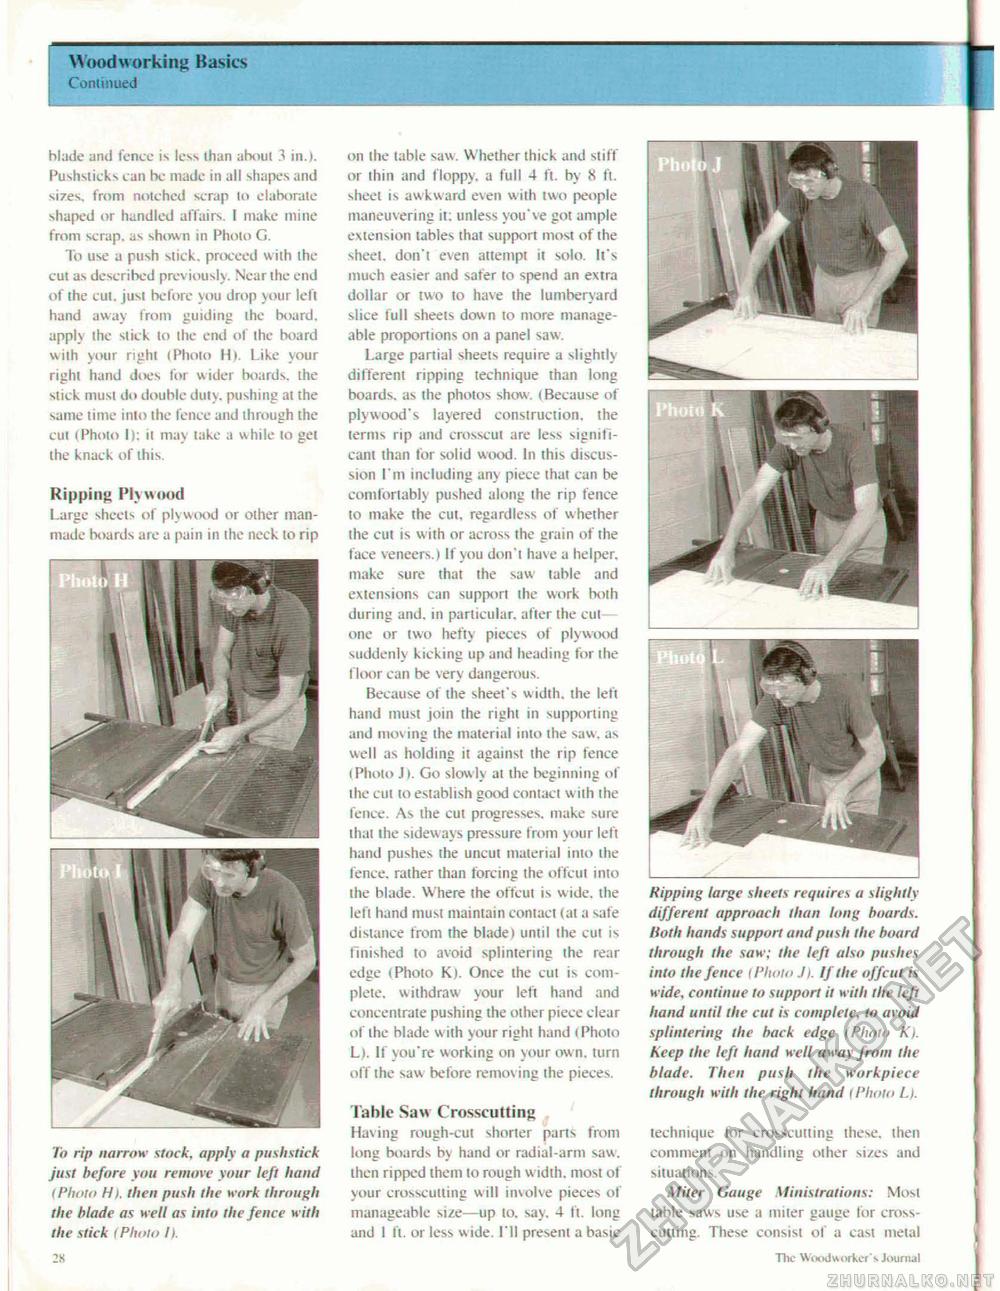
Woodworking Basics Continued on the table saw. Whether thick and stiff or thin and floppy, a full 4 ft. by 8 ft. sheet is awkward even with two people maneuvering it; unless you've got ample extension tables that support most of the sheet, don't even attempt it solo. It s much easier and safer to spend an extra dollar or two to have the lumberyard slice full sheets down to more manageable proportions on a panel saw. Large partial sheets require a slightly different ripping technique than long boards, as the photos show. (Because of plywood's layered construction, the terms rip and crosscut are less significant than for solid wood. In this discussion I'm including any piece that can be comfortably pushed along the rip fence to make the cut, regardless of whether the cut is with or across the grain of the face veneers.) If you don't have a helper, make sure that the saw table and extensions can support ihe work both during and. in particular, after the cut one or two hefty pieces of plywood suddenly kicking up and heading for the floor can be very dangerous. Because of the sheet's width, the left hand must join the right in supporting and moving the material into the saw. as well as holding it against the rip fence I Photo J). Go slow ly at the beginning of the cut to establish good contact with the fence. As the cut progresses, make sure that the sideways pressure from your left hand pushes the uncut material into the fence, rather than forcing the offcut into the blade. Where the offcut is w ide, the left hand must maintain contact (at a safe distance from the blade! until the cut is finished to avoid splintering the rear edge (Photo K). Once the cut is complete. withdraw your left hand and concentrate pushing the other piece clear of the blade with your right hand (Photo Ll. If you're working on your ow n. turn off the saw before removing the pieces. [able Saw C'rosscutting Having rough-cut shorter parts from long boards by hand or radial-arm saw. then ripped them lo rough width, most of your crosscutling will involve pieces of manageable size—up to. say. 4 ft. long and 1 ft. or less w ide. I'll present a basic blade and fence is less than about 3 in.). Pushsticks can be made in al! shapes and sizes, from notched scrap lo elaborate shaped or handled affairs. I make mine from scrap, as shown in Photo G. To use a push stick, proceed with the cut as described previously. Near the end of the cut. just before you drop your left hand away from guiding the board, apply the slick lo ihe end of the board with your right (Photo Ml. Like your right hand does for wider boards, the slick must do double duly, pushing at the same time into the fence and through the cut (Photo I): it may lake a while to get the knack ofihis. Ripping Pl> wood Large sheets of plywood or other man-made boards are a pain in ihe neck to rip To rip narrow stock, apply a pushstick just before you remove your left hand t Photo H>. then push the work through the blade as well as into the fence with the stick (Photo I). 28 technique for crosscutling these, then comment on handling other sizes and situations. Miter Gauge Ministrations: Mosl table saws use a miter gauge for cross-cutting. These consist of a cast metal The Woodworker's Journal Hipping large sheets requires a slightly different approach than long hoards. Both hands support and push the board through the saw; the left also pushes into the fence (Photo Ji If the offcut is wide, continue to support it with the left Itand until the cut is complete, to avoid splintering the back edge (Photo K). Keep the left hand well away from the blade. Then push the workpiece through with the right hand (I'luno I.). |


