Woodworker's Journal 1993-17-6, страница 39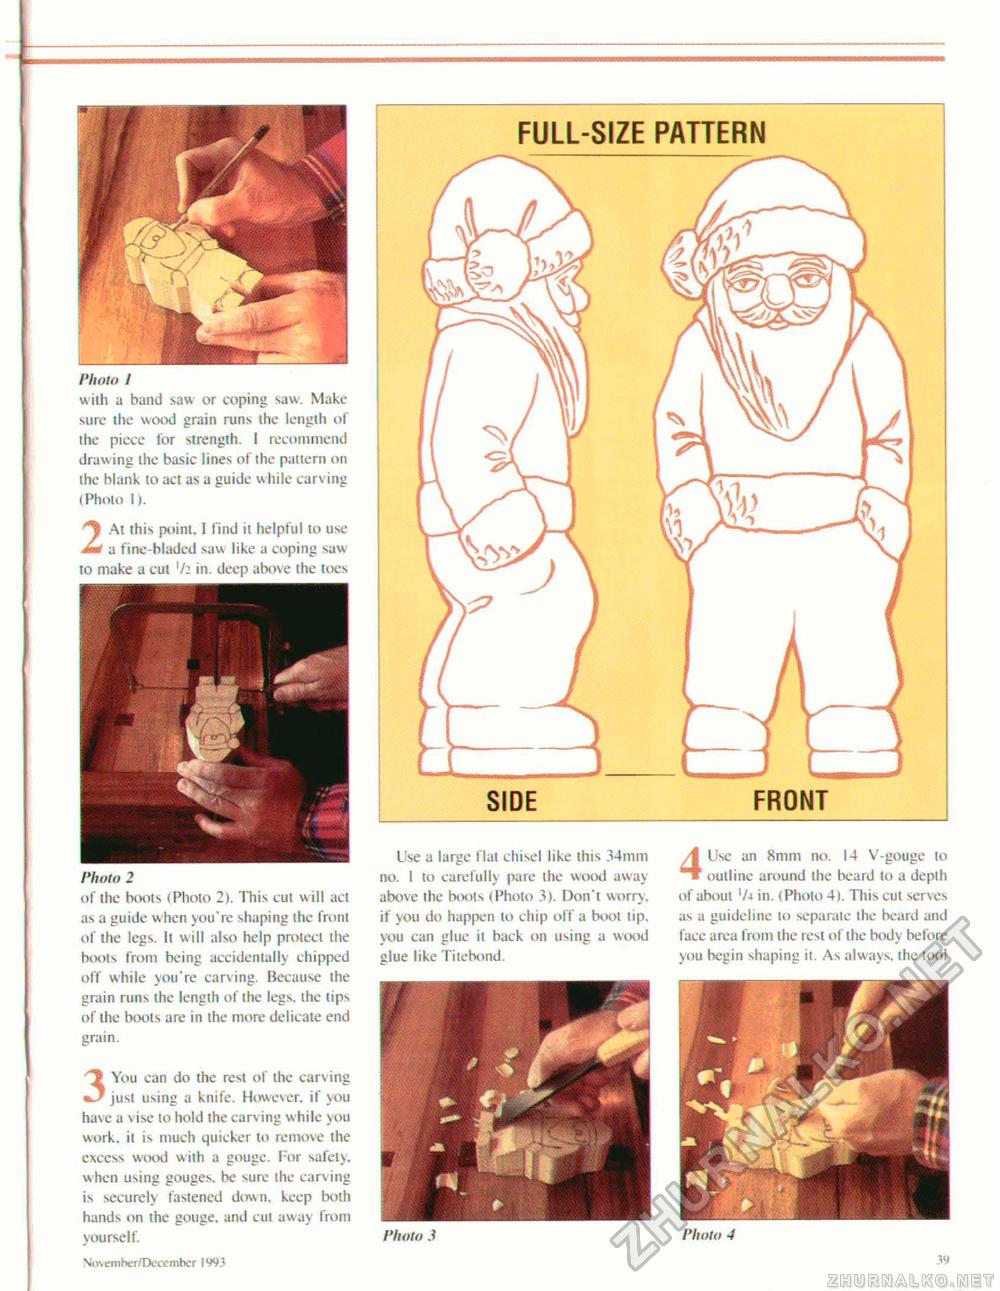
Photo / with a band saw or coping saw. Make sure ihe wood grain runs the lengih of ihe piece for strength. I recommend drawing the basic lines of the pattern on ihe blank 10 act as a guide while carving (Photo I). 2 At this point. I find it helpful to use a flne-bladed saw like a coping saw to make a cut '/a in. deep above the toes Photo 2 of the boots (Photo 2). This cut will act as a guide when you're shaping the front of the legs. It will also help protect the boots from being accidentally chipped off while you're carving. Because ihe grain runs the length of the legs, the tips of the boots are in ihe more delicate end grain. 3 You can do the rest of the carving just using a knife. However, if you have a vise to hold the carving while you work, it is much quicker to remove the excess wood with a gouge. For safety, when using gouges, be sure the carving is securely fastened down, keep both hands on the gouge, and cut away from yourself. November/Dcccmber 1993 Use a large flat chisel like this 34mm no. I to carefully pare the wood away above the boots (Photo 3). Don't worry, if you do happen lo chip off a boot tip. you can glue it back on using a wood glue like Titebond. 4 Use an 8mm no. 14 V-gouge to outline around the beard lo a depth of about '/a in. (Photo 4). This cut serves as a guideline to separate the beard and face area from the rest of the body before you begin shaping it. As always, the tool Photo.? Photo 4 |


