Woodworker's Journal 1993-17-6, страница 40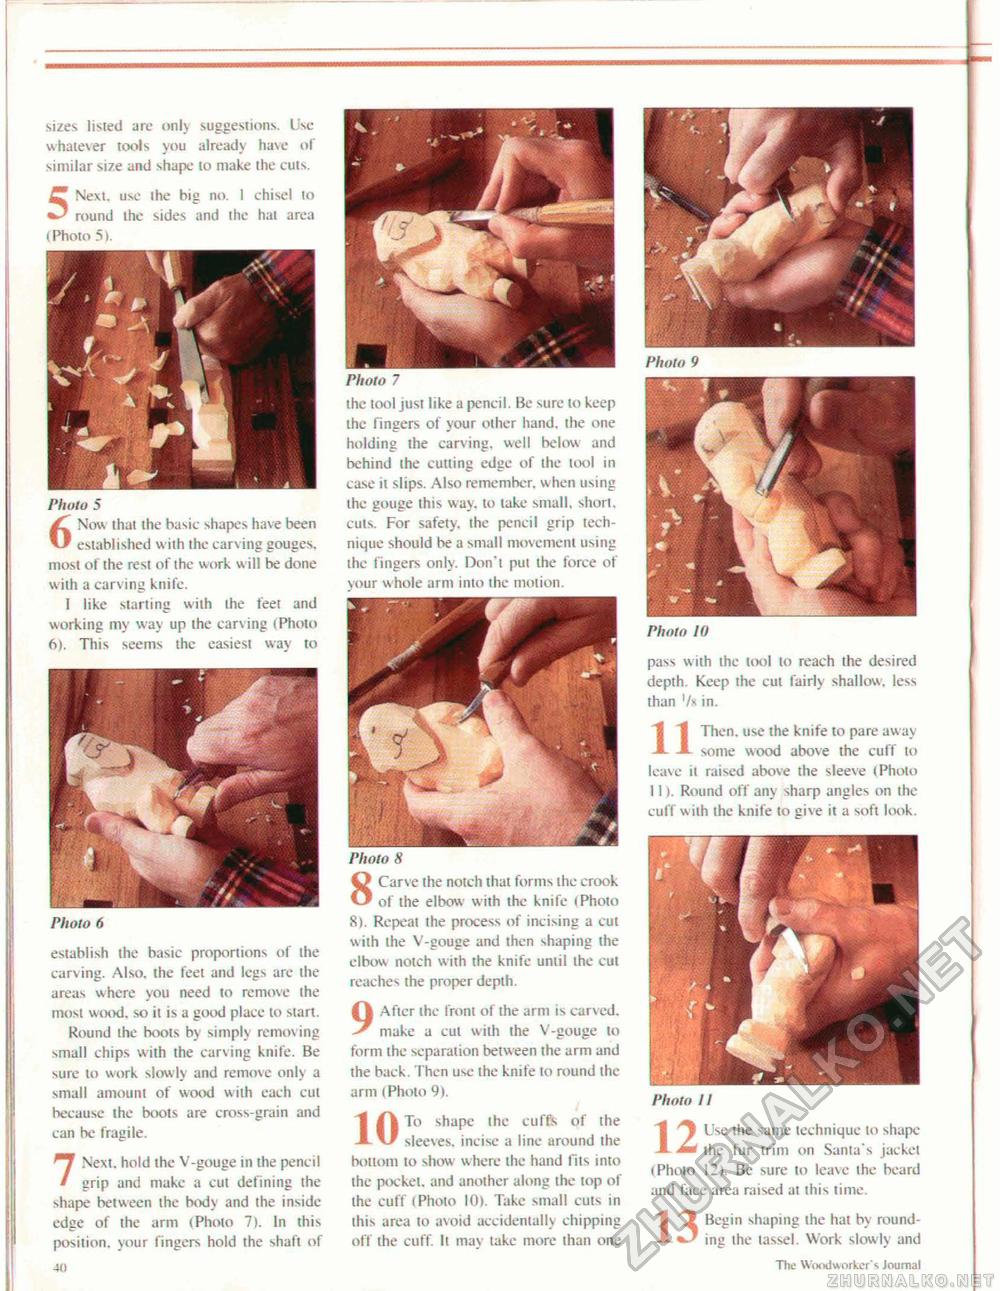
** 1 # » * Vv '■.:■" sizes listed are only suggestions. Use whatever tools you already have of similar size and shape to make the cuts. 5 Next, use the big no. 1 chisel to round the sides and the hat area (Photo 51. Photo 5 6 Now that the basic shapes have been established with the carving gouges, most of the rest of the work will be done with a carving knife. I like starting with the feet and working my way up the carv ing I Photo 6). This seems the easiest way to Photo 7 the tool just like a pencil. Be sure to keep the fingers of your other hand, the one holding the carving, well below and behind the cutting edge of the tool in case it slips. Also remember, when using the gouge this way. to take small, short, cuts. For safety, the pencil grip technique should be a small movement using the fingers only. Don't put the force of your w hole arm into the motion. Photo 6 establish the basic proportions of the carving. Also, the feet and legs are the areas where you need to remove the most wood, so it is a good place to start. Round the boots by simply removing small chips with the carving knife. Be sure to work slowly and remove only a small amount of wood with each cul because the boots are cross-grain and can be fragile. 7 Next, hold the V-gouge in the pencil grip and make a cut defining the shape between the body and the inside edge of the arm (Photo 7). In this position, your fingers hold the shaft of -to Photo 8 8 Carve the notch that forms the crook of the elbow with the knife (Photo 8). Repeat the process of incising a cut with the V-gouge and then shaping the elbow notch with the knife until the cul reaches the proper depth. 9 After the front of the arm is carved, make a cul with the V-gouge to form the separation between the arm and the back. Then use the knife to round the arm (Photo 9>. To shape the cuffs of the sleeves, incise a line around the bottom lo show where the hand fits into the pocket, and another along the top of the cuff (Photo 10). Take small cuts in this area to avoid accidentally chipping off the cuff. It mav take more than one Photo 9 Photo 10 pass with the tool to reach the desired depth. Keep the cul fairly shallow, less than '/s in. nThen. use the knife to pare away some wood above the cuff to leave il raised above the sleeve (Photo 11). Round off any sharp angles on the cuff w ith the knife to give it a soft look. Photo 11 "1 ^ Use the same technique lo shape -I ** the fur trim on Santa's jacket (Photo 12). Be sure to leave the beard and face area raised at this time. Begin shaping the hat by rounding the tassel. Work slowly and The Woodworker's Journal |


