Woodworker's Journal 1993-17-6, страница 43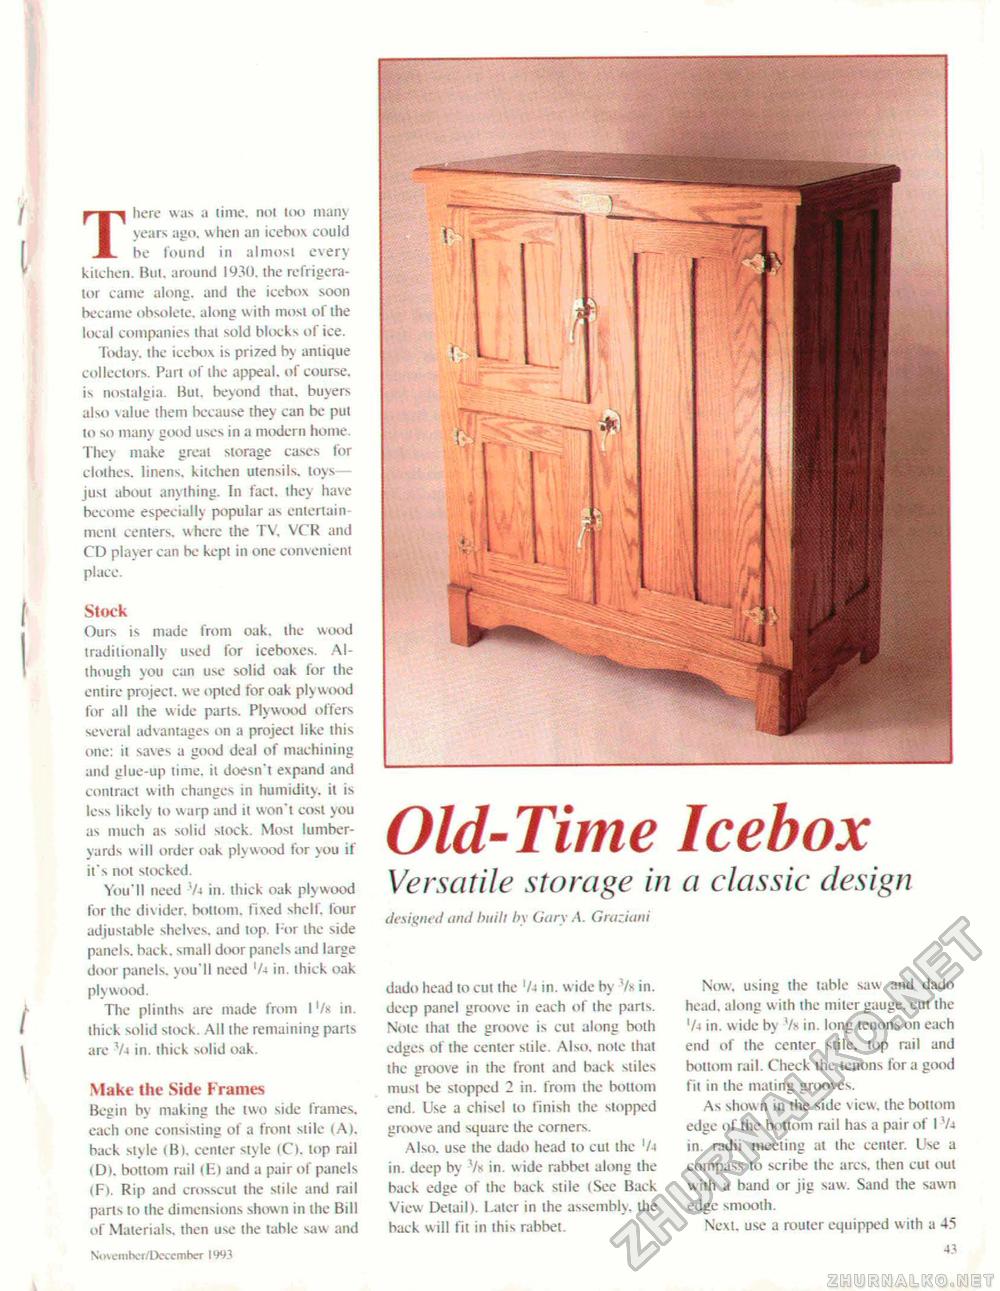
[ There was a time, not loo many years ago. when an icebox could be found in almost every kilchen. But. around 1930. the refrigerator came along, and the icebox soon became obsolete, along w ith most of the local companies that sold blocks of ice. Today, the icebox is priced by antique collectors. Part of the appeal, of course, is nostalgia. But. beyond that, buyers also value them because they can be put lo so many good uses in a modern home. They make great storage cases for clothes, linens, kitchen utensils, toys-just about anything. In fact, they have become especially popular as entertain ment centers, where the TV, VCR and CD player can be kept in one convenient place. Stock Ours is made from oak, the wood traditionally used for iceboxes. Although you can use solid oak for the entire project, we opted for oak plywood for all the wide parts. Plywood offers several advantages on a project like this one: it saves a good deal of machining and glue-up time, it doesn't expand and contract with changes in humidity, it is less likely to warp and it won't cost you as much as solid stock. Most lumberyards will order oak plywood for you if it's not stocked. You'll need l/4 in. thick oak plywood for the divider, bottom, fixed sheir. four adjustable shelves, and top. l or the side panels, back, small door panels and large door panels, you'll need '/j in. thick oak plywood. The plinths are made from I '/x in. thick solid stock. All the remaining parts are V* in. thick solid oak. Make the Side Frames Begin by making the two side frames, each one consisting of a front stile (A), back style (Bl. center style (C). top rail (D). bottom rait <E) and a pair of panels (Ft. Rip and crosscut the stile and rail parts 10 the dimensions shown in the Bill of .Materials, then use the table saw and Nmemher/Decemher 1993 Old-Time Icebox Versatile storage in a classic design designed and built by Gary A. Graziani dado head to cut the '/j in. w ide by Vx in. deep panel groove in each of the parts. Note that the groove is cut along both edges of the center stile. Also, note that the groove in the front and back stiles must be stopped 2 in. from the bottom end. Use a chisel to finish the stopped groove and square the corners. Also, use the dado head to cut the '/4 in. deep by -Vk in. w ide rabbet along the hack edge of the back stile (Sec Back View Detail). Later in the assembly, the back will fit in ihis rabbet. Now, using the table saw and dado head, along with the miter gauge, cut the 'A in. wide by Vk in. long tenons on each end of the center stile, top rail and bottom rail. Check the tenons for a good fit in the mating grooves. As show n in the side \ iew, ihe bottom edge of the bottom rail has a pair of I V-i in. radii meeting al the center. Use a compass to scribe ihe arcs, then cut out wiih a band or jig saw. Sand the sawn edge smooth. Next, use a router equipped w ith a 45 43 |


