Woodworker's Journal 1994-18-1, страница 44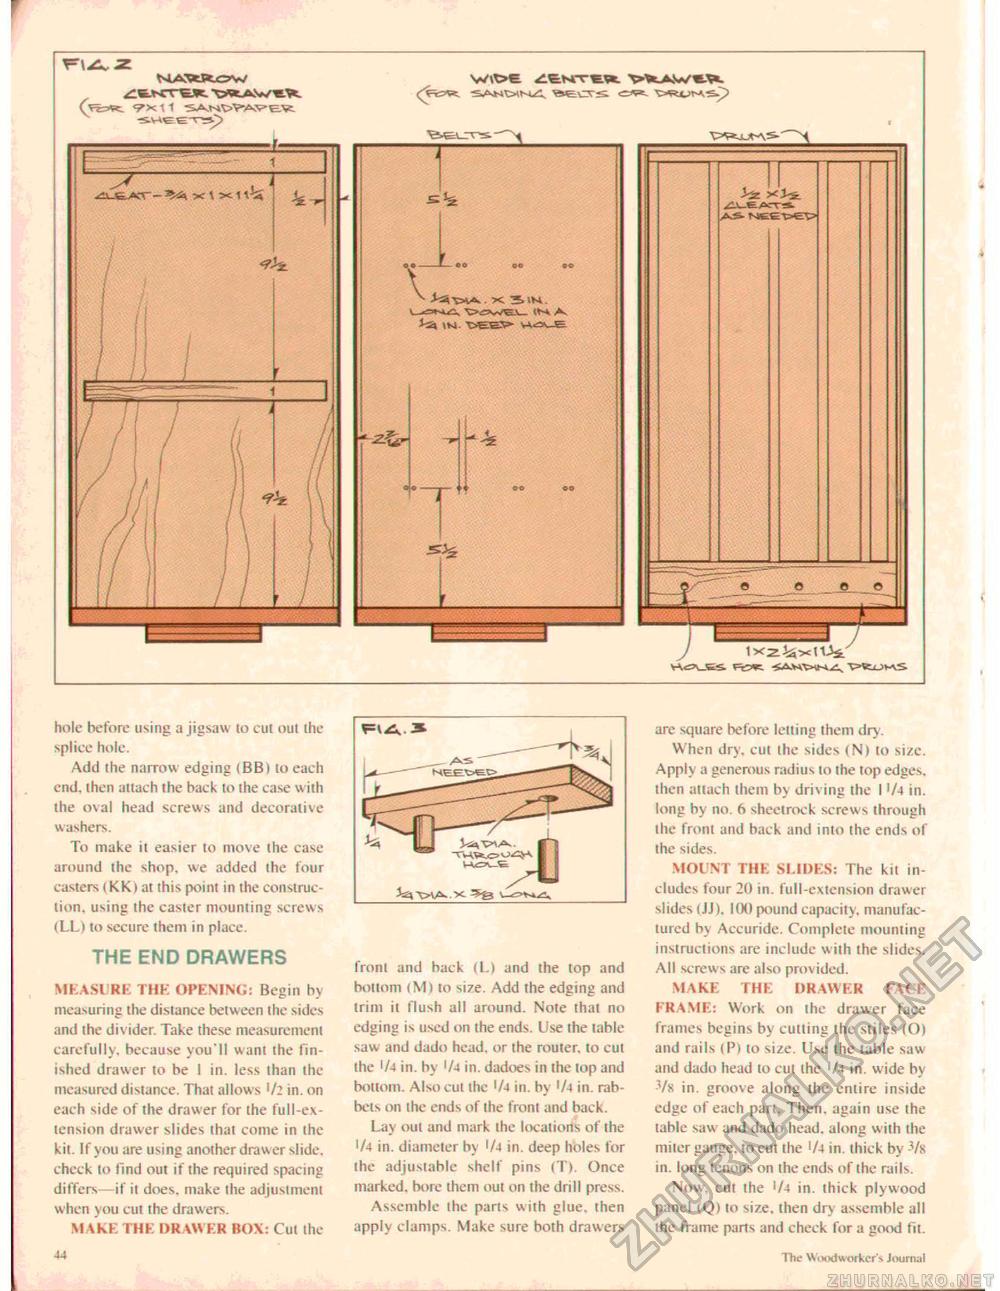
^tKTtHt. WAWl*. 9X11 -jAN^V-AV tv: 9 c« fTSSVe, -- k I <rJ± A V A. IM. wave OO OO -.............-. is y ixz-Js^ttAi' hole before using a jigsaw lo cut out the splice hole. Add the narrow edging (BB) to each end, then attach the back to the case w ith the oval head screws and decorative washers. To make it easier lo move (he case around the shop, w e added I he four casters tKKi at this point in the construction. using the easier mounting screws <LL) to secure them in place. THE END DRAWERS MEASURE THK OPENING: Begin by measuring the distance between the sides and the divider. Take these measurement carefully, because you'll want the finished drawer to be i in. less than the measured distance. Thai allows in. on each side of the drawer for the full-extension drawer slides that come in the kit. If you are using another drawer slide, check lo find out if the required spacing differs—if it does, make the adjustment when you cut ihe drawers. MAKE THE DRAWER BOX: Cul the from and back (I.) and the top and bottom CM) to size. Add the edging and trim it Hush ail around. Note that no edging is used on the ends. Use the table saw and dado head, or the router, to cut the l/4 in. by 1 /-4 in. dadoes in the top and bottom. Also cut the '/4 in. by >/4 in. rabbets on the ends of the fronl and back. Lay out and mark the locations of the '/4 in. diameter by '/■> in. deep holes for the adjustable shelf pins (T). Once marked, bore them out on the drill press. Assemble the parls with glue, then apply clamps. Make sure both drawers are square before letting them dry. When dry. cul the sides (N) to size. Apply a generous radius lo the top edge>. then attach them by driving the I Wi in. long by no. 6 sheclrock screws through the front and back and into the ends of Ihe sides, MOUNT THE SLIDES: The kit includes four 20 in. full-exlension drawer slides (JJ). 100 pound capacity, manufactured by Accuride. Complete mounting instructions are include with the slides. All screws are also provided. MAKE THE DRAWER FACE FRAME: Work on ihe drawer face frames begins by cutting the stiles CO) and rails (P) to size. Use the table saw and dado head lo cul the '/4 in. wide by Vx in. groove along ihe entire inside edge of each part. Then, again use the table saw and dado head, along with the miter gauge, to cut the 'At in. thick by -Vs in. long tenons on the ends of ihe rails. Now. cut the >/4 in. ihick plywood panel <Q) to size, then dry assemble all the frame parts and check for a good lit. .">8 The Woodworker's Journal |


