Woodworker's Journal 1994-18-1, страница 41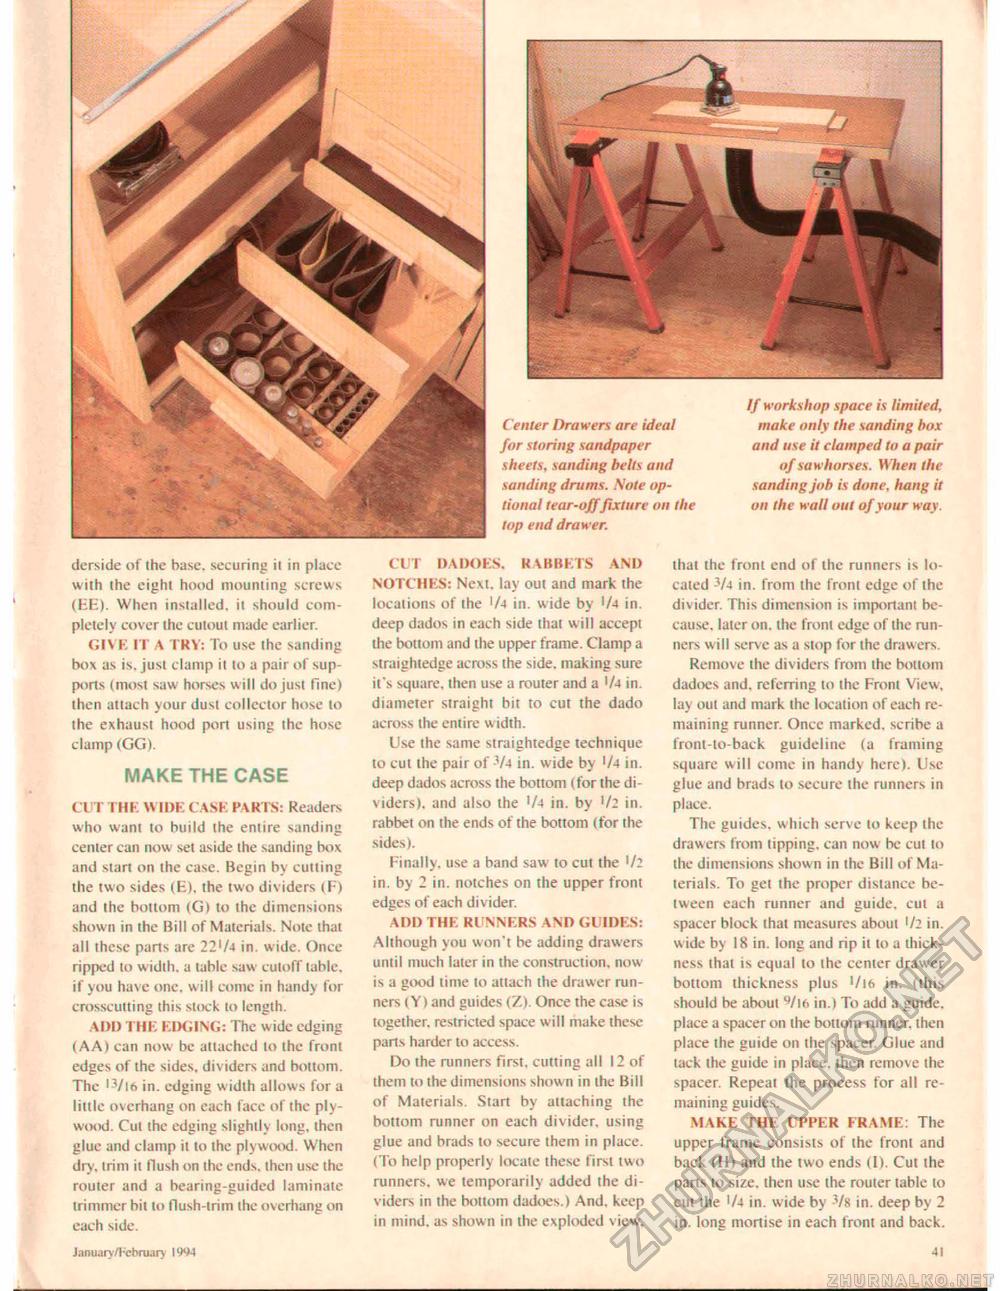
Center Drawers are ideal for storing sandpaper sheets, sanding belts and sanding drums. .\ote optional tear-offfixture on the top end drawer. If workshop space is limited, make only the sanding box and use it clamped to a pair of saw horses. When the sanding job is done, hang it on the wall out of your way. derside of ihe base, securing it in place with the eight hood mounting screws (HE). When installed, il should completely cover the cutout made earlier. GIVE IT A TRY: To use the sanding box as is, just clamp it to a pair of supports (most saw horses will do just fine) then attach your dust collector hose to the exhaust hood port using the hose clamp (GG). MAKE THE CASE CUT THE WIDE CASK PARTS: Readers who want to build the entire sanding center can now set aside the sanding box and start on the case. Begin by culling the two sides (E), the two dividers <F) and ihe bottom (G) to the dimensions shown in the Bill of Materials. Nole that all these parts are 22'/4 in. wide. Once ripped to width, a table saw cutoff lable. if you have one, will come in handy for crosscutting this stock to length. ADD THE EDGING: The wide edging (AA) can now be attached to ihe front edges of the sides, dividers and bottom. The ,3/l6 in. edging width allows for a liltIc overhang on cach face of the plywood. Cut the edging slightly long, ihcn glue and clamp il to the plywood. When dry. trim il flush on ihe ends, then use the rouier and a bearing-guided laminate trimmer bil to flush-irim the overhang on each side. CUT DADOES. R \BBKTS AND NOTCHES: Next, lay out and mark the locations of ihe '/4 in. wide by '/4 in. deep dados in each side that will accept the bottom and the upper frame. Clamp a siraighiedge across the side, making sure it's square, then use a router and a '/4 in. diameter straight bit to cut the dado across ihe entire w idih. Use the same straightedge technique to cut the pair of *V4 in. wide by '/4 in. deep dados across the bottom (for the dividers), and also the '/4 in. by '/: in. rabbet on the ends of the bottom (for the sides). Finally, use a band saw to cut the ]lz in. by 2 in. notches on the upper front edges of each divider. ADD THE RUNNERS AND GUIDES: Although you won't be adding drawers unlil much later in ihe construction, now is a good time to attach the drawer runners lY) and guides (Z). Once the case is together, restricted space will make these parts harder to access. Do the runners first, cutting all 12 of them to the dimensions shown in the Bill of Materials. Start by attaching the bottom runner on each divider, using glue and brads to secure them in place. (To help properly locale these first two runners, we temporarily added the dividers in the bottom dadoes,) And. keep in mind, as shown in the exploded view. that the front end of the runners is located -V4 in. from ihe front edge of the divider. This dimension is important because. later on. the front edge of ihe runners w ill serve as a slop for the drawers. Remove the dividers from the bottom dadoes and, referring lo the Front View, lay oul and mark the location of each remaining runner. Oncc marked, scribe a front-lo-back guideline (a framing square will come in handy here). Use glue and brads to secure the runners in place, The guides, which serve to keep the drawers from lipping, can now be cul to the dimensions shown in the Bill of Materials. To get the proper distance between each runner and guide, cul a spacer block that measures about '/2 in. wide by 18 in. long and rip it lo a thickness that is equal lo the center drawer bottom thickness plus '/ifi in. (this should be about 9/)fi in.) To add a guide, place a spacer on the bottom runner, then place the guide on ihe spacer. Glue and tack the guide in place, then remove the spacer. Repeat ihe process for all remaining guides. MAKE THE UPPER FRAME: The upper frame consists of the froni and back (H) and the two ends (I). Cut the pans lo size, then use ihe router table to cut the !/4 in. wide by in. deep by 2 in. Ions mortise in each front and back. January/February IW4 41 |


