Woodworker's Journal 1994-18-5, страница 42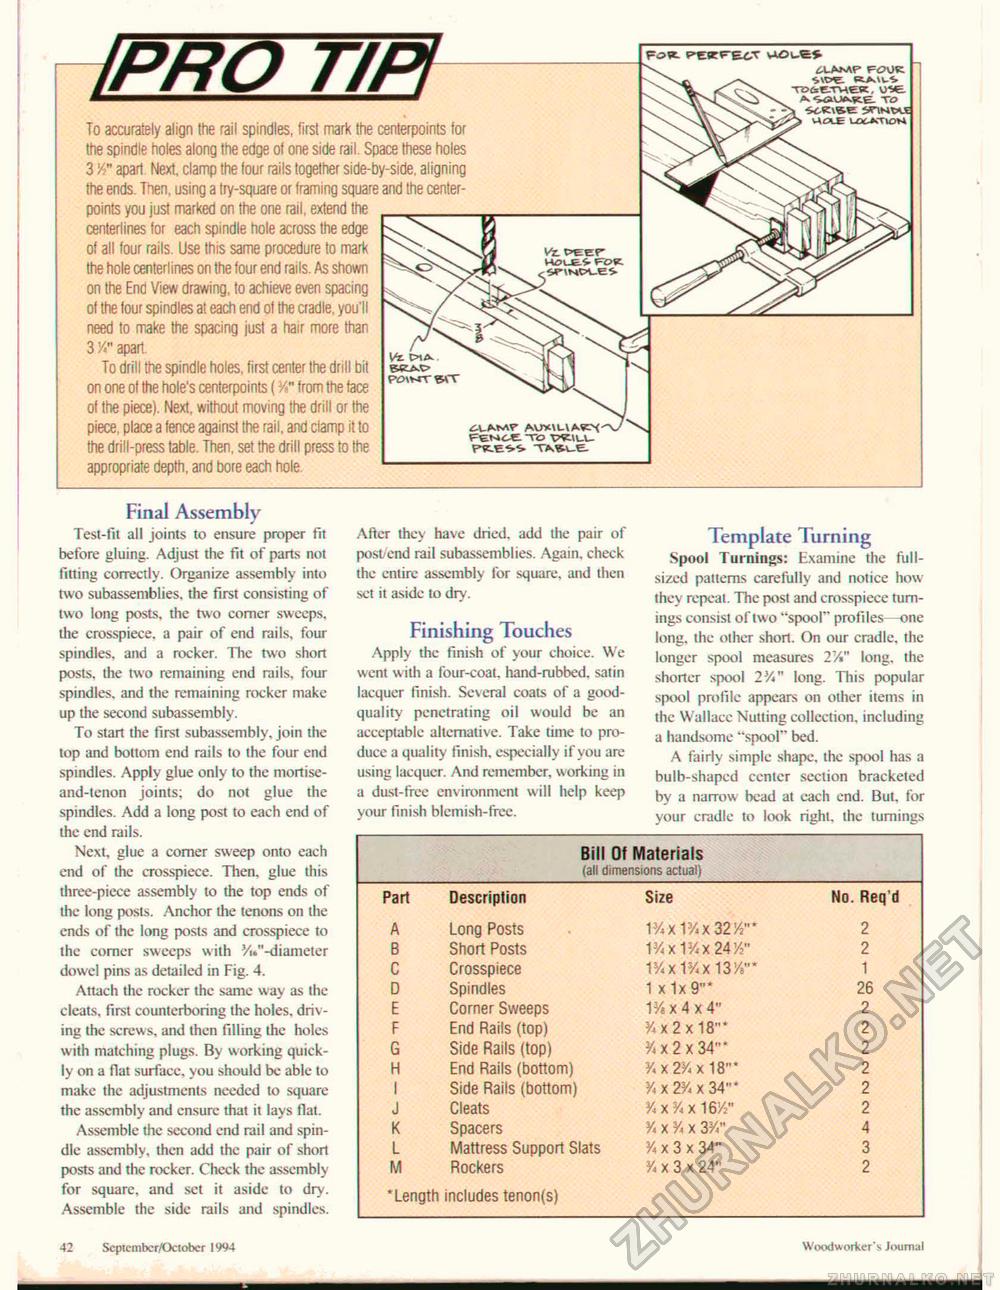
To accurately align the rail spindles, first mark the centerpoints for the spindle holes along the edge of one side rail. Space these holes 3 Y" apart Next, clamp the four rails together side-by-side, aligning the ends. Then, using a try-square or framing square and the center-points you just marked on the one rail, extend the centerlines for each spindle hole across the edge of all four rails. Use this same procedure to mark the hole centerlines on the four end rails. As shown on the End View drawing, to achieve even spacing of the four spindles at each end of the cradle, you'll need to make the spacing just a hair more than 3 Y*" apart To drill the spindle holes, first center the drill bit on one of the hole's centerpoints (V" from the face of the piece). Next, without moving the drill or the piece, place a fence against the rail, and clamp it to the drill-press table. Then, set the drill press to the appropriate depth, and bore each hole. Vt. FENCt TO V^ILU /PRO T/P! FoV*. vAOuEJ TOitTMEK, UVE. A TO wocB Lo-wum Final Assembly Test-fit all joints to ensure proper fit before gluing. Adjust the fit of parts not fining correctly. Organize assembly into two subassemblies, the first consisting of two long posts, the two comer sweeps, the crosspiece. a pair of end rails, four spindles, and a rocker. The two short posts, the two remaining end rails, four spindles, and the remaining rocker make up the second subassembly. To start the first subassembly, join the lop and bottom end rails to the four end spindles. Apply glue only to the mortise-and-tenon joints; do not glue the spindles. Add a long post to each end of the end rails. Next, glue a comer sweep onto each end of the crosspiece. Then, glue this three-piece assembly to the top ends of the long posts. Anchor the tenons on the ends of the long posts and crosspiece to the corner sweeps with VW'-diameter dowel pins as detailed in Fig. 4. Attach the rocker the same way as the cleats, first counterboring the holes, driving the screws, and then filling the holes with matching plugs. By working quickly on a flat surface, you should be able to make the adjustments needed to square the assembly and ensure that it lays flat. Assemble the second end rail and spindle assembly, then add the pair of short posts and the rocker. Check the assembly for square, and set it aside to dry. Assemble the side rails and spindles. After they have dried, add the pair of post/end rail subassemblies. Again, check the entire assembly for square, and then set it aside to dry. Finishing Touches Apply the finish of your choice. We went with a four-coat, hand-rubbed, satin lacquer finish. Several coats of a good-quality penetrating oil would be an acceptable alternative. Take time to produce a quality finish, especially if you are using lacquer. And remember, working in a dust-free environment will help keep your finish blemish-free. Template Turning Spool Turnings: Examine the full-sized patterns carefully and notice how they repeat. The post and crosspiece turnings consist of two "spool" profiles—one long, the other short. On our cradle, the longer spool measures 2"/»" long, the shorter spool 23/«" long. This popular spool profile appears on other items in the Wallacc Nutting collection, including a handsome "spool" bed. A fairly simple shape, the spool has a bulb-shaped center section bracketed by a narrow bead at each end. But. for your cradle to look right, the turnings
42 Scptcmber/October 1994 Woodworker's Journal |
||||||||||||||||||||||||||||||||||||||||||||||||||||||||||||||||


