Woodworker's Journal 1994-18-5, страница 50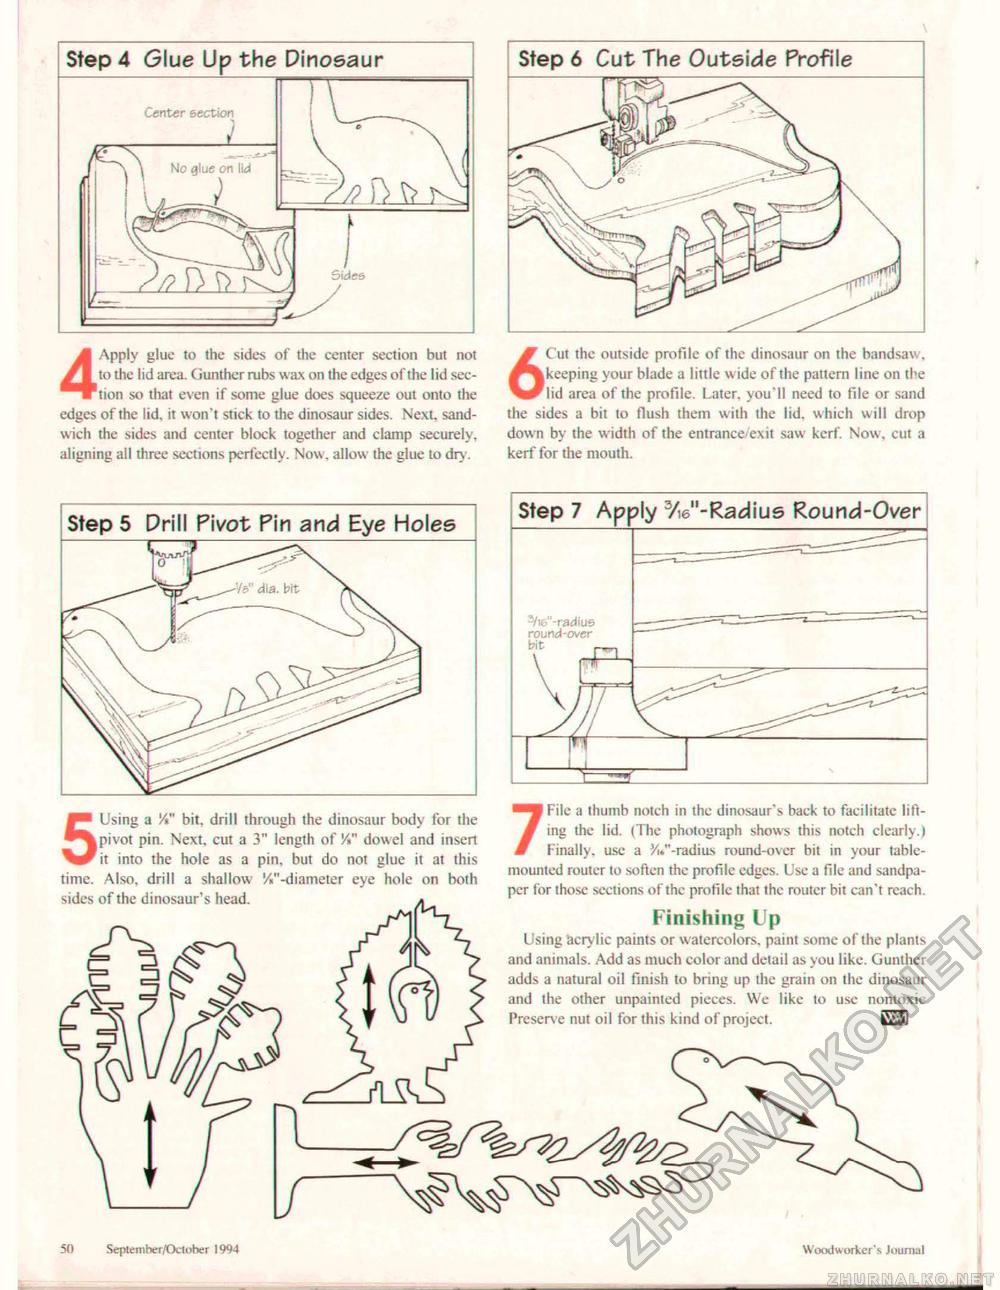
Step 4 Glue Up the Dinosaur Center section 4Apply glue to the sides of the center section but not to the lid area. Gunther rubs wax on the edges of the lid section so that even if some glue does squeeze out onto the edges of the lid, it won't stick to the dinosaur sides. Next, sandwich the sides and center block together and clamp securely, aligning all three sections perfectly. Now. allow the glue to dry . 6C ut the outside profile of the dinosaur on the handsaw, keeping your blade a little wide of the pattern line on the lid area of the profile. Later, you'll need to file or sand the sides a bit to flush them with the lid. which will drop down by the width of the entrance-exit saw kerf. Now, cut a kerf for the mouth.
Step 5 Drill Pivot Pin and Eye Holes 5Using a V%" bit. drill through the dinosaur body for the pivot pin. Next, cut a 3" length of 'A" dowel and insert it into the hole as a pin, but do not glue it at this time. Also, drill a shallow W-diameter eye hole on both sides of the dinosaur's head. 7 File a thumb notch in the dinosaur's back to facilitate lifting the lid. (The photograph shows this notch clearly.) Finally, use a ^"-radius round-over bit in your table-mounted router to soften the profile edges. Use a file and sandpaper for those sections of the profile that the router bit can't reach. Finishing Up Using acry lic paints or watercolors. paint some of the plants and animals. Add as much color and detail as you like. Gunther adds a natural oil finish to bring up the grain on the dinosaur and the other unpainted pieces. We like to use nontoxic Preserve nut oil for this kind of project. GJj 50 Seplemher/Ocloher 1994 Woodworker's Journal |
|||||||||


