Woodworker's Journal 1994-18-5, страница 62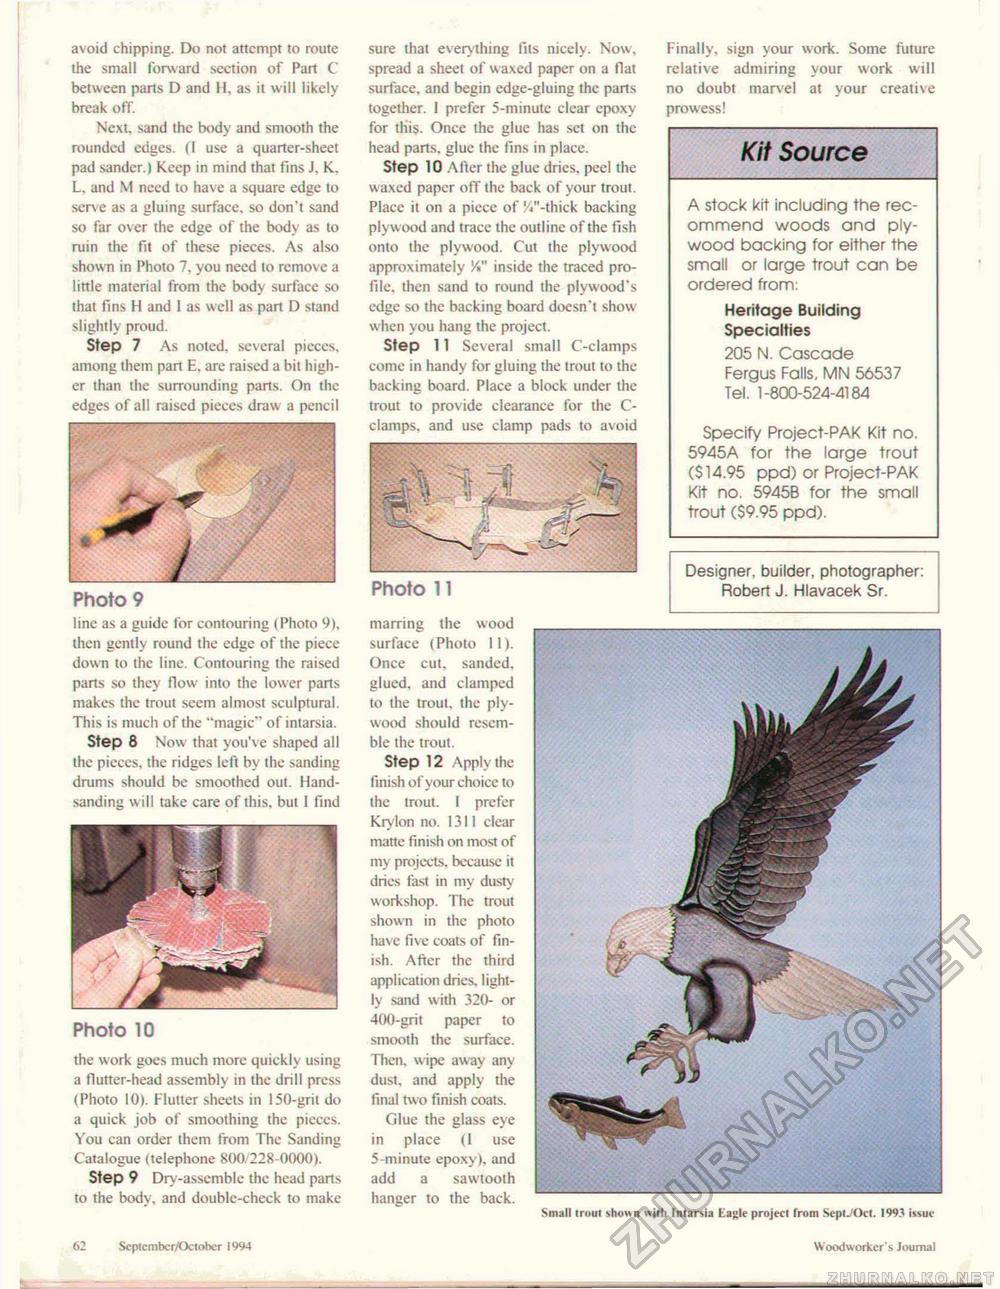
avoid chipping. Do not attempt to route the small forward section of Part C between parts D and H, as it will likely break off. Next, sand the body and smooth the rounded edges. (1 use a quarter-sheet pad sandcr.) Keep in mind that fins J. K. L, and M need to have a square edge to serve as a gluing surface, so don't sand so far over the edge of the body as to ruin the fit of these pieces. As also shown in Photo 7, you need to remove a little material from the body surface so that fins H and I as well as part D stand slightly proud. Step 7 As noted, several pieces, among them part E, are raised a bit higher than the surrounding parts. On the edges of all raised pieces draw a pencil line as a guide for contouring (Photo 9), then gently round the edge of the piece down to the line. Contouring the raised parts so they flow into the lower parts makes the trout seem almost sculptural. This is much of the "magic" of intarsia. Step 8 Now that you've shaped all the picccs, the ridges left by the sanding drums should be smoothed out. Hand-sanding will take care of this, but 1 find the work goes much more quickly using a flutter-head assembly in the drill press (Photo 10). Flutter sheets in 150-grit do a quick job of smoothing the picccs. You can order them from The Sanding Catalogue (telephone 800/228-0000). Step 9 Dry-assemble the head parts to the body, and double-check to make 62 Scptcmbcr/October 1994 sure that everything fits nicely. Now, spread a sheet of waxed paper on a flat surface, and begin edge-gluing the parts together. 1 prefer 5-minutc clear epoxy for this. Once the glue has set on the head parts, glue the fins in place. Step 10 After the glue dries, peel the waxed paper off the back of your trout. Place it on a piece of '//'-thick backing plyw ood and trace the outline of the fish onto the plywood. Cut the plywood approximately /*" inside the traced profile, then sand to round the plywood's edge so the backing board doesn't show when you hang the project. Step 11 Several small C-clamps come in handy for gluing the trout to the backing board. Place a block under the trout to provide clearance for the C-clamps, and use clamp pads to avoid marring the wood surface (Photo 11). Once cut, sanded, glued, and clamped to the trout, the plywood should resemble the trout. Step 12 Apply the finish of your choice to the trout. I prefer Krylon no. 1311 clear matte finish on most of my projects, because it dries fast in my dusty workshop. The trout shown in the photo have five coats of finish. After the third application dries, lightly sand with 320- or 400-grit paper to smooth the surface. Then, wipe away any dust, and apply the final two finish coats. Glue the glass eye in place (1 use 5-minute epoxy), and add a sawtooth hanger to the back. Finally, sign your work. Some future relative admiring your work will no doubt marvel at your creative prowess! Kit Source A stock kit including the recommend woods and plywood backing for either the small or large trout can be ordered from: Heritage Building Specialties 205 N. Cascade Fergus Falls, MN 56537 Tel. 1-800-524-4184 Specify Project-PAK Kit no. 5945A for the large trout ($14.95 ppd) or Project-PAK Kit no. 5945B for the small trout ($9.95 ppd). Designer, builder, photographer: Robert J. Hlavacek Sr. Woodworker's Journal - Photo 9 Photo 10 |


