Woodworker's Journal 1994-18-6, страница 45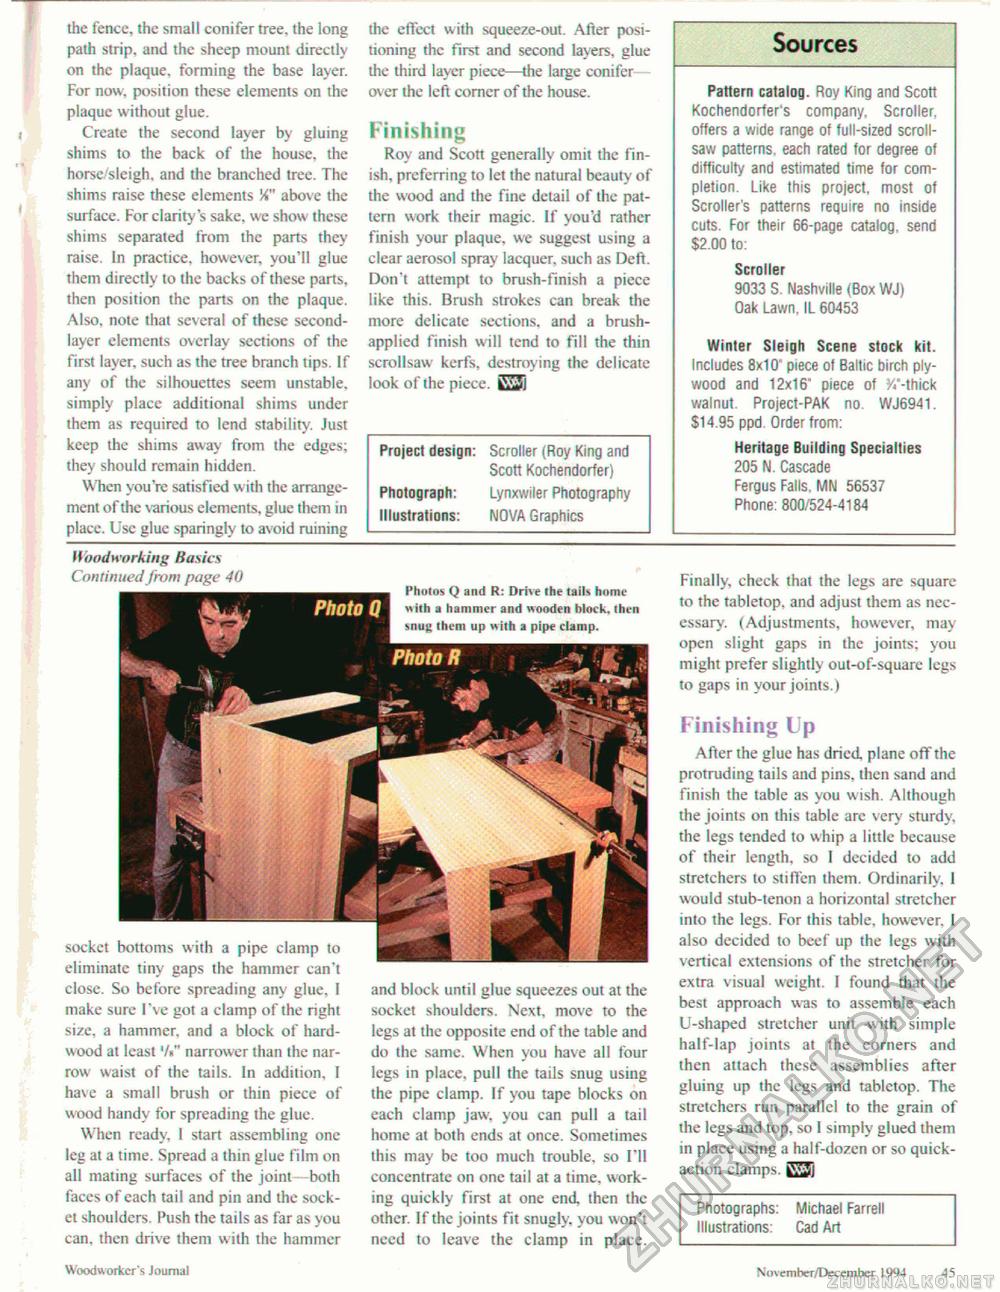
the fence, the small conifer tree, the long path strip, and the sheep mount directly on the plaque, forming the base layer. For now, position these elements on the plaque without glue. Create the second layer by gluing shims to the back of the house, the horsc/sleigh, and the branched tree. The shims raise these elements 5T above the surface. For clarity's sake, we show these shims separated from the parts they raise. In practice, however, you'll glue them directly to the backs of these parts, then position the parts on the plaque. Also, note that several of these second-layer elements overlay sections of the First layer, such as the tree branch tips. If any of the silhouettes seem unstable, simply place additional shims under them as required to lend stability. Just keep the shims away from the edges; they should remain hidden. When you're satisfied w ith the arrangement of the various elements, glue them in place. Use glue sparingly to avoid ruining the effect with squeeze-out. After positioning the first and second layers, glue the third layer piece—the large conifer over the left corner of the house. Finishing Roy and Scon generally omit the finish, preferring to let the natural beauty of the wood and the fine detail of the pattern work their magic. If you'd rather finish your plaque, we suggest using a clear aerosol spray lacquer, such as Deft. Don't attempt to brush-finish a piece like this. Brush strokes can break the more delicate sections, and a brush-applied finish will tend to fill the thin scrollsaw kerfs, destroying the delicate look of the piece. GJ) Project design: Photograph: Illustrations: Scroller (Roy King and Scott Kochendorfer) Lynxwiler Photography NOVA Graphics Sources Pattern catalog. Roy King and Scott Kochendorfer's company. Scroller, offers a wide range of full-sized scroll-saw patterns, each rated for degree of difficulty and estimated time for completion. Like this project, most of Scroller's patterns require no inside cuts. For their 66-page catalog, send $2.00 to: Scroller 9033 S. Nashville (Box WJ) Oak Lawn, IL 60453 Winter Sleigh Scene stock kit. Includes 8x10' piece of Baltic birch plywood and 12x16" piece of y/-thick walnut. Project-PAK no. WJ6941. $14.95 ppd. Order from: Heritage Building Specialties 205 N. Cascade Fergus Fails. MN 56537 Phone: 800/524-4184 Woodworking Basics Continued from page 40 Photos Q and R: Drive the tails home with a hammer and wooden block, then snug them up witti a pipe clamp. socket bottoms with a pipe clamp to eliminate tiny gaps the hammer can't close. So before spreading any glue, I make sure I've got a clamp of the right size, a hammer, and a block of hardwood at least'/«" narrower than the narrow waist of the tails. In addition, I have a small brush or thin piece of wood handy for spreading the glue. When ready, I start assembling one leg at a time. Spread a thin glue film on all mating surfaces of the joint both faces of each tail and pin and the socket shoulders. Push the tails as far as you can. then drive them with the hammer and block until glue squeezes out at the socket shoulders. Next, move to the legs at the opposite end of the table and do the same. When you have all four legs in place, pull the tails snug using the pipe clamp. If you tape blocks on each clamp jaw, you can pull a tail home at both ends at once. Sometimes this may be too much trouble, so I'll concentrate on one tail at a time, working quickly first at one end, then the other. If the joints fit snugly, you w on't need to leave the clamp in place. Finally, check that the legs are square to the tabletop, and adjust them as necessary. (Adjustments, however, may open slight gaps in the joints; you might prefer slightly out-of-square legs to gaps in your joints.) Finishing Up After the glue has dried plane off the protruding tails and pins, then sand and finish the table as you wish. Although the joints on this table are very sturdy, the legs tended to whip a little because of their length, so I decided to add stretchers to stitfcn them. Ordinarily, I would stub-tenon a horizontal stretcher into the legs. For this table, however. I also decided to beef up the legs with vertical extensions of the stretcher for extra visual weight. I found that the best approach was to assemble each U-shaped stretcher unit with simple half-lap joints at the corners and then attach these assemblies after gluing up the legs and tabletop. The stretchers run parallel to the grain of the legs and top, so I simply glued them in place using a half-dozen or so quick-action clamps kv>'Jl Photographs: Illustrations: Michael Farrell Cad Art Woodworker s Journal Novembcr/December 1994 1<1 |


