Woodworker's Journal 1994-18-6, страница 48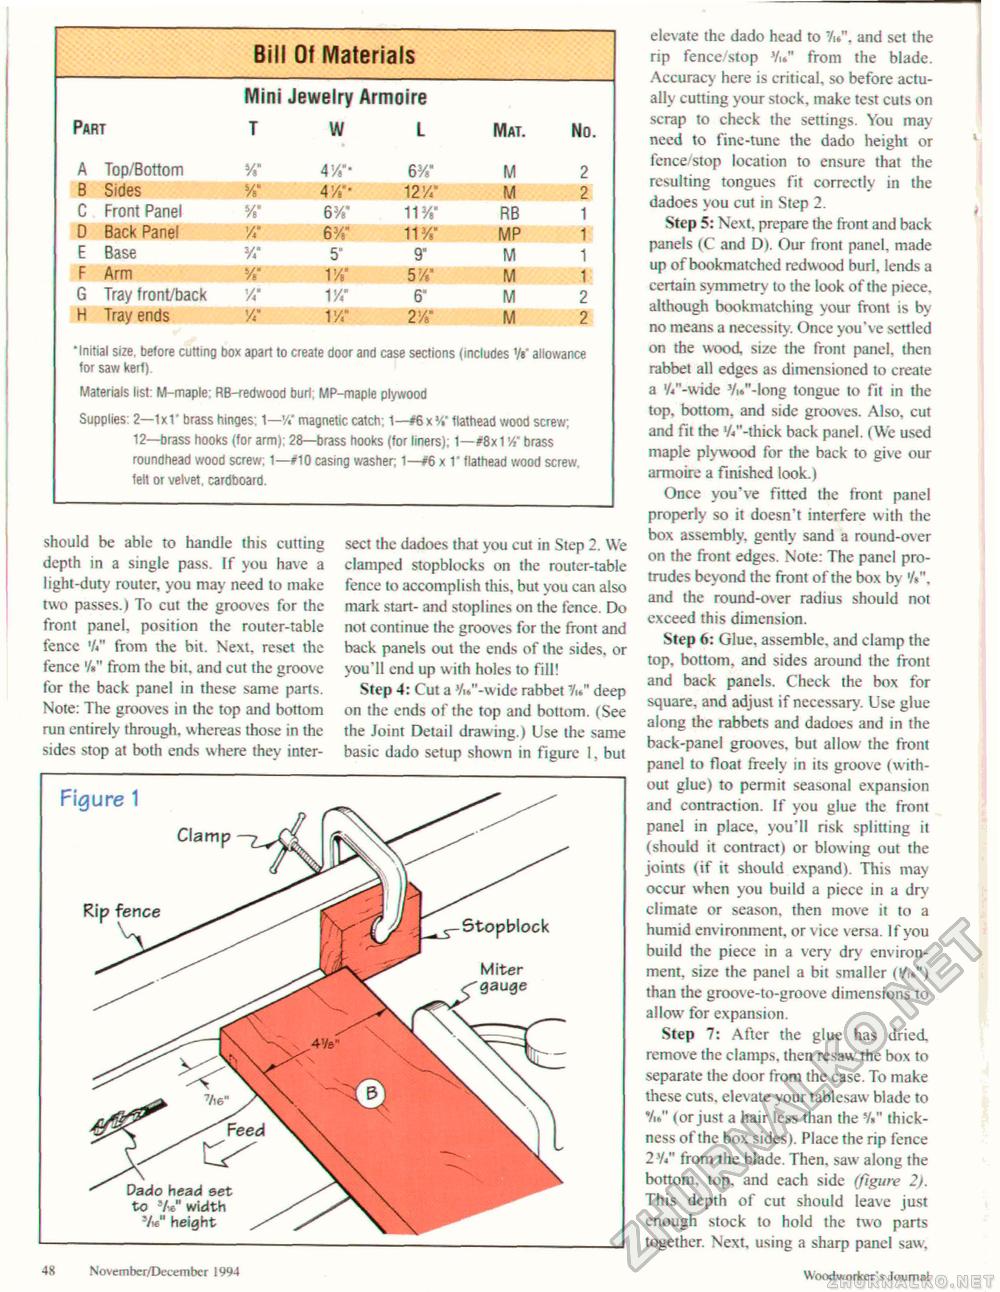
Bill Of Materials Mini Jewelry Armoire
"Initial size, belore cutting box apart to create door and case sections (includes '/«" allowance for saw Kerf). Materials list: M-maple; RB-redwood burl; MP-maple plywood Supplies: 2—1x1' brass hinges: 1—'/." magnetic catch: 1—#6 x '/•" fiathead wood screw; 12—brass hooks (for arm); 28—brass hooks (for Itners); 1—#8x114" brass roundhead wood screw; 1—#10 casing washer; 1—#6 x 1" fiathead wood screw, felt or velvet, cardboard. should be able to handle this cutting depth in a single pass. If you have a light-duty router, you may need to make two passes.) To cut the grooves for the front panel, position the router-table fencc '/♦" from the bit. Next, reset the fence '/*" from the bit, and cut the groove for the back panel in these same parts. Note: The grooves in the top and bottom run entirely through, whereas those in the sides stop at both ends where they inter- Fig sect the dadoes that you cut in Step 2. We clamped stopblocks on the router-table fence to accomplish this, but you can also mark start- and stoplines on the fcnce. Do not continue the grooves for the front and back panels out the ends of the sides, or you'll end up with holes to fill! Step 4: Cut a J/i."-wide rabbet 7«" deep on the ends of the top and bottom. (See the Joint Detail drawing.) Use the same basic dado setup shown in figure 1, but elevate the dado head to V, and set the rip fence/stop V./' from the blade. Accuracy here is critical, so before actually cutting your stock, make test cuts on scrap to check the settings. You may need to fine-tune the dado height or fence/stop location to ensure that the resulting tongues fit correctly in the dadoes you cut in Step 2. Step 5: Next, prepare the front and back panels (C and D). Our front panel, made up of bookmatched redwood burl, lends a certain symmetry to the look of the piece, although bookmatching your front is by no means a necessity. Once you've settled on the wood, size the front panel, then rabbet all edges as dimensioned to create a '//'-wide Vi.'Mong tongue to fit in the top, bottom, and side grooves. Also, cut and fit the 'A"-thick back panel. (We used maple plywood for the back to give our armoire a finished took.) Once you've fitted the front panel properly so it doesn't interfere with the box assembly, gently sand a round-over on the front edges. Note: The panel protrudes beyond the front of the box by '/*", and the round-over radius should not exceed this dimension. Step 6: Glue, assemble, and clamp the top, bottom, and sides around the front and back panels. Check the box for square, and adjust if necessary. Use glue along the rabbets and dadoes and in the back-panel grooves, but allow the front panel to float freely in its groove (without glue) to permit seasonal expansion and contraction. If you glue the front panel in place, you'll risk splitting it (should it contract) or blowing out the joints (if it should expand). This may occur when you build a piece in a dry climate or season, then move it to a humid environment, or vice versa. If you build the piece in a very dry environment. size the panel a bit smaller («/«") than the groove-to-groove dimensions to allow for expansion. Step 7: After the glue has dried, remove the clamps, then resaw the box to separate the door from the case. To make these cuts, elevate your tablcsaw blade to */.*" (or just a hair less than the ¥." thickness of the box sides). Place the rip fcnce 2 '/<" from the blade. Then, saw along the bottom, top, and each side (figure 2). This depth of cut should leave just enough stock to hold the two parts together. Next, using a sharp panel saw. 48 Novemher/December 1994 Wixxiworkcr's Journal |


