Woodworker's Journal 1994-18-6, страница 49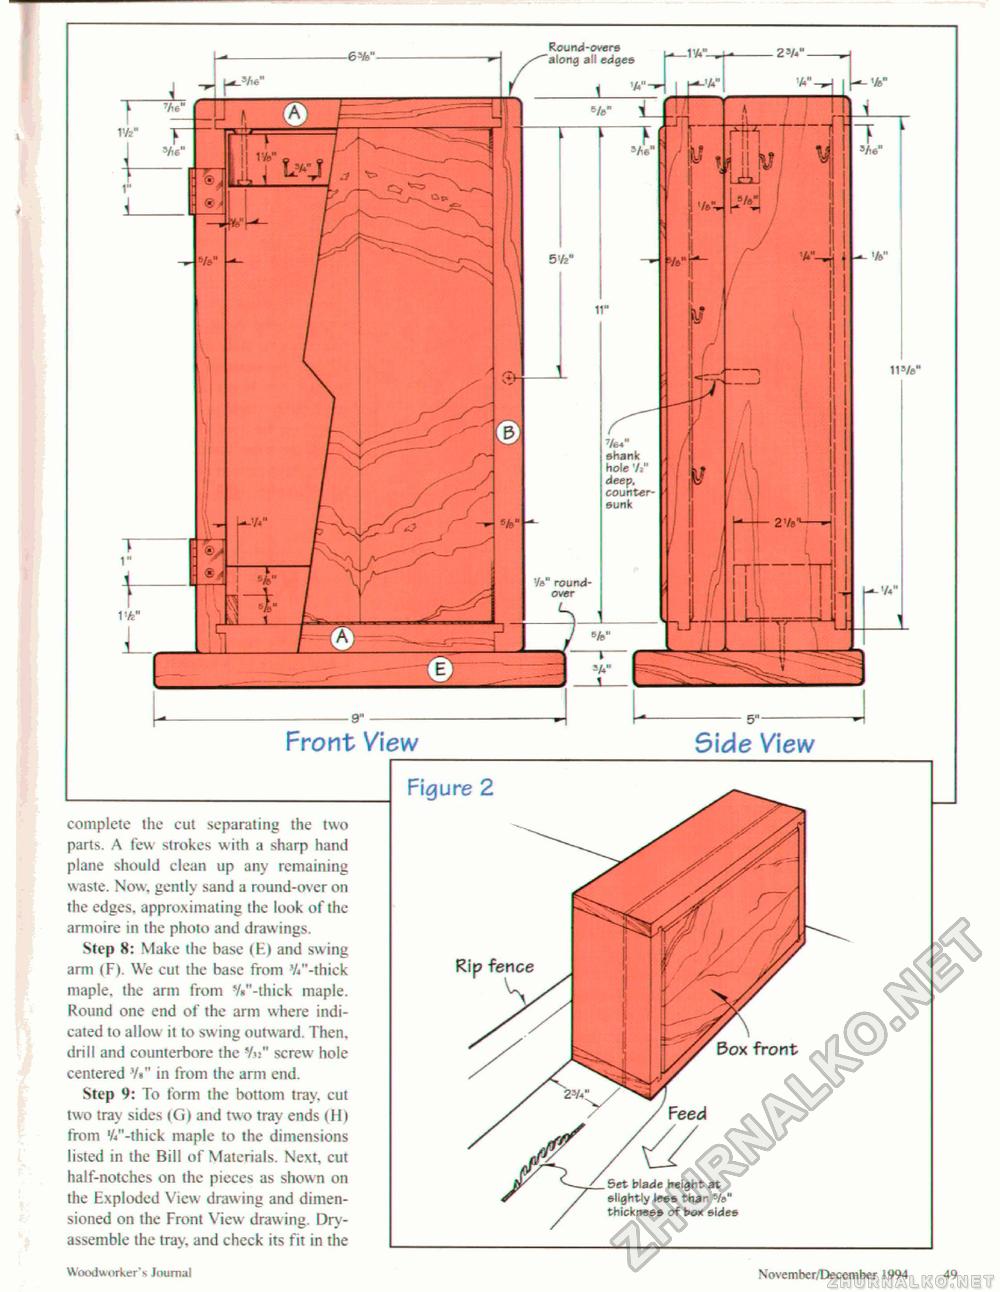
Front View S\de View complete the cut separating the two parts. A few strokes w ith a sharp hand plane should clean up any remaining waste. Now. gently sand a round-over on the edges, approximating the look of the armoire in the photo and drawings. Step 8: Make the base (Hi and swing arm (F). We cut the base from '//'-thick maple, the arm from '//'-thick maple. Round one end of the arm where indicated to allow it to swing outward. Then, drill and counterbore the 'Aj" screw hole centered 7«" in from the arm end. Step 9: To form the bottom tray, cut two tray sides (G) and two tray ends <H» from '//'-thick maple to the dimensions listed in the Bill of Materials. Next, cut half-notches on the pieces as shown on the Exploded View drawing and dimensioned on the Front View draw ing. Dry-assemble the tray, and check its fit in the Figure 2 Rip fence Box front _ Set Made height at slightly less than thickness of box sides Woodworker s Journal Novembcr/December 1994 1<1 |


