Woodworker's Journal 1994-18-6, страница 43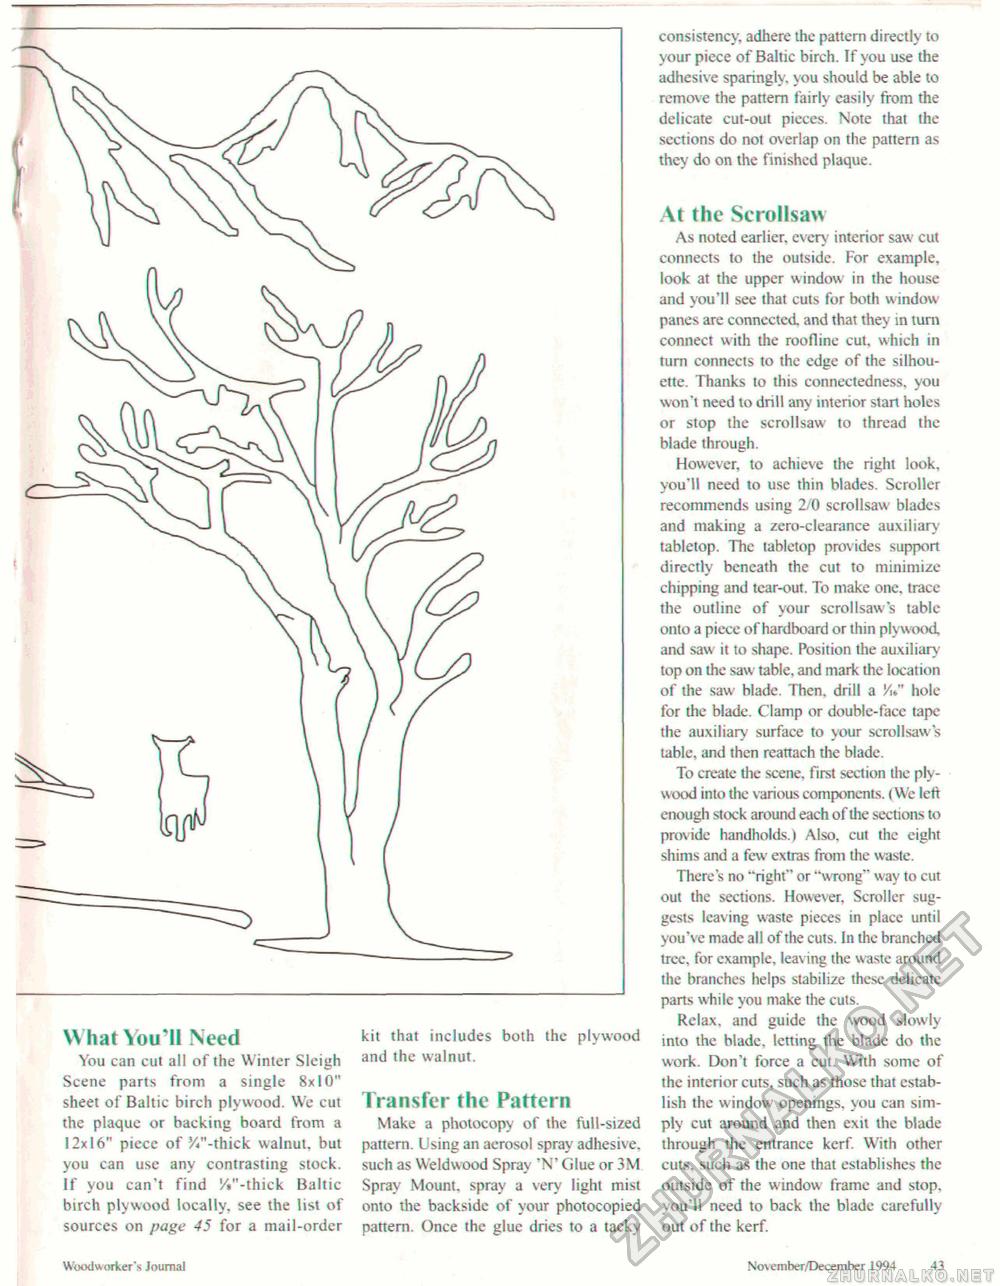
What You'll Need You can cut all of the Winter Sleigh Scene parts from a single 8x10" sheet of Baltic birch plywood, Wc cut the plaque or backing board from a 12x16" piece of 3/«"-thick walnut, but you can use any contrasting stock. If you can't find /«"-thick Baltic birch plywood locally, see the list of sources on page 45 for a mail-order kit that includes both the plywood and the walnut. Transfer the Pattern Make a photocopy of the full-sized pattern. Using an aerosol spray adhesive, such as Weldwood Spray 'N' Glue or 3M Spray Mount, spray a very light mist onto the backside of your photocopied pattern. Once the glue dries to a tacky consistency, adhere the pattern directly to your piece of Baltic birch. If you use the adhesiv e sparingly, you should be able to remove the pattern fairly easily from the delicate cut-out pieces. Note that the sections do not overlap on the pattern as they do on the finished plaque. At the Scroll saw As noted earlier, every interior saw cut connects to the outside. For example, look at the upper window in the house and you'll see that cuts for both w indow panes are connected and that they in turn connect with the roofline cut, which in turn connects to the edge of the silhouette. Thanks to this connectedness, you won't need to drill any interior start holes or stop the scrollsaw to thread the blade through. However, to achieve the right look, you'll need to use thin blades. Scroller recommends using 2/0 scrollsaw blades and making a zero-clearance auxiliary tabletop. The tabletop provides support directly beneath the cut to minimize chipping and tear-out. To make one. trace the outline of your scrollsaw's table onto a piece of hardboard or thin plywood and saw it to shape. Position the auxiliary top on the saw table, and mark the location of the saw blade. Then, drill a M*" hole for the blade. Clamp or double-face tape the auxiliary surface to your scrollsaw 's table, and then reattach the blade. To create the scene, first section the plywood into the various components. (We left enough stock around each of the sections to provide handholds.) Also, cut the eight shims and a few extras from the waste. There's no "right" or "wrong"' way to cut out the sections. However, Scroller suggests leaving waste pieces in place until you've made all of the cuts. In the branched tree, for example, leaving the waste around the branches helps stabilize these delicate parts while you make the cuts. Relax, and guide the wood slowly into the blade, letting the blade do the work. Don't force a cut. With some of the interior cuts, such as those that establish the window openings, you can simply cut around and then exit the blade through the entrance kerf. With other cuts, such as the one that establishes the outside of the window frame and stop, you'll need to back the blade carefully out of the kerf. Woodworker s Journal Novembcr/December 1994 1<1 |


