Woodworker's Journal 1994-18-6, страница 40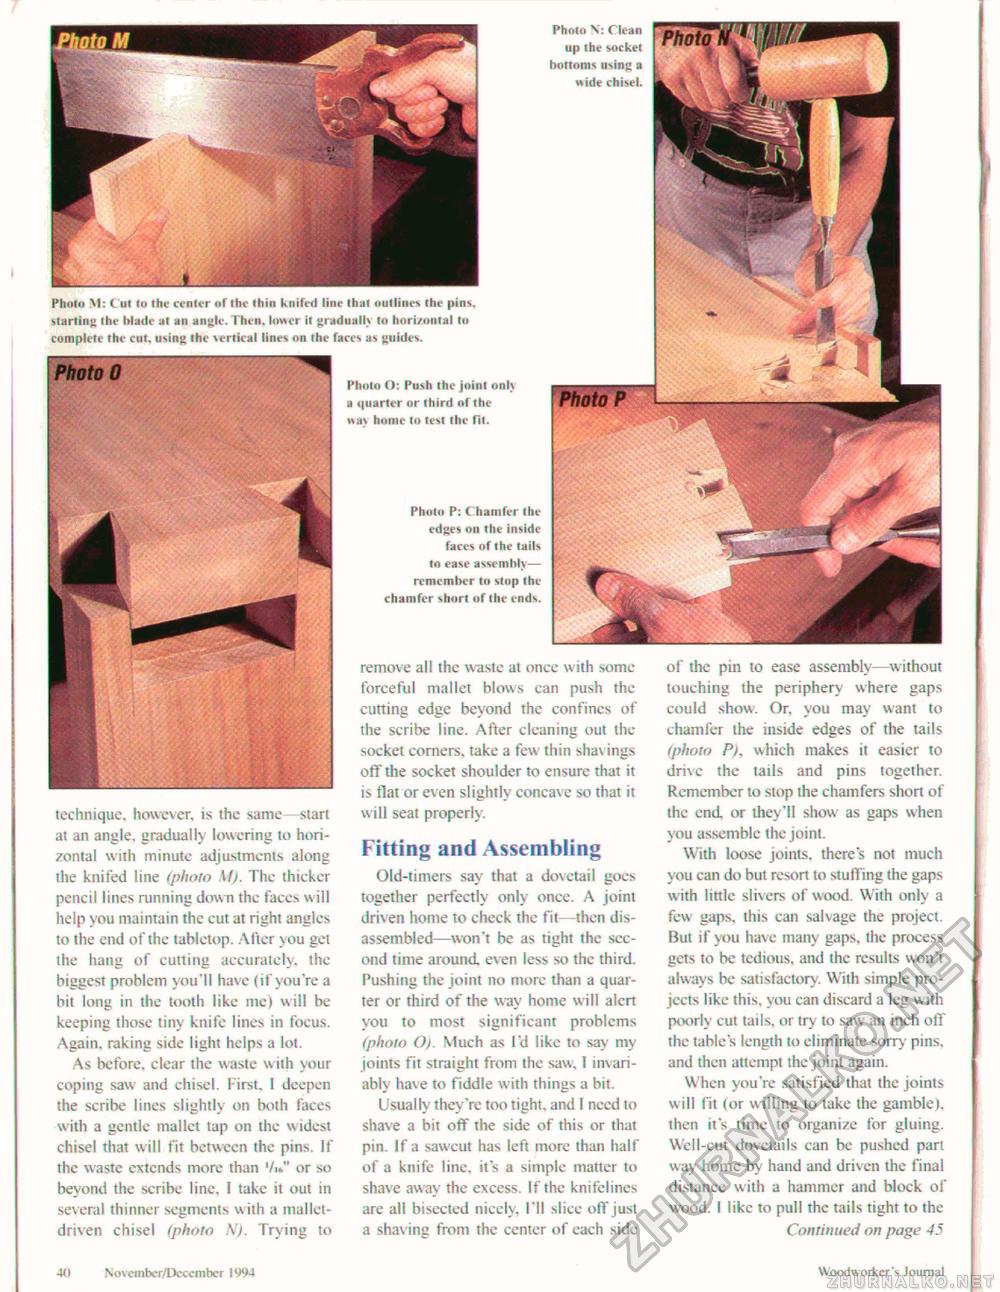
Photo V Clean up the socket bottoms using a Jr wide chisel. Photo VI: Cut to the center of the thin knifed line that outlines the pins, starting the blade at an angle. Then, lower it gradually to horizontal to complete the cut. using the vertical lines on the faces as guides. Photo 0 % technique, however, is the same start at an angle, gradually lowering to horizontal with minute adjustments along the knifed line (photo M). The thicker pencil lines running down the faces will help you maintain the cut at right angles to the end of the tabletop. After you get the hang of cutting accurately, the biggest problem you'll have (if you're a bit long in the tooth like me) will be keeping those tiny knife lines in focus. Again, raking side light helps a lot. As before, clear the waste with your coping saw and chisel. First, I deepen the scribe lines slightly on both faces with a gentle mallet tap on the widest chisel that will fit between the pins. If the waste extends more than '/i»" or so beyond the scribe line, I take it out in several thinner segments with a mallet-driven chisel (photo N). Trying to Photo O: Push the joinl only a quarter or third of the wax home to test the fit. Photo P: Chamfer the edges on the inside faces of the tails to ease assembly— remember to stop the chamfer short of the ends. remove all the waste at once with some forceful mallet blows can push the cutting edge beyond the confines of the scribe line. After cleaning out the socket corners, take a few thin shav ings off the socket shoulder to ensure that it is flat or even slightly concave so that it will seat properly. Fitting and Assembling Old-timers say that a dovetail goes together perfectly only once, A joint driven home to check the fit then disassembled—won't be as tight the second time around even less so the third. Pushing the joint no more than a quarter or third of the way home will alert you to most significant problems (photo O). Much as I'd like to say my joints fit straight from the saw, I invariably have to fiddle with things a bit. Usually they're too tight, and I need to shave a bit off the side of this or that pin. If a sawcut has left more than half of a knife line, it's a simple matter to shave away the excess. If the knifelines are all bisected nicely. I'll slice off just a shavinc from the center of each side of the pin to ease assembly—without touching the periphery where gaps could show. Or, you may want to chamfer the inside edges of the tails (photo P), which makes it easier to drive the tails and pins together. Remember to slop the chamfers short of the end or they'll show as gaps when you assemble the joint. With loose joints, there's not much you can do but resort to stuffing the gaps with little slivers of wood. With only a few gaps, this can salvage the project. But if you have many gaps, the process gets to be tedious, and the results won't always be satisfactory. With simple projects like this, you can discard a leg with poorly cut tails, or try to saw an inch off the table's length to eliminate sorry pins, and then attempt the joint again. When you're satisfied that the joints will fit (or willing to take the gamble), then its time to organize for gluing. Well-cut dovetails can be pushed part way home by hand and driven the final distance with a hammer and block of wood. I like to pull the tails tight to the Continued on page 45 40 November/December 1994 Woodw orker's Journal I |


