Woodworker's Journal 1994-18-6, страница 38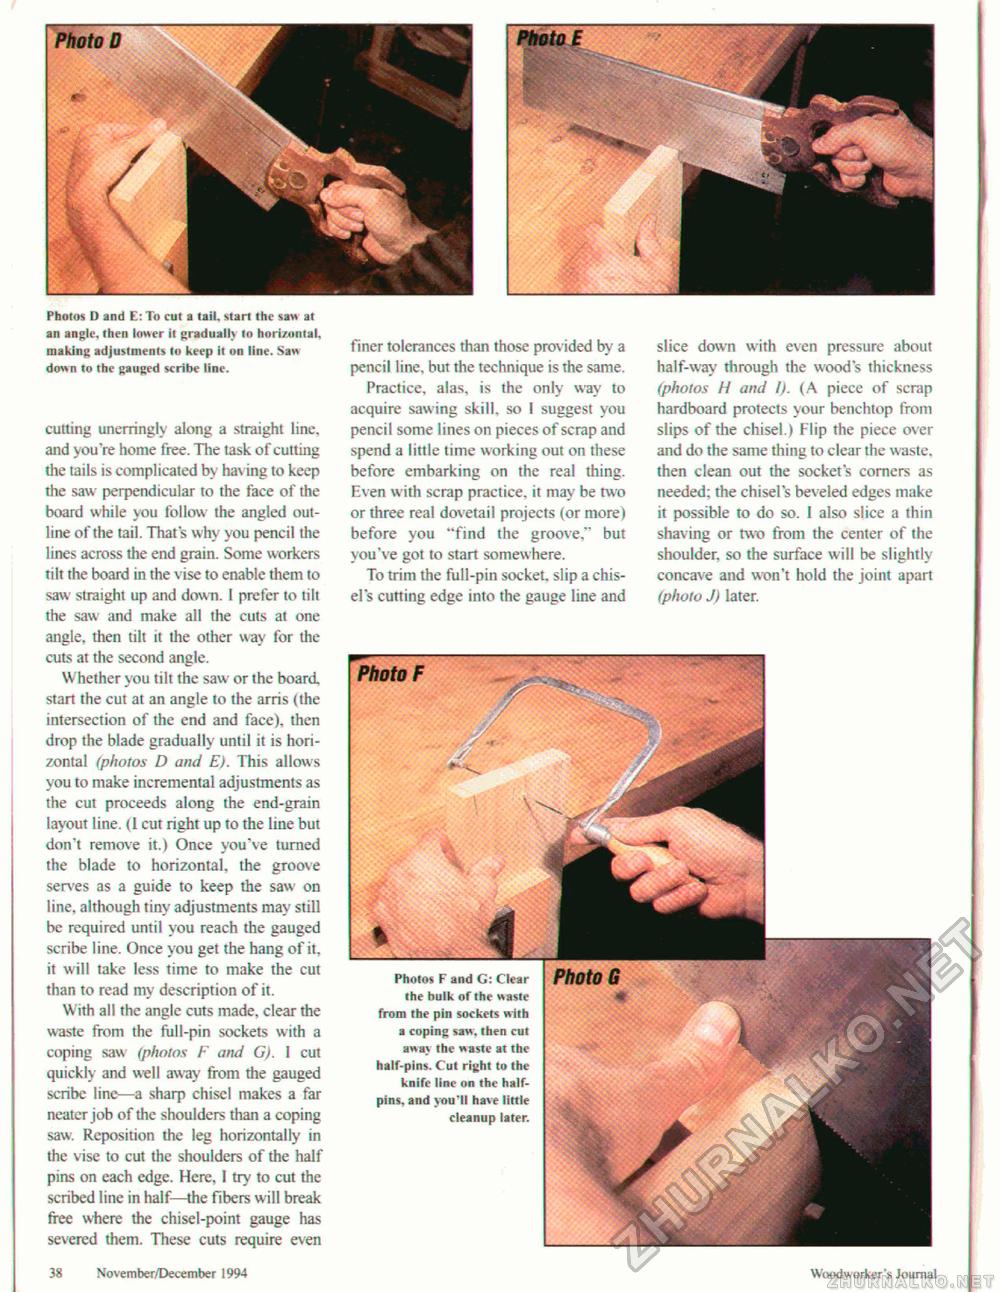
Photos D and E: To cut a tail, start the saw at an angle, then loner it gradual!) to horizontal, making adjustments to keep it on line. San down to the gauged scribe line. cutting unerringly along a straight line, and you're home free. The task of cutting the tails is complicated by having to keep the saw perpendicular to the face of the board while you follow the angled outline of the tail. That's why you pencil the lines across the end grain. Some workers tilt the board in the vise to enable them to saw straight up and down. I prefer to tilt the saw and make all the cuts at one angle, then tilt it the other way for the cuts at the second angle. Whether you tilt the saw or the board start the cut at an angle to the arris (the intersection of the end and face), then drop the blade gradually until it is horizontal (photos D and E). This allows you to make incremental adjustments as the cut proceeds along the end-grain layout line. (1 cut right up to the line but don't remove it.) Once you've turned the blade to horizontal, the groove serves as a guide to keep the saw on line, although tiny adjustments may still be required until you reach the gauged scribe line. Once you get the haug of it, it will take less time to make the cut than to read my description of it. With all the angle cuts made, clear the waste from the full-pin sockets with a coping saw (photos F and G). i cut quickly and well away from die gauged scribe line—a sharp chisel makes a far neater job of the shoulders than a coping saw. Reposition the leg horizontally in the vise to cut the shoulders of the half pins on each edge. Here. I try to cut the scribed line in half—the fibers will break free where the chisel-point gauge has severed them. These cuts require even finer tolerances than those prov ided by a pencil line, but the technique is the same. Practice, alas, is the only way to acquire saw ing skill, so I suggest you pencil some lines on pieces of scrap and spend a little time working out on these before embarking on the real thing. Even with scrap practice, it may be two or three real dovetail projects (or more) before you "find the groove," but you've got to start somewhere. To trim the full-pin socket, slip a chisel's cutting edge into the gauge line and slice down with even pressure about half-way through the wood's thickness (photos H and I). (A piece of scrap hardboard protects your benchtop from slips of the chisel.) Flip the piece over and do the same thing to clear the waste, then clean out the socket's corners as needed; the chisel's beveled edges make it possible to do so. I also slice a thin shaving or two from the center of the shoulder, so the surface will be slightly concave and won't hold the joint apart (photo J) later. 38 November/December 1994 Woodw orker's Journal I Photos F and G: Clear the hulk of the waste from the pin sockets with a coping saw. then cut awav the waste at the half-pins. Cut right to the knife line on the half-pins. and you'll have little cleanup later. Photo G Photo F |


