Woodworker's Journal 1994-18-6, страница 36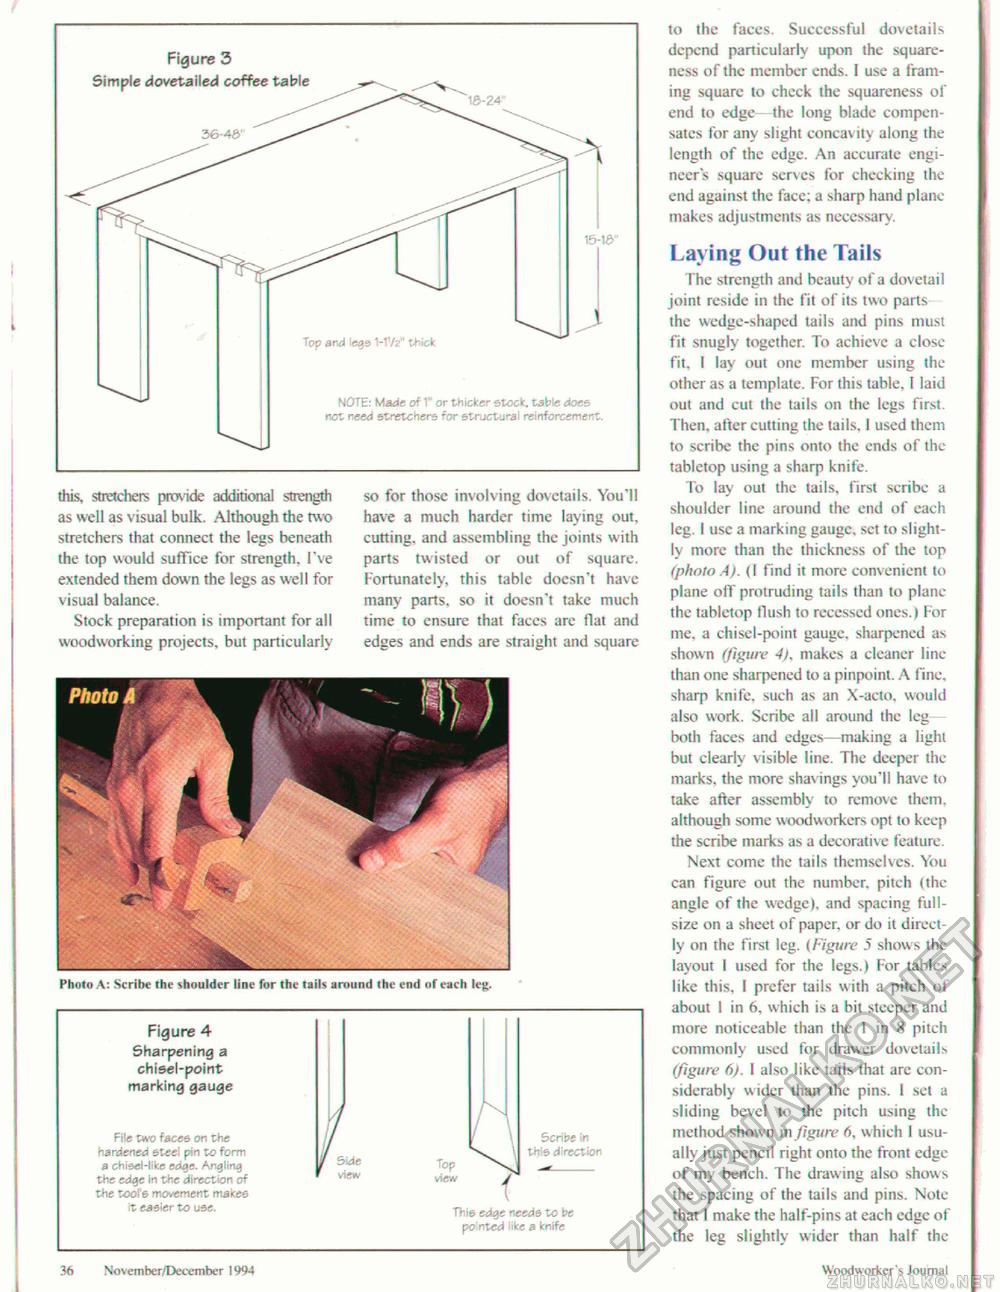
this, stretchers provide additional strength as well as visual bulk. Although the two stretchers that connect the legs beneath the top would suffice for strength. I've extended them down the legs as well for visual balance. Stock preparation is important for all woodworking projects, but particularly so for those involving dovetails. You'll have a much harder time laying out, cutting, and assembling the joints with parts twisted or out of square. Fortunately, this table doesn't have many parts, so it doesn't take much time to ensure that faces are flat and edges and ends are straight and square Photo A: Scribe the shoulder line for the tails around the end of each leg. Figure 4 Sharpening a chisel-point marking gauge File two faces on the hardened steel pin to form a chisel-like edge. Angling the edqe in the direction of the tool's movement makes it easier to use. Side Top view f Scribe in this direction This edge needs to be pointed like a knife to the faces. Successful dovetails depend particularly upon the squareness of the member ends. I use a framing square to check the squareness of end to edge—the long blade compensates for any slight concavity along the length of the edge. An accurate engineer's square serves for checking the end against the face; a sharp hand plane-makes adjustments as necessary. Laying Out the Tails The strength and beauty of a dovetail joint reside in the fit of its two parts the wedge-shaped tails and pins must fit snugly together. To achieve a close fit, 1 lay out one member using (he other as a template. For this table, I laid out and cut the tails on the legs First. Then, after cutting the tails. 1 used them to scribe the pins onto the ends of the tabletop using a sharp knife. To lay out the tails, first scribe a shoulder line around the end of each leg. I use a marking gauge, set to slightly more than the thickness of the top (photo A). (I find it more convenient to plane off protruding tails than to plane the tabletop flush to recessed ones.) For me. a chisel-point gauge, sharpened as shown (figure 4). makes a cleaner line than one sharpened to a pinpoint. A fine, sharp knife, such as an X-acto, would also work. Scribe all around the leg both faces and edges—making a light but clearly visible line. The deeper the marks, the more shav ings you'll have to take after assembly to remove them, although some woodworkers opt to keep the scribe marks as a decorative feature. Next come the tails themselves. You can figure out the number, pitch (the angle of the wedge), and spacing full-size on a sheet of paper, or do it directly on the first leg. (Figure 5 shows the layout I used for the legs.) For tables like this, I prefer tails with a pitch of about I in 6, which is a bit steeper and more noticeable than the I in 8 pitch commonly used for drawer dovetails (figure 6). I also like tails that are considerably wider than the pins. I set a sliding bevel to the pitch using the method shown m figure 6, which I usually just pencil right onto the front edge of my bench. The drawing also shows the spacing of the tails and pins. Note that I make the half-pins at each edge of the leg slightly wider than half the 36 Novemher/December 1994 Wixxiworkcr's Journal |


