Woodworker's Journal 1994-18-6, страница 37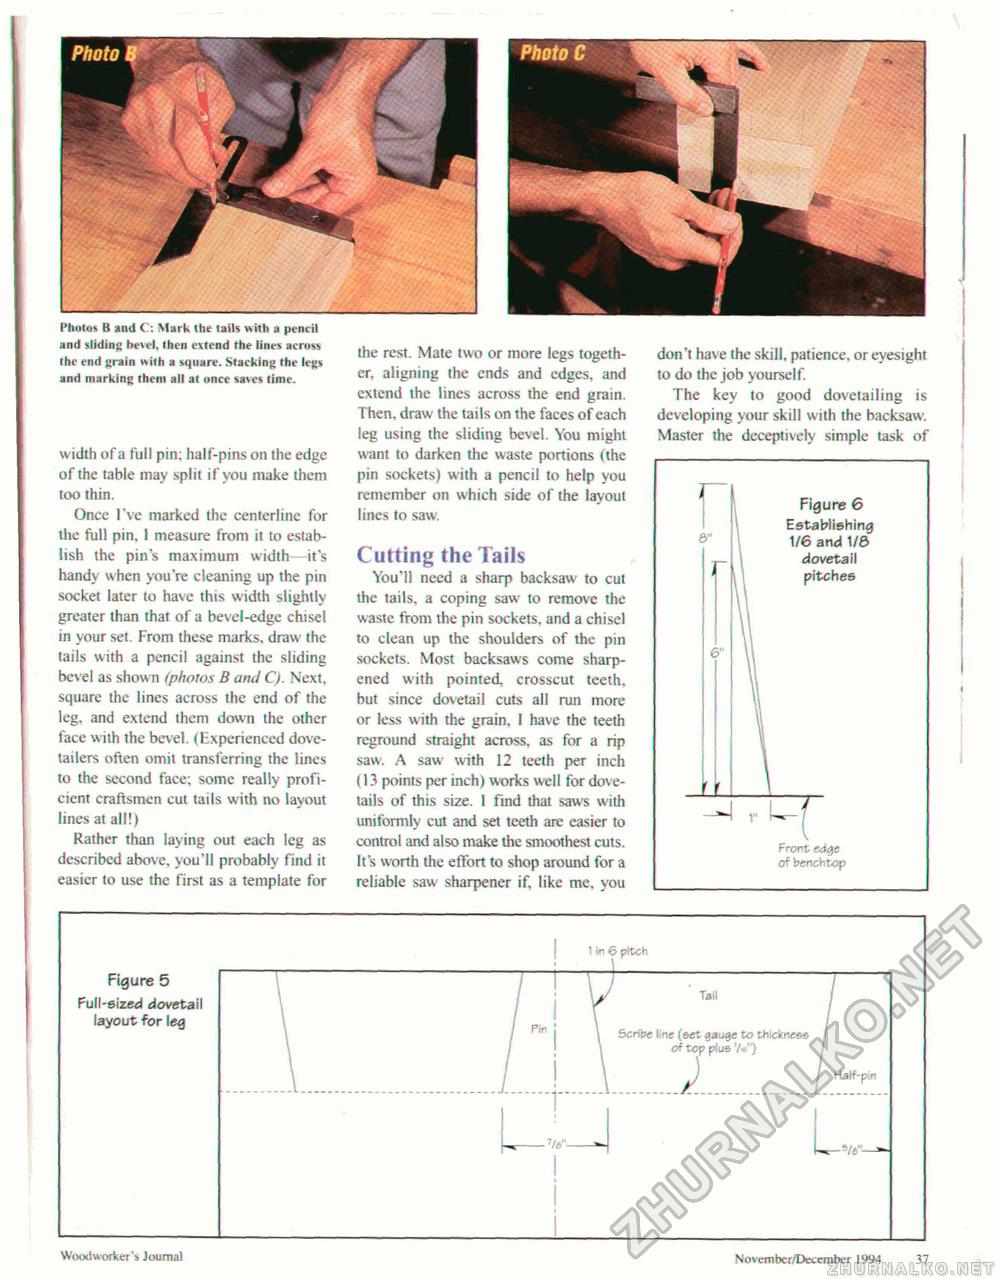
Photo C I'hutos R and C: Mark the tails with a pencil and sliding bevd, then extend the lines across the end grain with » square. Stacking the legs and marking them all a( imce saves time. width of a full pin; half-pins on the edge of the table may split if you make them too thin. Once I've marked the centerline for the full pin, I measure from it to establish the pin's maximum width—it's handy when you're cleaning up the pin socket later to have this width slightly greater than that of a bevel-edge chisel in your set. From these marks, draw the tails with a pencil against the sliding bevef as shown (photos B and C). Next, square the lines across the end of the leg, and extend them down the other face with the bevel. (Experienced dove-tailers often omit transferring the lines to the second face; some really proficient craftsmen cut tails with no layout lines at all!) Rather than laying out each leg as described above, you'll probably find it easier to use the first as a template for the rest. Mate two or more legs together, aligning the ends and edges, and extend the lines across the end grain. Then, draw the tails on the faces of each leg using the sliding bevel. You might want to darken the waste portions (the pin sockets) with a pencil to help you remember on which side of the layout lines to saw. Cutting the Tails You'll need a sharp backsaw to cut the tails, a coping saw to remove the waste from the pin sockets, and a chisel to clean up the shoulders of the pin sockets. Most backsaws come sharpened with pointed, crosscut teeth, but since dovetail cuts all run more or less with the grain. I have the teeth reground straight across, as for a rip saw. A saw with 12 teeth per inch (13 points per inch) works well for dovetails of this size. 1 find that saws with uniformly cut and set teeth are easier to control and also make the smoothest cuts. It's worth the effort to shop around for a reliable saw sharpener if, like me, you don't have the skill, patience, or eyesight to do the job yourself. The key to good dovetailing is developing your skill with the backsaw. Master the deceptively simple task of Figure 6 Establishing 1/6 and 1/6 dovetail pitches Front edge of bcnchtop Figure 5 Full-sized dovetail layout for leg 1 in 6 pitch Tail Scribe line (set gauge to thickness j of top plus'/«") / I Half-pin L-s/e- Woodworker s Journal Novembcr/December 1994 1<1 |


