Woodworker's Journal 1994-18-6, страница 39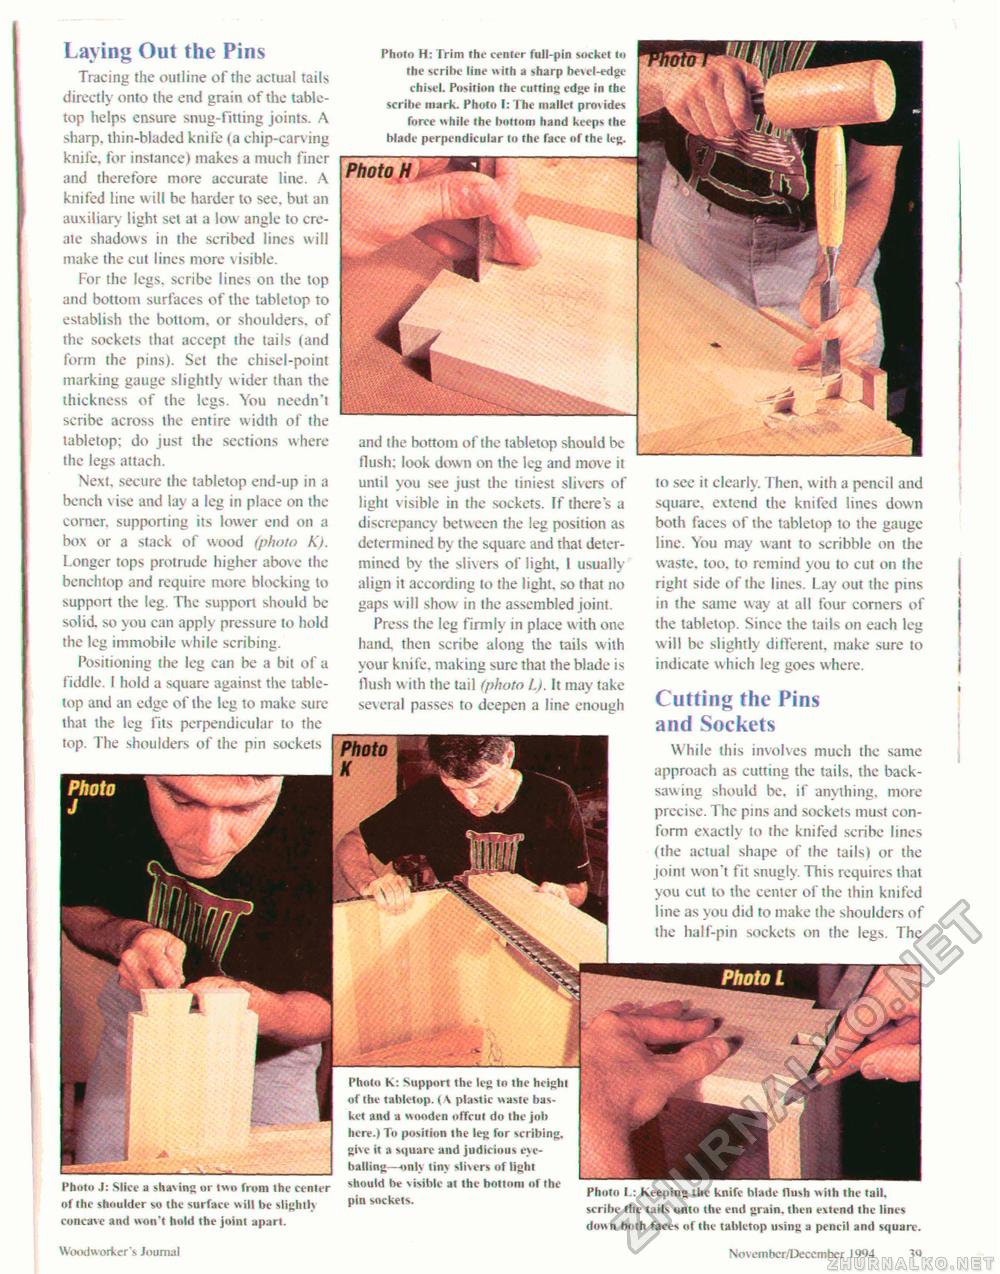
Laying Out the Pins Tracing the outline of the actual tails directly onto the end grain of the table-top helps ensure snug-fitting joints. A sharp, thin-bladed knife (a chip-carving knife, for instance) makes a much finer and therefore more accurate line. A knifed line will be harder to see, but an auxiliary light set at a low angle to create shadows in the scribed lines will make the cut lines more visible. For the legs, scribe lines on the top and bottom surfaces of the tabletop to establish the bottom, or shoulders, of the sockets that accept the tails {and form the pins). Set the chisel-point marking gauge slightly wider than the thickness of the legs. You needn't scribe across the entire width of the tabletop; do just the sections where the legs attach. Next, secure the tabletop end-up in a bench vise and lay a leg in place on the corner, supporting its lower end on a box or a stack of wood (photo K). Longer tops protrude higher above the benchtop and require more blocking to support the leg. The support should be solid so you can apply pressure to hold the leg immobile while scribing. Positioning the leg can be a bit of a fiddle. I hold a square against the table-top and an edge of the leg to make sure that the leg fits perpendicular to the top. The shoulders of the pin sockets Photo J Photo H; Trim the center full-pin socket to the scribe line with a sharp besel-edge chisel. Position the cutting edge in the scribe mark. Photo I: Ihe mallet provides force while the bottom hand keeps the blade perpendicular to the face of the leg. Photo H & and the bottom of the tabletop should be flush; look down on the leg and move it until you see just the tiniest slivers of light visible in the sockcts. Tf there's a discrepancy between the leg position as determined by the square and thai determined by the slivers of light, I usually align it according to the light. so that no gaps will show in the assembled joint. Press the leg Firmly in place with one hand then scribe along the tails with your knife, making sure that the blade is flush with the tail (photo L). It may take several passes to deepen a line enough Photo to see it clearly. Then, with a pencil and square, extend the knifed lines down both faces of the tabletop to the gauge line. You may want to scribble on the waste, too. to remind you to cut on the right side of the lines. Lay out the pins in the same way at all four corners of the tabletop. Since the tails on each leg w ill be slightly different, make sure to indicate which leg goes where. Cutting the Pins and Sockets While this involves much the same approach as cutting the tails, the back-sawing should be. if anything, more precise. The pins and sockets must conform exactly to the knifed scribe lines (the actual shape of the tails) or the joint won't fit snugly. This requires that you cut to the centcr of the thin knifed line as you did to make the shoulders of the half-pin sockcts on the legs. The Photo L Photo L: Keeping the knife blade flush with ihe tail, scribe the tails onto the end grain, then extend the lines down both faces of the tabletop using a pencil and square. HP - Photo J: Slice a shaving or two from Ihe center of the shoulder so the surface will be slight!} concave and won't hold the joint apart. Photo K: Support the leg to the heighi of the tabletop. ( A plastic waste basket and a wooden offrut do Ihe job here.) To position the leg for scribing, give it a square and judicious eye-balling—only liny slivers of light should be visible at the bottom of the pin sockets. Woodworker s Journal Novembcr/December 1994 1<1 |


