Woodworker's Journal 1994-18-6, страница 58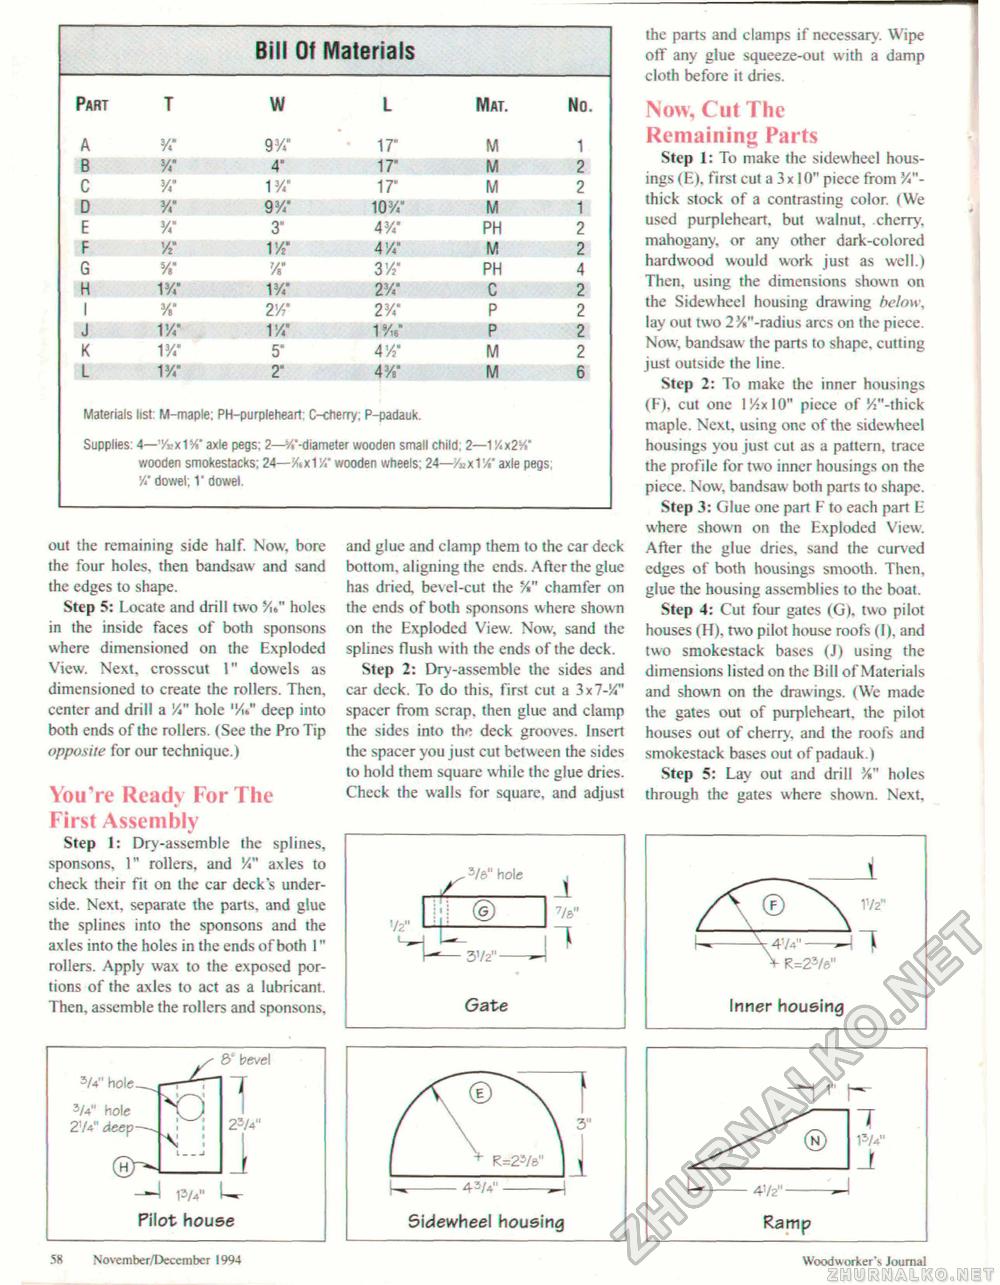
out the remaining side half. Now, bore the four holes, then bandsaw and sand the edges to shape. Step 5: Locate and drill two Yit>" holes in the inside faces of both sponsons where dimensioned on the Exploded View. Next, crosscut 1" dowels as dimensioned to create the rollers. Then, center and drill a %" hole "/*" deep into both ends of the rollers. (See the Pro Tip opposite for our technique.) You're Ready For The First Assembly Step 1: Dry-assemble the splines, sponsons, 1" rollers, and V" axles to check their fit on the car deck's underside. Next, separate the parts, and glue the splines into the sponsons and the axles into the holes in the ends of both 1" rollers. Apply wax to the exposed portions of the axles to act as a lubricant. Then, assemble the rollers and sponsons. and glue and clamp them to the car deck bottom, aligning the ends. After the glue has dried bevel-cut the 54" chamfer on the ends of both sponsons where shown on the Exploded View. Now, sand the splines flush with the ends of the deck. Step 2: Dry-assemble the sides and car deck. To do this, first cut a 3 * 1-V" spacer from scrap, then glue and clamp the sides into the deck grooves. Insert the spacer you just cut between the sides to hold them square while the glue dries. Check the walls for square, and adjust 3/e" hole j jl__i Gate 3/4" hole- 3/4" hole 2W deep- (hH r^l I I Al : 6' bevel T 23/4" i p/v L«- Pilot house Sidewheel housing the parts and clamps if necessary. Wipe off any glue squeeze-out with a damp cloth before it dries. Now, Cut The Remaining Parts Step 1: To make the sidewheel housings (E), first cut a 3x 10" piece from V"-thick stock of a contrasting color. (We used purpleheart. but walnut, cherry, mahogany, or any other dark-colored hardwood would work just as well.) Then, using the dimensions shown on the Sidewheel housing drawing below, lay out two 2 %"-radius arcs on the piece. Now. bandsaw the parts to shape, cutting just outside the line. Step 2: To make the inner housings (F), cut one l/2xl0" piece of ^"-thick maple. Next, using one of the sidewheel housings you just cut as a pattern, trace the profile for two inner housings on the piece. Now, bandsaw both parts to shape. Step 3: Glue one part F to each part E where shown on the Exploded View. After the glue dries, sand the curved edges of both housings smooth. Then, glue the housing assemblies to the boat. Step 4: Cut four gates (G). two pilot houses (H), two pilot house roofs (I), and two smokestack bases (J) using the dimensions listed on the Bill of Materials and shown on the drawings. (We made the gates out of purpleheart. the pilot houses out of cherry, and the roofs and smokestack bases out of padauk.) Step 5: Lay out and drill Y»" holes through the gates where shown. Next,
41/2" Ramp 58 Novemher/December 1994 Wixxiworkcr's Journal |
|||||||||||||||||||||||||||||||||||||||||||||||||||||||||||||||||||||||||||||||||||||||||||||||||||||||||


