Woodworker's Journal 2001-25-1, страница 39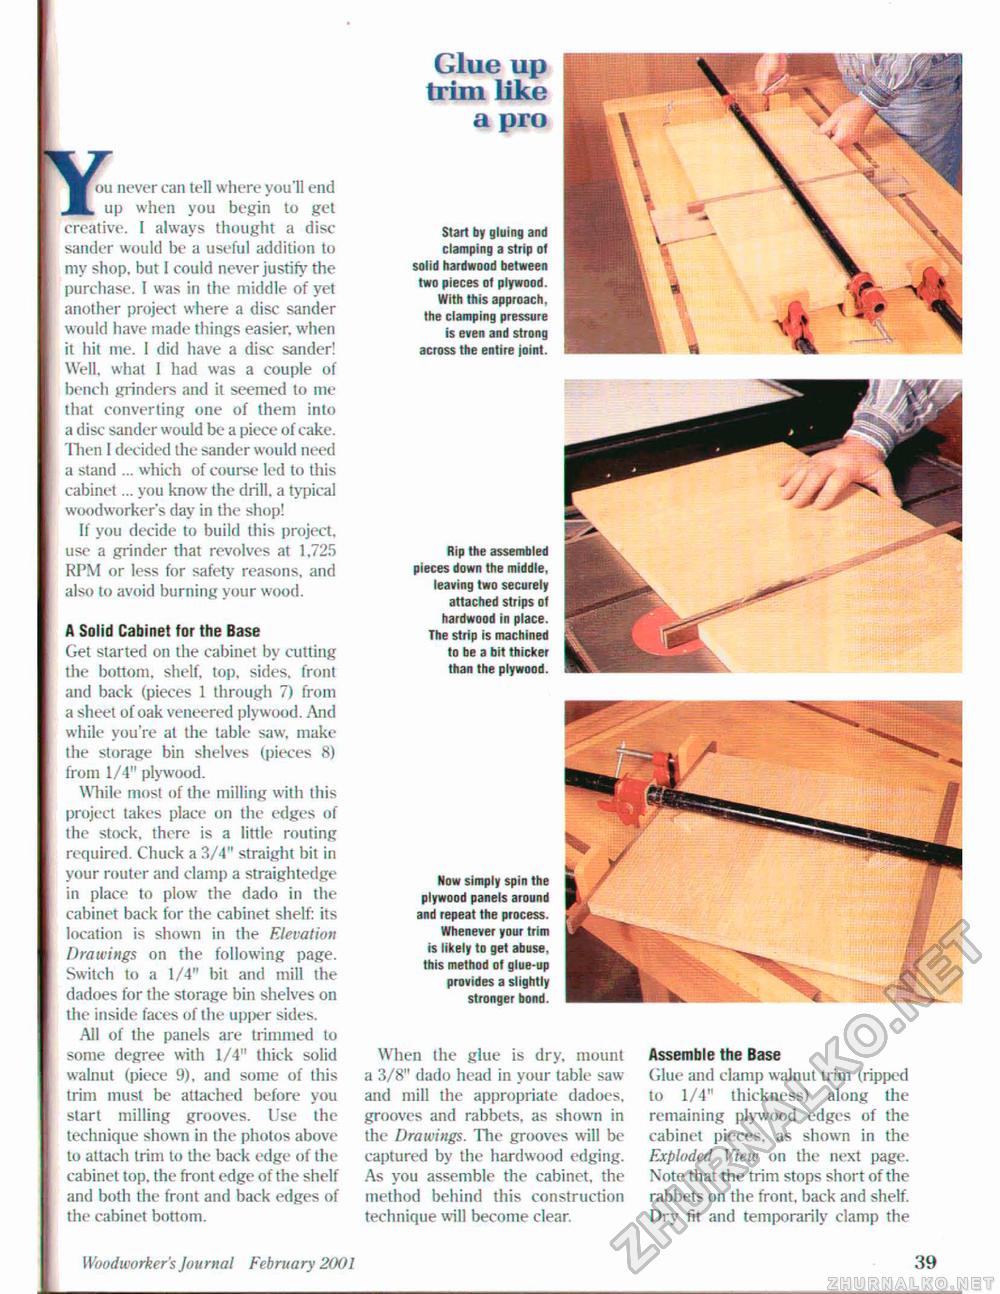
ou never can tell where you 11 end JL up when you begin to get creative. I always thought a disc sander would be a useful addition to I my shop, but I could never justify the purchase. I was in the middle of yet I another project where a disc sander would have made things easier, when it hit me. I did have a disc sander! Well, what 1 had was a couple of bench grinders and it seemed to me that converting one of them into | a disc sander would be a piece of cake. | Then I decided the sander would need a stand ... which of course led to this cabinet ... you know7 the drill, a typical woodworker's day in the shop! If you decide to build this project, use a grinder tiiat revolves at 1,725 RPM or less for safety reasons, and also to avoid burning your wood. A Solid Cabinet tor the Base Get started on the cabinet by cutting the bottom, shelf, top, sides, front and back (pieces 1 through 7) from a sheet of oak veneered plywood. And while you're at the table saw, make the storage bin shelves (pieces 8) from 1/4" plywood. While most of the milling with this project takes place on the edges of the stock, there is a little routing required. Chuck a 3/4" straight bit in your router and clamp a straightedge 1 in place to plow the dado in the i cabinet back for the cabinet shelf: its location is shown in the Elevation Drawings on the following page. Switch to a 1/4" bit and mill the dadoes for the storage bin shelves on the inside faces of the upper sides. .All of the panels are trimmed to | some degree with 1/4" thick solid ' walnut (piece 9). and some of this ; trim must be attached before you I start milling grooves. Use the ! technique shown in the photos above to attach trim to the back edge of the cabinet top, the front edge of the shelf and both the front and back edges of the cabinet bottom. Glue up trim like a pro Start by gluing and clamping a strip of solid hardwood between two pieces of plywood. With this approach, the clamping pressure is even and strong across the entire joint. Rip the assembled pieces down the middle, leaving two securely attached strips of hardwood in place. The strip is machined to be a bit thicker than the plywood. Now simply spin the plywood panels around and repeat the process. Whenever your trim is likely to get abuse, this method of glue-up provides a slightly stronger bond. When the glue is dry, mount a 3/8" dado head in your table saw and mill the appropriate dadoes, grooves and rabbets, as shown in the Drawings. The grooves will be captured by the hardwood edging. As you assemble the cabinet, the method behind this construction technique will become clear. Assemble the Base Glue and clamp walnut trim (ripped to 1/4" thickness) along the remaining plywood edges of the cabinet pieces, as shown in the Exploded View on the next page. Note that the trim stops short of the rabbets on the front, back and shelf. Dry fit and temporarily clamp the Woodworker's Journal February 2001 39 |


