Woodworker's Journal 2001-25-2, страница 54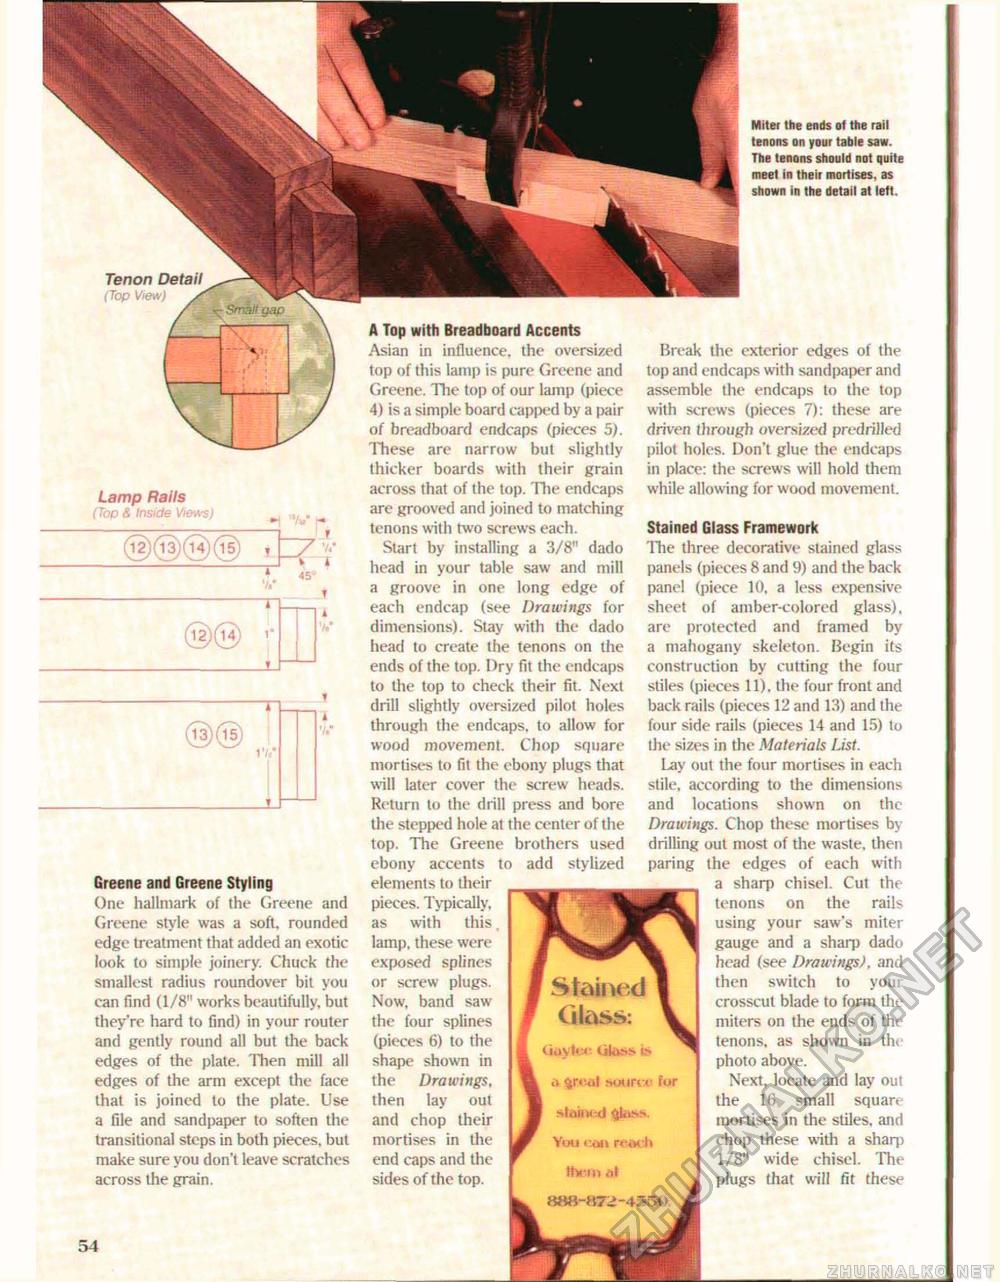
Miter the ends of the rail tenons on your table saw. The tenons should not quite meet in their mortises, as shown in the detail at left. Lamp Rails (Top & Inside Views) _,U ~7 7/ "> T t I 1V»* Greene and Greene Styling One hallmark of the Greene and Greene style was a soft, rounded edge treatment that added an exotic look to simple joinery. Chuck the smallest radius roundover bit you can find (1/8" works beautifully, but they're hard to find) in your router and gently round all but the back edges of the plate. Then mill all edges of the arm except the face that is joined to the plate. Use a file and sandpaper to soften the transitional steps in both pieces, but make sure you don't leave scratches across the grain. A Top with Breadboard Accents Asian in influence, the oversized top of this lamp is pure Greene and Greene. Hie top of our lamp (piece 4) is a simple board capped by a pair of breadboard endcaps (pieces 5). These are narrow but slightly thicker boards with their grain across that of the top. The endcaps are grooved and joined to matching tenons with two screws each. Start by installing a 3/8" dado head in your table saw and mill a groove in one long edge of each endcap (see Drawings for dimensions). Stay with the dado head to create the tenons on the ends of the top. Dry fit the endcaps to the top to check their fit. Next drill slightly oversized pilot holes through the endcaps. to allow for wood movement. Chop square mortises to fit the ebony plugs that will later cover the screw heads. Return to the drill press and bore the stepped hole at the center of the top. The Greene brothers used ebony accents to add stylized elements to their _ pieces. Typically, as with this, lamp, these were exposed splines or screw plugs. Now, band saw the four splines (pieces 6) to the shape shown in the Drawings, then lay out and chop their mortises in the end caps and the sides of the top. a lr<'ut MMtrce for stniu<-(.l You reach 54 Break the exterior edges of the top and endcaps with sandpaper and assemble the endcaps to the top with screws (pieces 7): these are driven through oversized predrilled pilot holes. Don't glue the endcaps in place: the screws will hold them while allowing for wood movement. Stained Glass Framework The three decorative stained glass panels (pieces 8 and 9) and the back panel (piece 10, a less expensive sheet of amber-colored glass), are protected and framed by a mahogany skeleton. Begin its construction by cutting the four stiles (pieces 11). the four front and back rails (pieces 12 and 13) and the four side rails (pieces 14 and 15) to Ihe sizes in the Materials List. Lay out the four mortises in each stile, according to the dimensions and locations shown on the Drawings. Chop these mortises by drilling out most of the waste, then paring the edges of each with _ a sharp chisel. Cut the tenons on the rails using your saw's miter gauge and a sharp dado head (see Drawings), and then switch to your crosscut blade to form the miters on the ends of the tenons, as shown in the photo above. Next, locate and lay out the 16 small square mortises in the stiles, and chop these with a sharp 1/8" wide chisel. The plugs (hat will fit these |


