Woodworker's Journal 2001-25-2, страница 55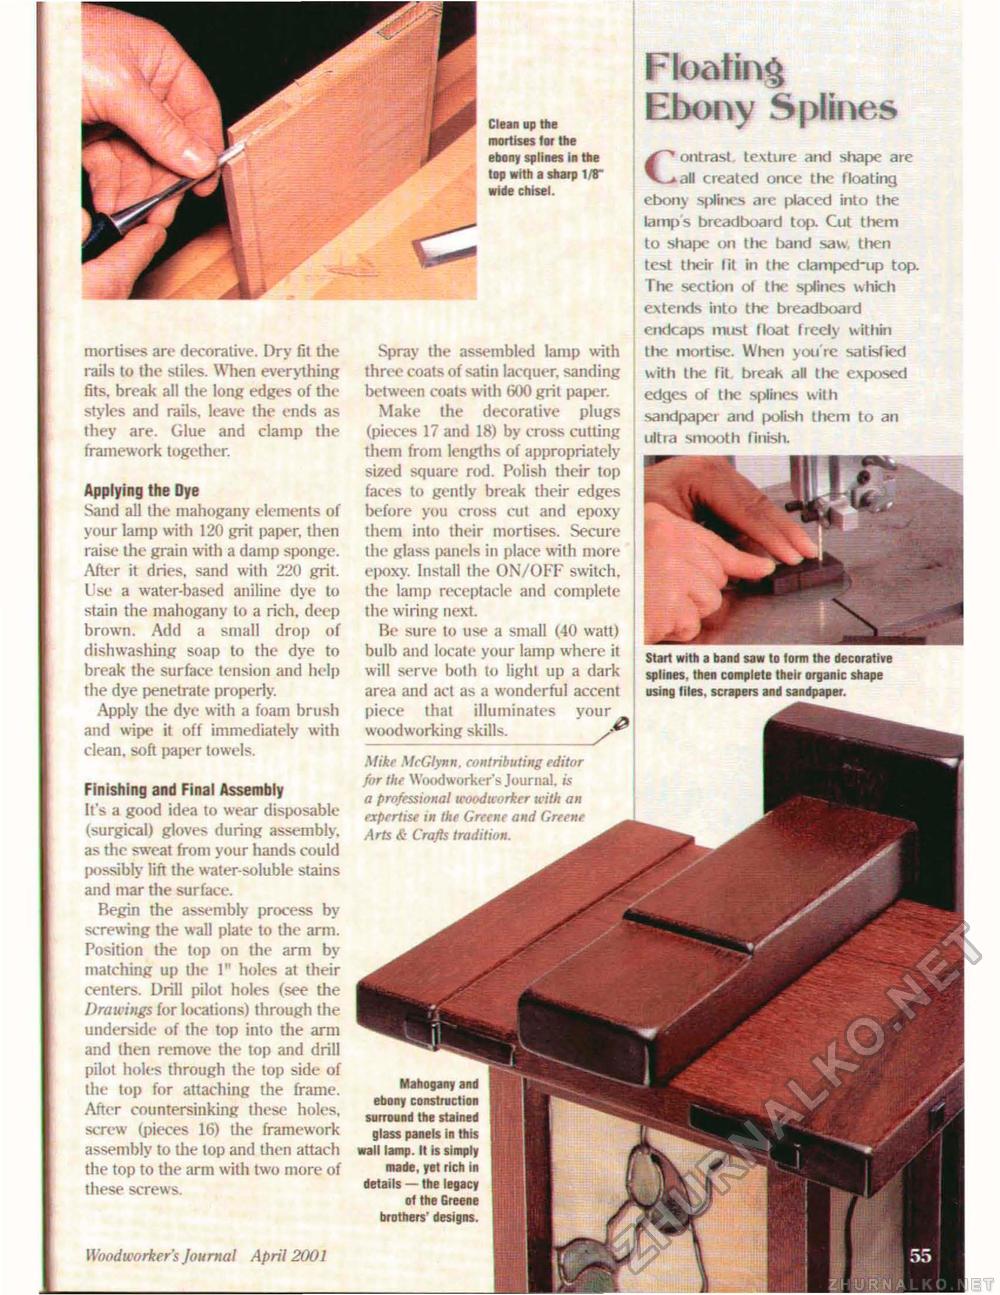
Clean up the mortises tor the ebony splines in the top with a sharp 1/8" wide chisel. Spray the assembled lamp with three coats of satin lacquer, sanding between coats with 600 grit paper. Make the decorative plugs (pieces 17 and 18) by cross cutting them from lengths of appropriately sized square rod. Polish their top faces to gently break their edges before you cross cut and epoxy them into their mortises. Secure the glass (>anels in place with more epoxy. Install the ON/OFF switch, the lamp receptacle and complete the wiring next. Be sure to use a small (40 watt) bulb and locate your lamp where it will serve both to light up a dark area and act as a wonderful accent piece that illuminates your woodworking skills. / Mike McGlynn. contributing editor for the Woodworker's Journal, is a professional woodworker with an expertise in the Greene and Greene & Crafts tradition. Contrast, texture arid shape are all created once the floating ebony seines are placed into the lamps breadboard top. Cut them to shape on tttc liar id saw. then test their tit in the clamped-up top. The section of the splines which extends into the breadboard endcaps must float freely within the mortise. Wlien you're satisfied with the fit break all the exposed edges of the splines wilh sandpaper and polish them to an ultra smooth finish. Start with a band saw to form the decorative splines, then complete their organic shape using files, scrapers and sandpaper. Mahogany and ebony construction surround the stained glass panels in this wall lamp. It is simply made, yet rich in details — the legacy of the Greene brothers' designs. Floating Ebony Splines mortises are decorative. Dry fit the rails to the stiles. When everything fits, break alt the long edges of the styles and rails, leave the ends as they are. Glue and clamp the framework together. Applying the Dye Sand all the mahogany elements of your lamp with 120 grit paper, then raise the grain with a damp sponge. After it dries, sand wilh 220 grit. Use a water-based aniline dye to stain the mahogany to a rich, deep brown. Add a small drop of dishwashing soap to the dye to break the surface tension and help the dye penetrate properly. Apply the dye with a foam brush and wipe it off immediately with clean, soft pajier towels. Finishing and Final Assembly It's a good idea to wear disposable (surgical) gloves during assembly, as the sweat from your hands could possibly lift the water-soluble stains and mar the surface. Begin the assembly process by screwing the wall plate to the arm. Position the top on the arm by matching up the 1" holes at their centers. Drill pilot holes (see the Drawings for locations) through the underside of the top into the arm and then remove the top and drill pilot holes through the top side of the lop for attaching the frame. After countersinking these holes, screw (pieces 16) the framework assembly to die lop and then attach the top to the arm with two more of these screws. Woodworker 's Journal April 2001 55 |


