Woodworker's Journal 2002-26-3, страница 24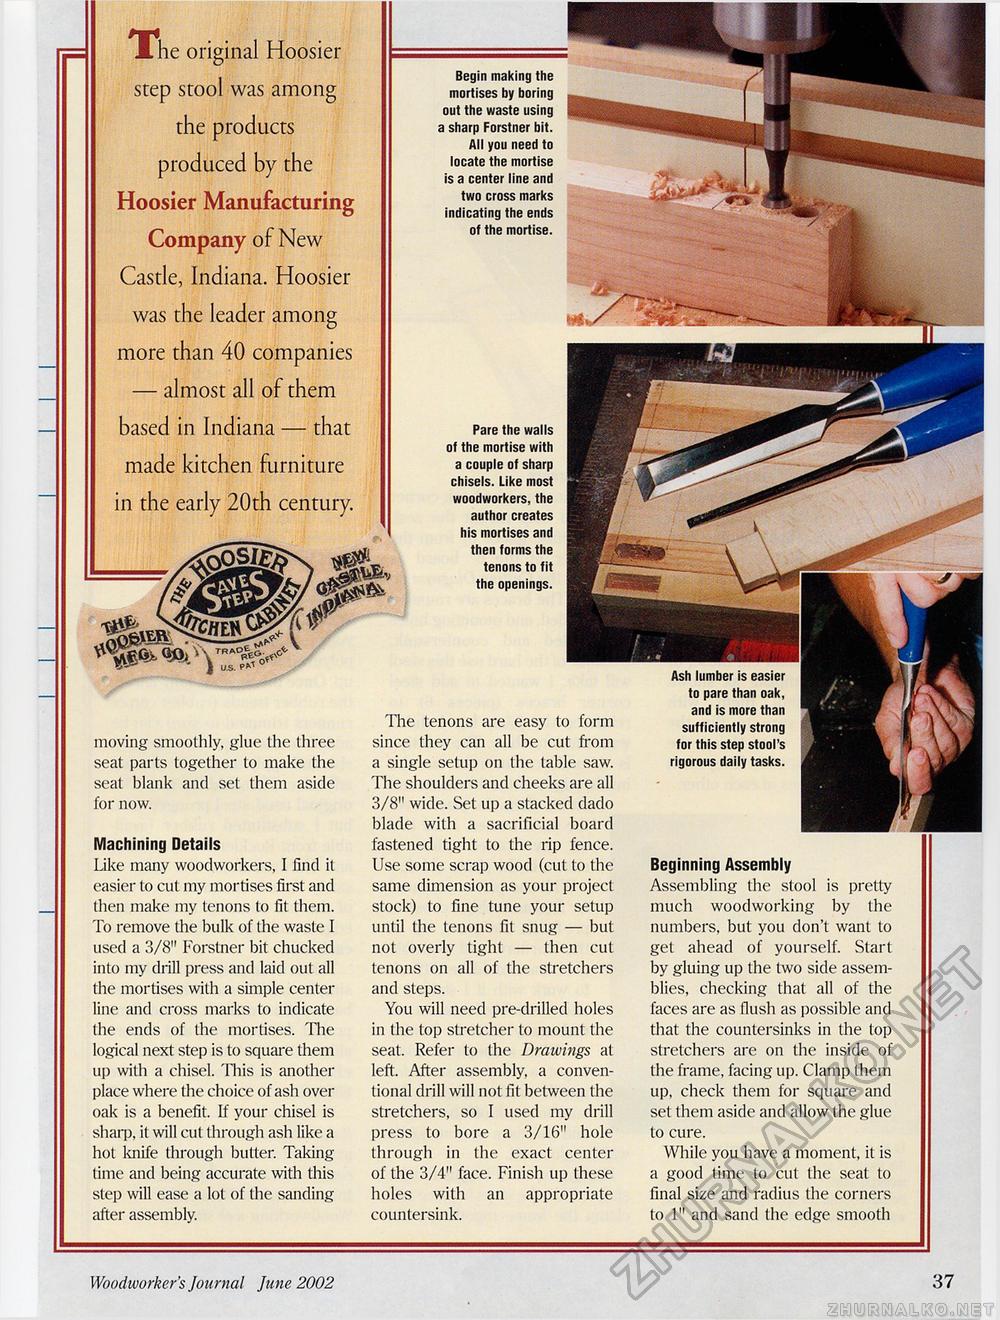
moving smoothly, glue the three seat parts together to make the seat blank and set them aside for now. Machining Details Like many woodworkers, I find it easier to cut my mortises first and then make my tenons to fit them. To remove the bulk of the waste I used a 3/8" Forstner bit chucked into my drill press and laid out all the mortises with a simple center line and cross marks to indicate the ends of the mortises. The logical next step is to square them up with a chisel. This is another place where the choice of ash over oak is a benefit. If your chisel is sharp, it will cut through ash like a hot knife through butter. Taking time and being accurate with this step will ease a lot of the sanding after assembly. The tenons are easy to form since they can all be cut from a single setup on the table saw. The shoulders and cheeks are all 3/8" wide. Set up a stacked dado blade with a sacrificial board fastened tight to the rip fence. Use some scrap wood (cut to the same dimension as your project stock) to fine tune your setup until the tenons fit snug — but not overly tight — then cut tenons on all of the stretchers and steps. You will need pre-drilled holes in the top stretcher to mount the seat. Refer to the Drawings at left. After assembly, a conventional drill will not fit between the stretchers, so I used my drill press to bore a 3/16" hole through in the exact center of the 3/4" face. Finish up these holes with an appropriate countersink. The original Hoosier step stool was among the products produced by the Hoosier Manufacturing Company of New Castle, Indiana. Hoosier was the leader among more than 40 companies — almost all of them based in Indiana — that made kitchen furniture in the early 20th century. m cHm U.S. eM ° m Ash lumber is easier to pare than oak, and is more than sufficiently strong for this step stool's rigorous daily tasks. Beginning Assembly Assembling the stool is pretty much woodworking by the numbers, but you don't want to get ahead of yourself. Start by gluing up the two side assemblies, checking that all of the faces are as flush as possible and that the countersinks in the top stretchers are on the inside of the frame, facing up. Clamp them up, check them for square and set them aside and allow the glue to cure. While you have a moment, it is a good time to cut the seat to final size and radius the corners to 1" and sand the edge smooth Begin making the mortises by boring out the waste using a sharp Forstner bit. All you need to locate the mortise is a center line and two cross marks indicating the ends of the mortise. Pare the walls of the mortise with a couple of sharp chisels. Like most woodworkers, the author creates his mortises and then forms the tenons to fit the openings. Woodworker's Journal June 2002 37 |


