Woodworker's Journal 2002-26-3, страница 29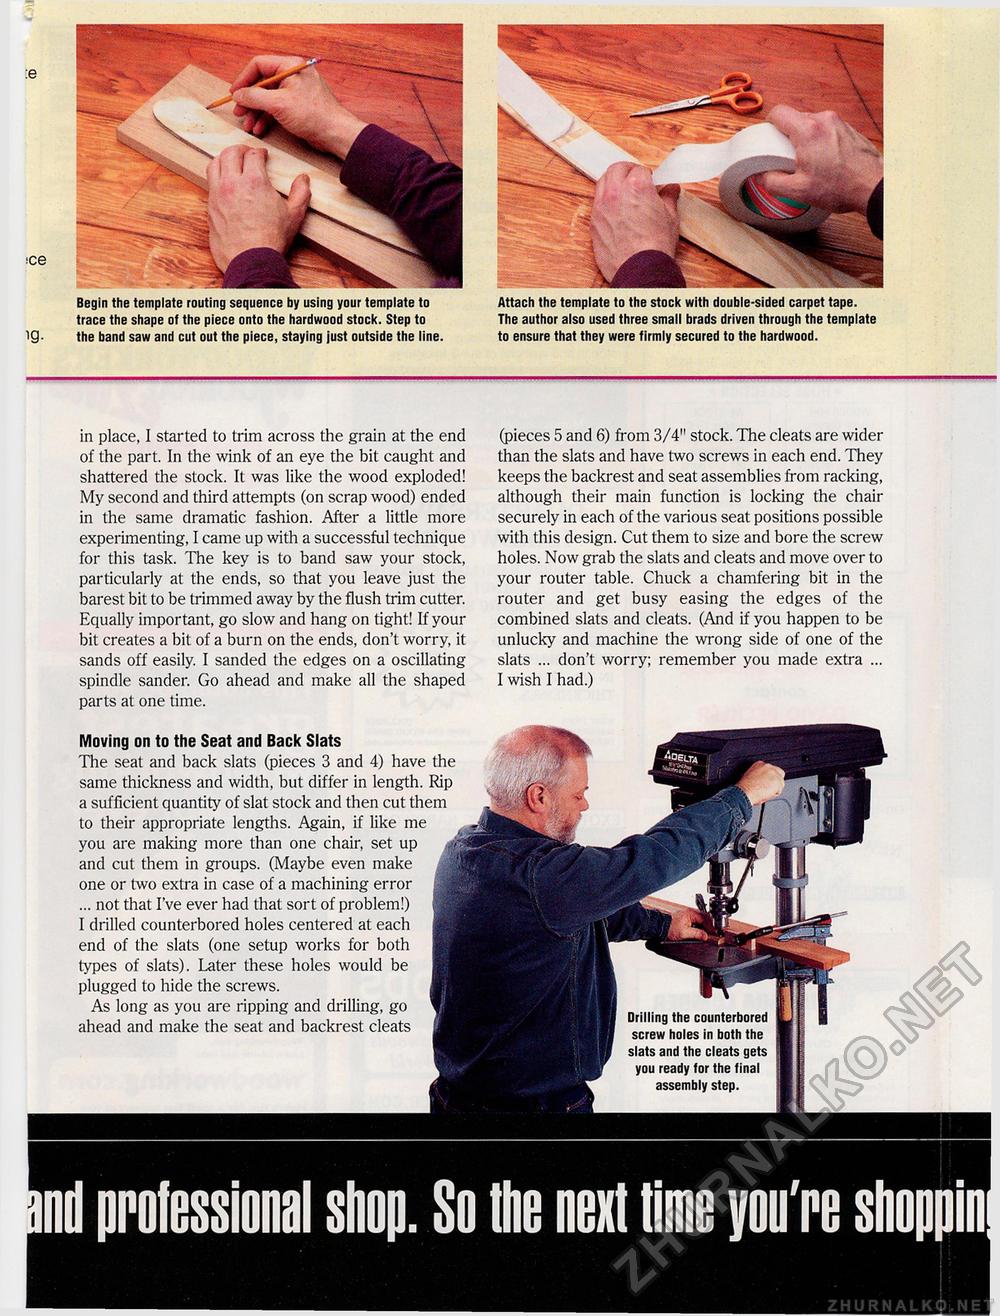
Begin the template routing sequence by using your template to trace the shape of the piece onto the hardwood stock. Step to ig. the band saw and cut out the piece, staying just outside the line. Attach the template to the stock with double-sided carpet tape. The author also used three small brads driven through the template to ensure that they were firmly secured to the hardwood. in place, I started to trim across the grain at the end of the part. In the wink of an eye the bit caught and shattered the stock. It was like the wood exploded! My second and third attempts (on scrap wood) ended in the same dramatic fashion. After a little more experimenting, I came up with a successful technique for this task. The key is to band saw your stock, particularly at the ends, so that you leave just the barest bit to be trimmed away by the flush trim cutter. Equally important, go slow and hang on tight! If your bit creates a bit of a burn on the ends, don't worry, it sands off easily. I sanded the edges on a oscillating spindle sander. Go ahead and make all the shaped parts at one time. (pieces 5 and 6) from 3/4" stock. The cleats are wider than the slats and have two screws in each end. They keeps the backrest and seat assemblies from racking, although their main function is locking the chair securely in each of the various seat positions possible with this design. Cut them to size and bore the screw holes. Now grab the slats and cleats and move over to your router table. Chuck a chamfering bit in the router and get busy easing the edges of the combined slats and cleats. (And if you happen to be unlucky and machine the wrong side of one of the slats ... don't worry; remember you made extra ... I wish I had.) Moving on to the Seat and Back Slats The seat and back slats (pieces 3 and 4) have the same thickness and width, but differ in length. Rip a sufficient quantity of slat stock and then cut them to their appropriate lengths. Again, if like me you are making more than one chair, set up and cut them in groups. (Maybe even make one or two extra in case of a machining error ... not that I've ever had that sort of problem!) I drilled counterbored holes centered at each end of the slats (one setup works for both types of slats). Later these holes would be plugged to hide the screws. As long as you are ripping and drilling, go ahead and make the seat and backrest cleats |


