Woodworker's Journal 2002-26-3, страница 33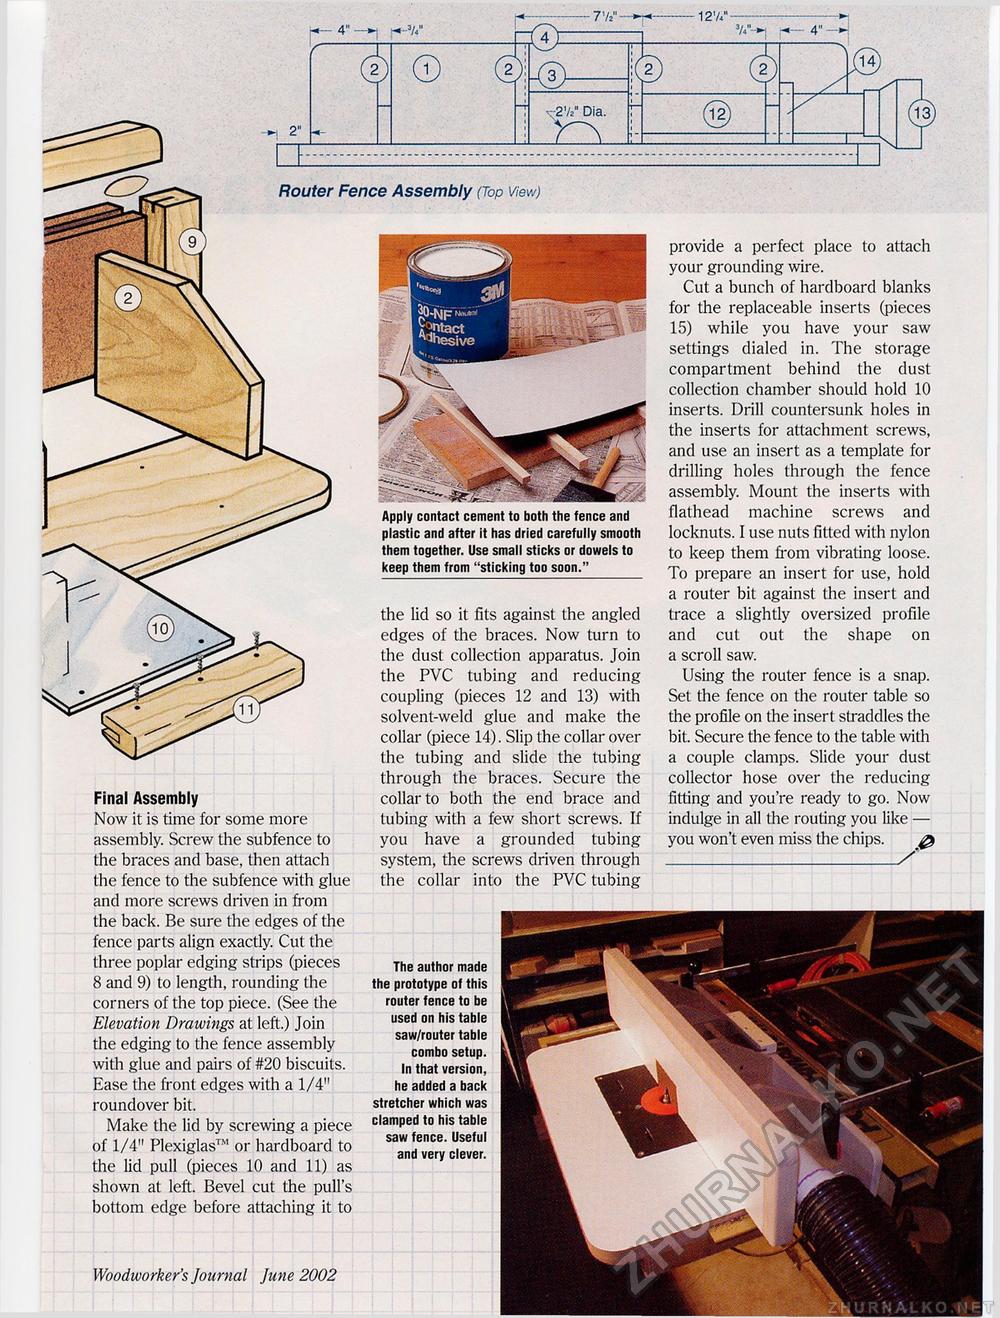
Router Fence Assembly (Top view) Woodworker's Journal June 2002 33 V-i 4"
Final Assembly Now it is time for some more assembly. Screw the subfence to the braces and base, then attach the fence to the subfence with glue and more screws driven in from the back. Be sure the edges of the fence parts align exactly. Cut the three poplar edging strips (pieces 8 and 9) to length, rounding the corners of the top piece. (See the Elevation Drawings at left.) Join the edging to the fence assembly with glue and pairs of #20 biscuits. Ease the front edges with a 1/4" roundover bit. Make the lid by screwing a piece of 1/4" Plexiglas™ or hardboard to the lid pull (pieces 10 and 11) as shown at left. Bevel cut the pull's bottom edge before attaching it to provide a perfect place to attach your grounding wire. Cut a bunch of hardboard blanks for the replaceable inserts (pieces 15) while you have your saw settings dialed in. The storage compartment behind the dust collection chamber should hold 10 inserts. Drill countersunk holes in the inserts for attachment screws, and use an insert as a template for drilling holes through the fence assembly. Mount the inserts with flathead machine screws and locknuts. I use nuts fitted with nylon to keep them from vibrating loose. To prepare an insert for use, hold a router bit against the insert and trace a slightly oversized profile and cut out the shape on a scroll saw. Using the router fence is a snap. Set the fence on the router table so the profile on the insert straddles the bit. Secure the fence to the table with a couple clamps. Slide your dust collector hose over the reducing fitting and you're ready to go. Now indulge in all the routing you like — you won't even miss the chips. Apply contact cement to both the fence and plastic and after it has dried carefully smooth them together. Use small sticks or dowels to keep them from "sticking too soon." the lid so it fits against the angled edges of the braces. Now turn to the dust collection apparatus. Join the PVC tubing and reducing coupling (pieces 12 and 13) with solvent-weld glue and make the collar (piece 14). Slip the collar over the tubing and slide the tubing through the braces. Secure the collar to both the end brace and tubing with a few short screws. If you have a grounded tubing system, the screws driven through the collar into the PVC tubing The author made the prototype of this router fence to be used on his table saw/router table combo setup. In that version, he added a back stretcher which was clamped to his table saw fence. Useful and very clever. |


